Series
39/40/42
to
52 Field
Upgrade
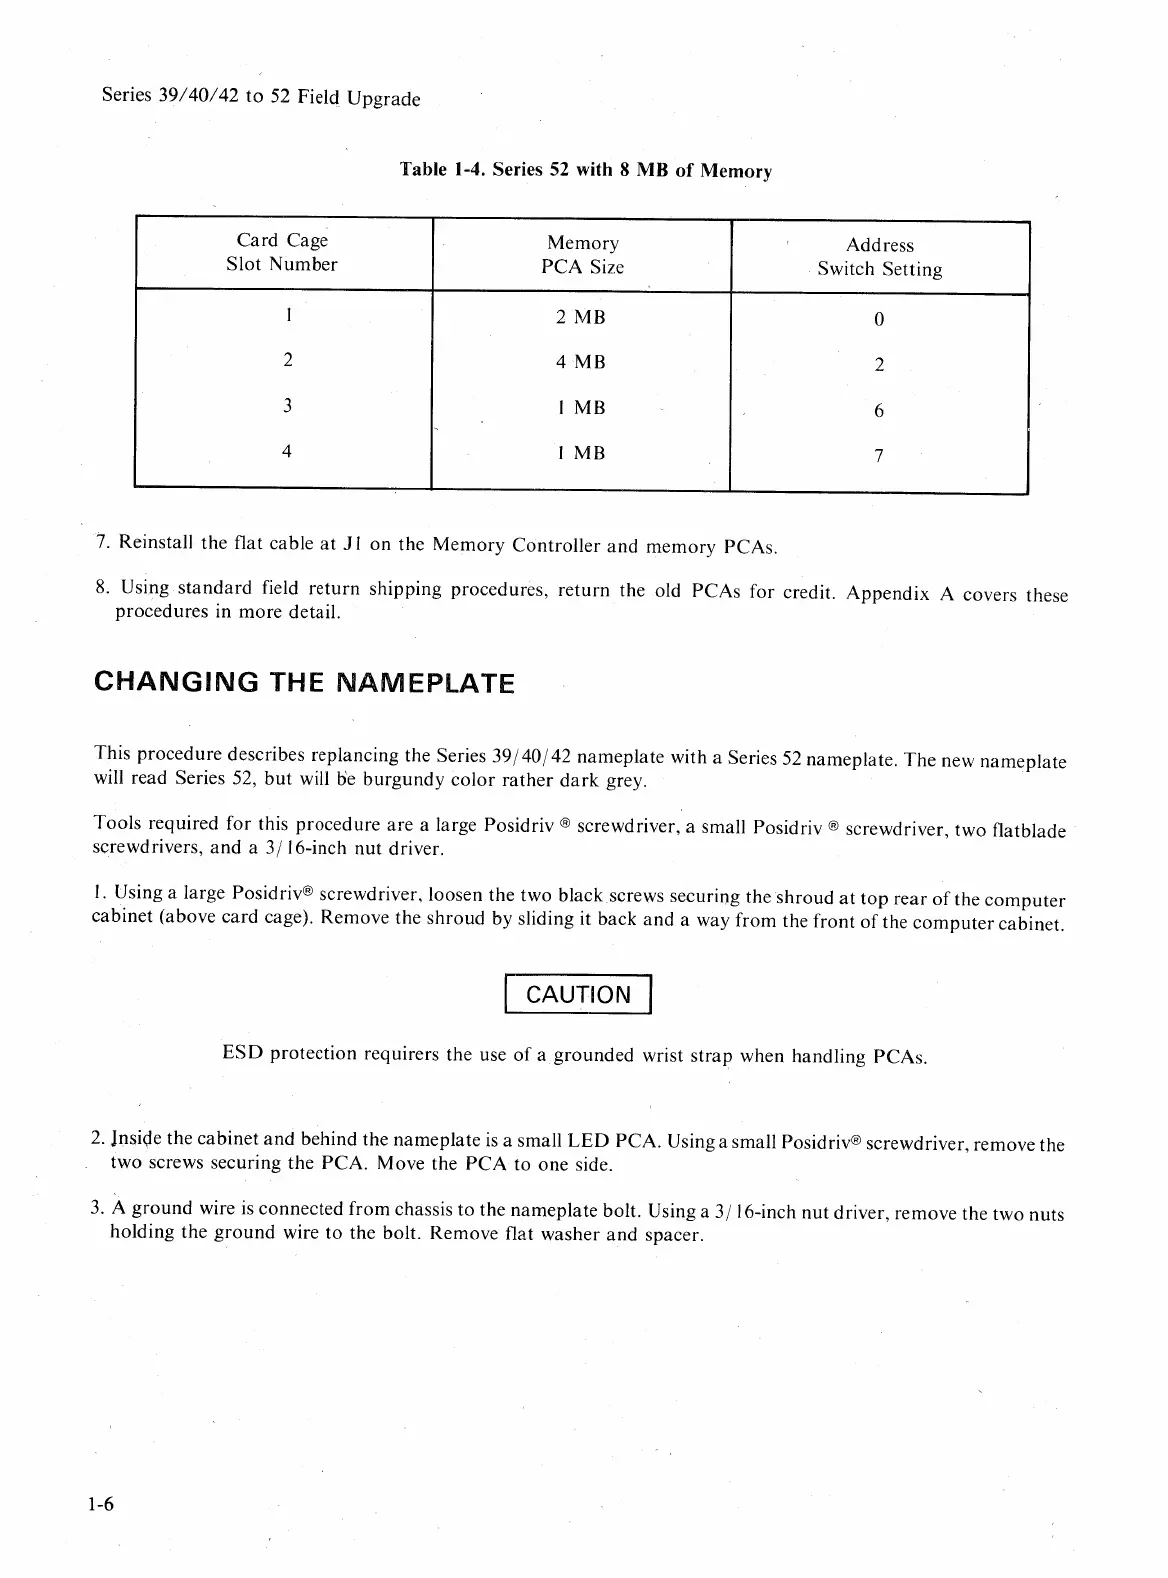
Table 1-4. Series
52
with 8 MB
of
Memory
Card
Cage
Memory
Address
Slot
Number
PCA
Size Switch Setting
I 2 MB 0
2
4MB
2
3
1MB
6
,
4
1MB
7
7.
Reinstall the flat cable
at
J I
on
the
Memory
Controller
and
memory
PCAs.
8.
Using
standard
field
return
shipping procedures,
return
the old
PCAs
for credit.
Appendix
A covers these
procedures
in
more
detail.
CHANGING
THE
NAMEPLATE
This
procedure
describes replancing the Series
39/40/42
nameplate
with a Series 52 nameplate.
The
new
nameplate
will read Series 52,
but
will
De
burgundy
color
rather
dark
grey.
Tools
required
for
this
procedure
are
a large Posidriv ® screwdriver, a small Posidriv ® screwdriver, two flatblade
screwdrivers,
and
a
3/
16-inch
nut
driver.
I.
Using a large Posidriv® screwdriver, loosen the two
blackscrews
securing the
shroud
at
top
rear
of
the
computer
cabinet
(above
card
cage). Remove the
shroud
by sliding it back
and
a way
from
the front
of
the
computer
cabinet.
ICAUTION I
ESD
protection
requirers the use
of
a
grounded
wrist
strap
when handling PCAs.
2.
Jnside the
cabinet
and
behind the
nameplate
is
a small
LED
PCA.
Using a small Posidriv® screwdriver, remove the
two screws securing
the
PCA.
Move the
PCA
to one side.
3.
A
ground
wire
is
connected
from
chassis
to
the
nameplate
bolt. Using a
3/
16-inch
nut
driver, remove the two nuts
holding
the
ground
wire
to
the bolt. Remove flat washer
and
spacer.
1-6
 Loading...