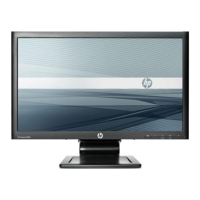
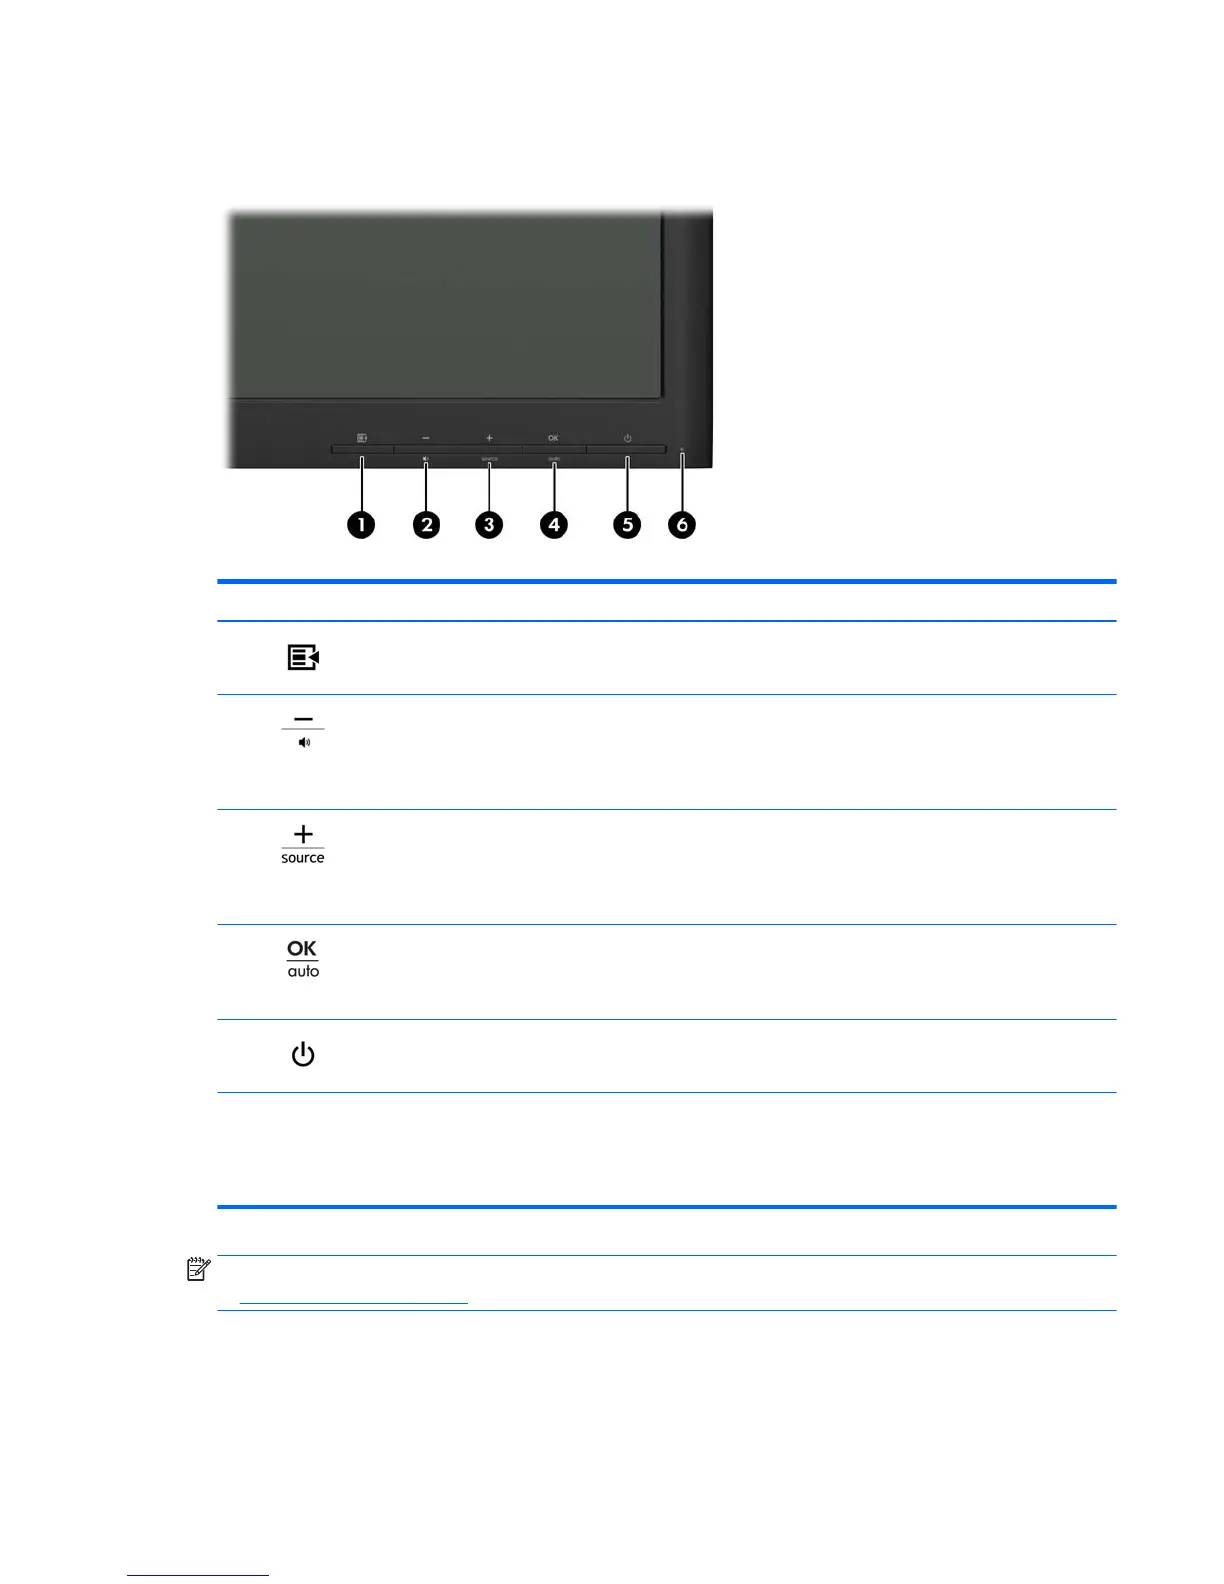
Front components
Figure 3-9 Front components
Table 3-1 Front components
Component Description
1 Menu button Opens, selects from, or exits the OSD menu.
2 Minus/volume button If the OSD menu is on, press to navigate backward through the OSD
menu and decrease adjustment levels.
If the OSD menu is inactive, press to activate the volume adjustment
menu.
3 Plus/source button If the OSD menu is on, press to navigate forward through the OSD
menu and increase adjustment levels.
If the OSD menu is inactive, press to activate the source button that
chooses the video signal input (DisplayPort, DVI, or VGA).
4 OK/auto button If the OSD menu is on, press to select the highlighted menu item.
If the OSD menu is inactive, press to activate the auto adjustment
feature to optimize the screen image.
5 Power button Turns the monitor on or off.
6 Power LED Blue = Fully powered.
Amber = Sleep mode.
Flashing Amber = Sleep timer mode.
NOTE: To view an OSD menu simulator, visit the HP Customer Self Repair Services Media Library
at http://www.hp.com/go/sml.
Front components 11