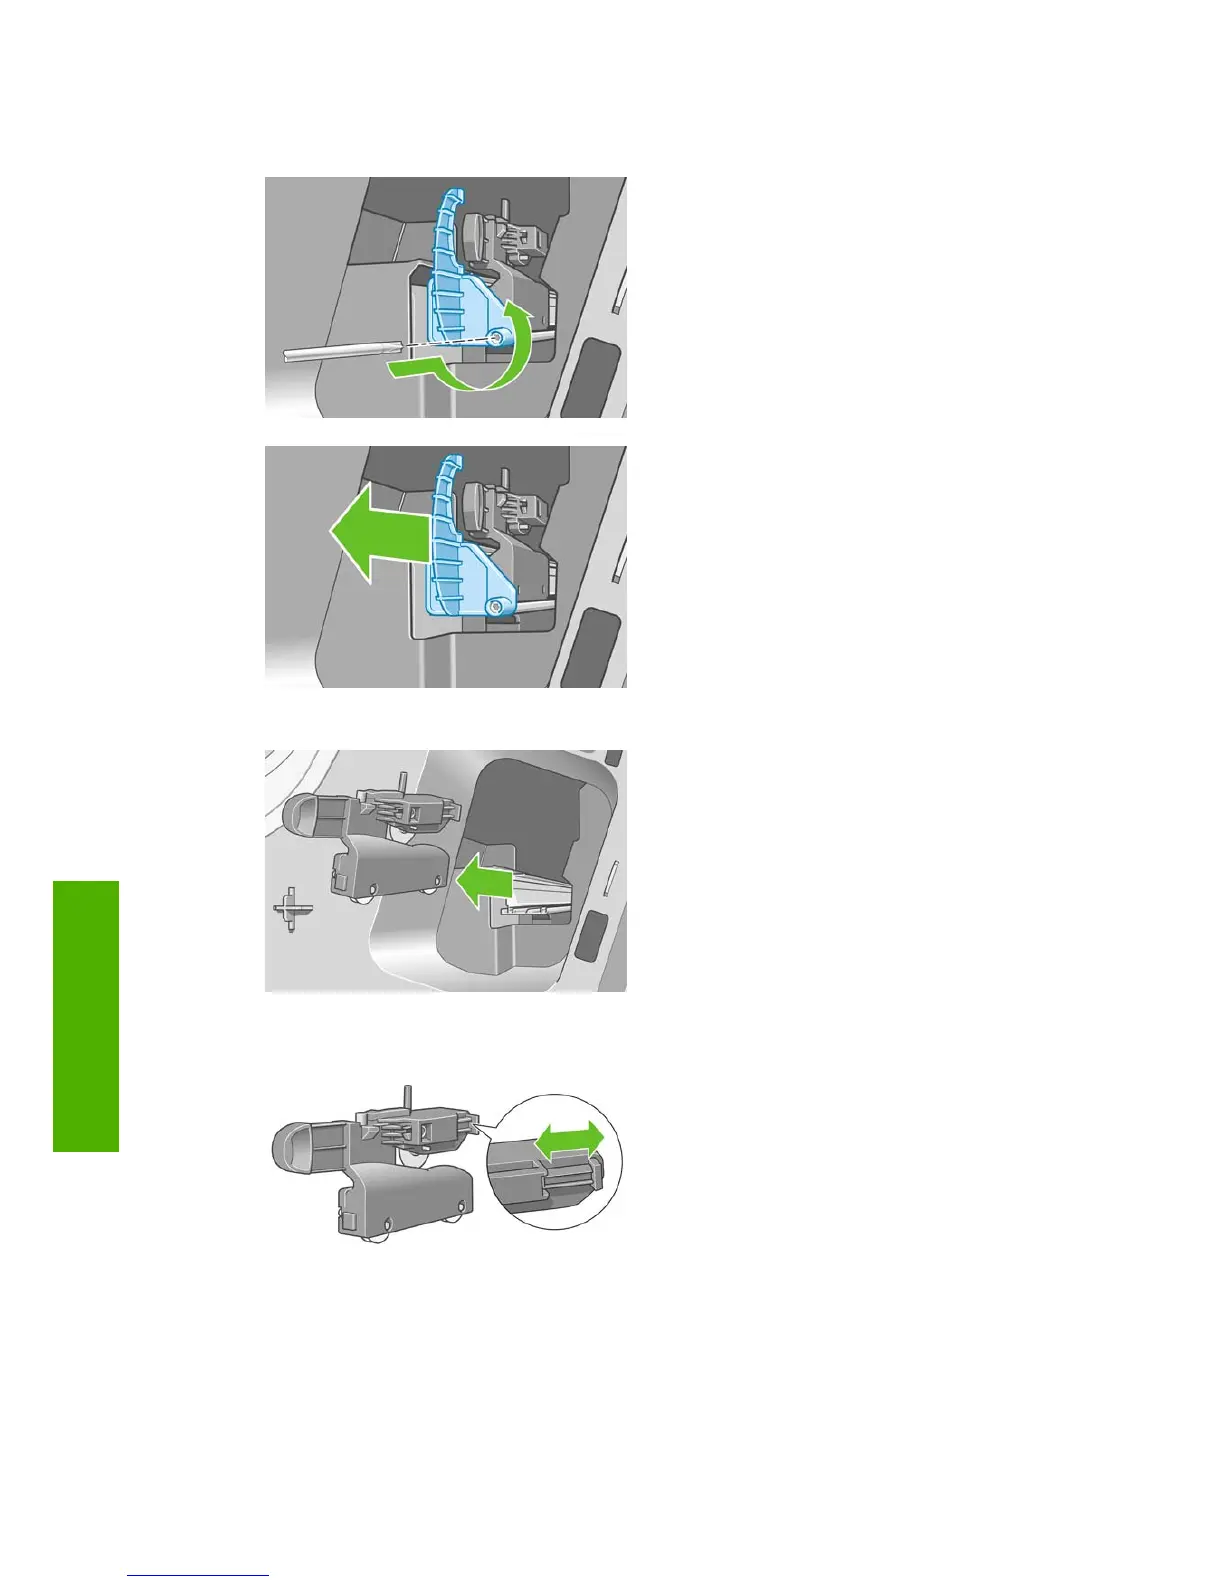
7. Unscrew and remove the cutter stop using the TORX PLUS screwdriver provided with the new
cutter. The screw is captive and will not fall out.
8. Remove the old cutter.
9. Take the new cutter from the maintenance kit and move the plunger at the top slowly back and
forth within its housing to check that it moves freely.
96 Chapter 9 Maintaining the printer ENWW
Maintaining the printer
 Loading...
