633009-DN1 3
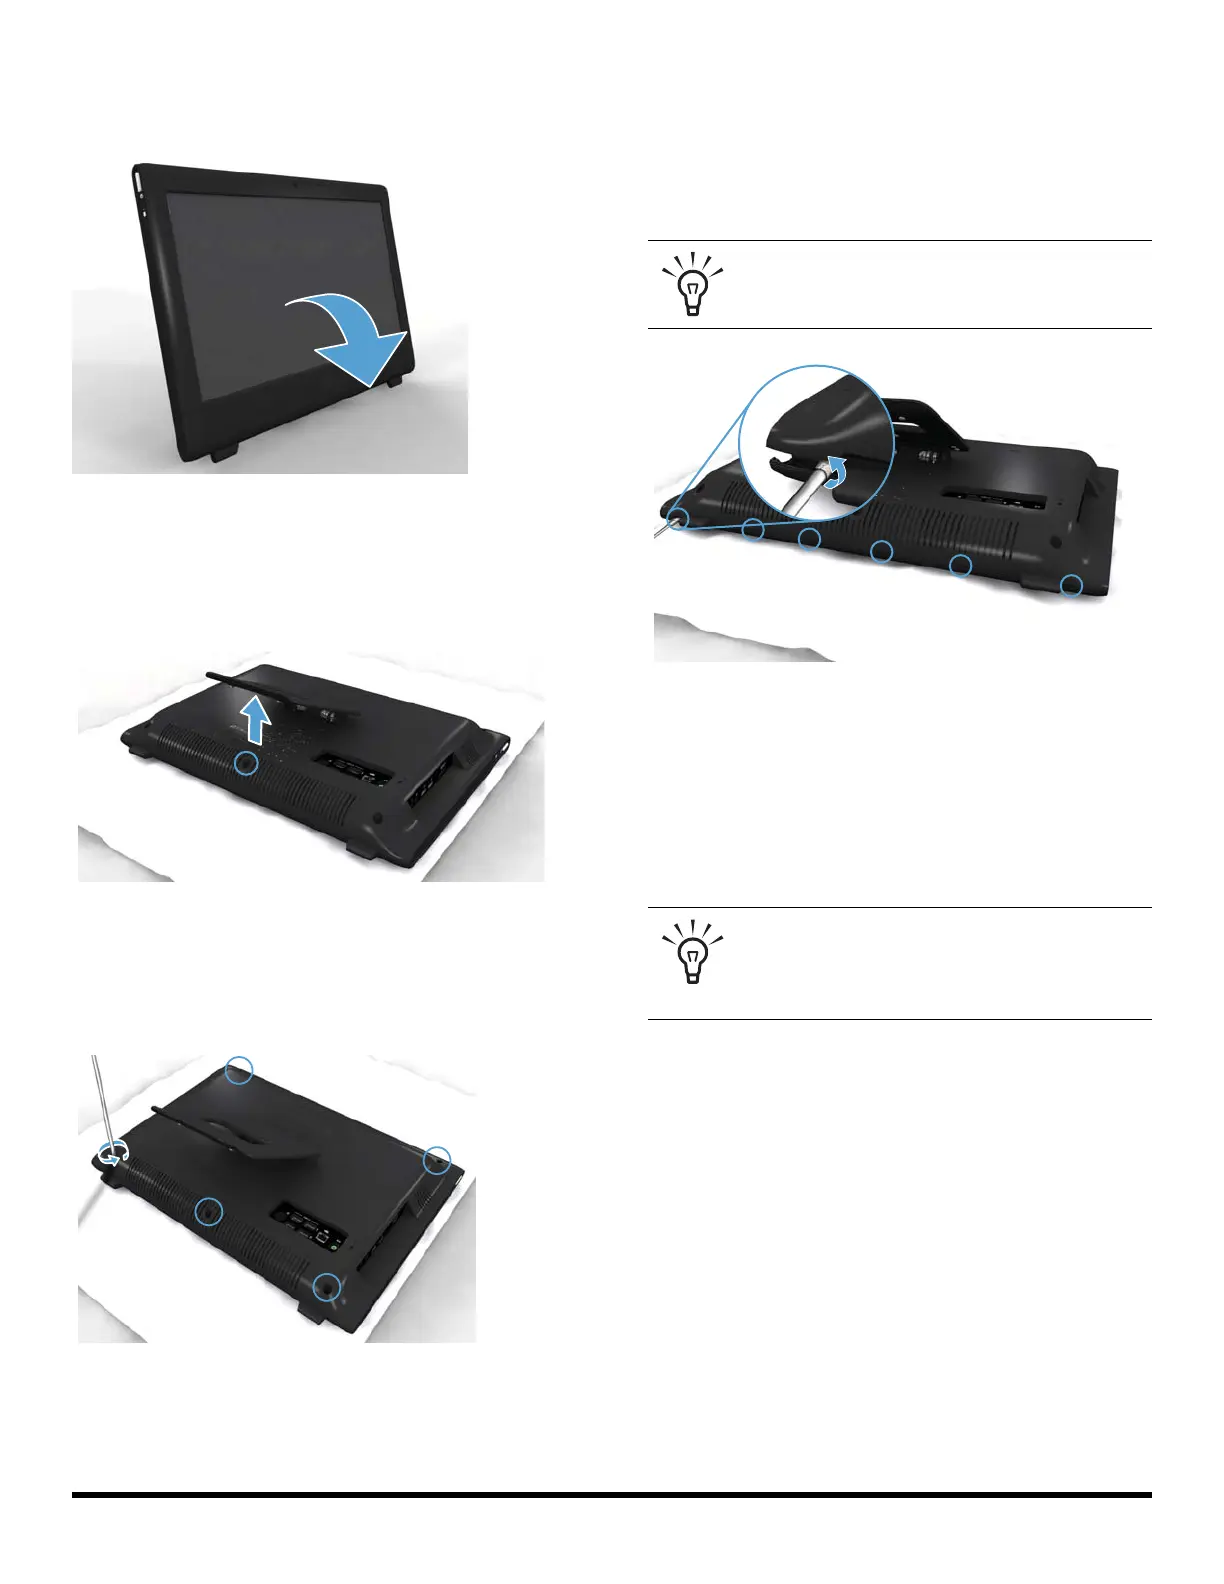
5 Lay the computer down on a flat surface, covered with
a soft cloth to protect the screen from scratches or
other damage.
Posez l’ordinateur sur une surface plane recouverte
d’un chiffon doux afin de protéger l’écran contre les
éraflures ou autres dommages.
6 Lift the stand so that the bottom screw is accessible.
Soulevez le socle pour que la vis du bas soit
accessible.
7 Using a flathead/Torx screwdriver, remove the five
screws attaching the back cover to the computer.
A l’aide d’un tournevis à tête plate/Torx, enlevez les
cinq vis qui fixent le capot arrière à l’ordinateur.
8 Insert the screwdriver into each of the six slots at the
bottom of the computer, and then twist the screwdriver
to release the cover. Do one slot at a time, beginning
with the slot at the far left or right and progressing to
the other side until the screwdriver has been twisted in
all six slots.
Insérez le tournevis dans chacun des six logements de
la partie inférieure de l’ordinateur, puis servez-vous en
pour détacher le capot. Prenez un logement après
l’autre, en commençant par le logement situé à
l’extrême gauche ou droite, puis en progressant vers
l’autre côté jusqu’à ce que le tournevis ait été introduit
dans les six logements.
TIP: Wrap the end of the screwdriver in tape
or other soft material so as not to scratch the
slots.
CONSEIL : Enveloppez l’extrémité du
tournevis dans du ruban ou dans un autre
matériau souple pour ne pas rayer les
logements.