Removal and replacement procedures
Maintenance and Service Guide 4–11
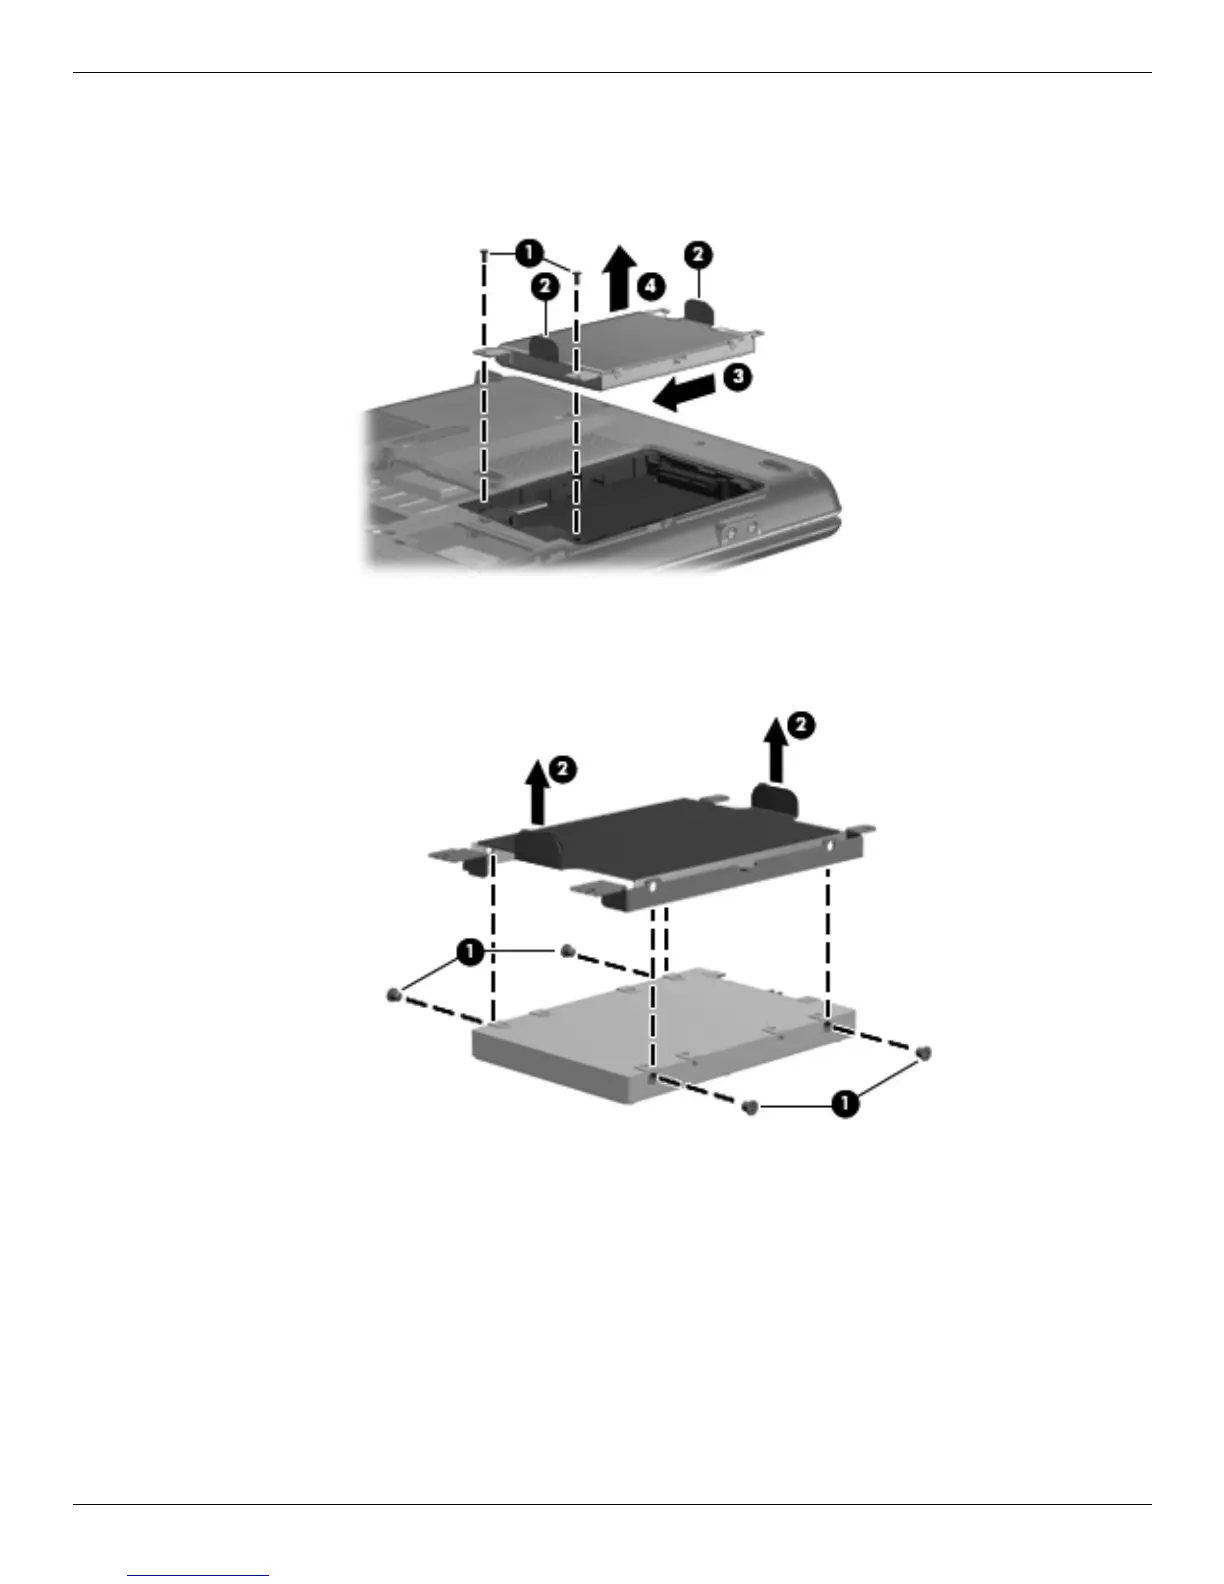
3. Remove the 2 Phillips PM2.5×7.0 screws 1 that secure the hard drive to the computer.
4. Grasp the Mylar tabs 2 on the hard drive, and then slide the hard drive to the left to disconnect it from
the system board 3.
5. Remove the hard drive 4 from the hard drive bay.
6. If it is necessary to replace the hard drive bracket, remove the 2 Phillips PM3.0×4.0 hard drive bracket
screws 1 from each side of the hard drive.
7. Grasp the 2 attached Mylar tabs 2 and pull the bracket straight up to remove it from the hard drive.
Reverse this procedure to reassemble and install the hard drive.
 Loading...