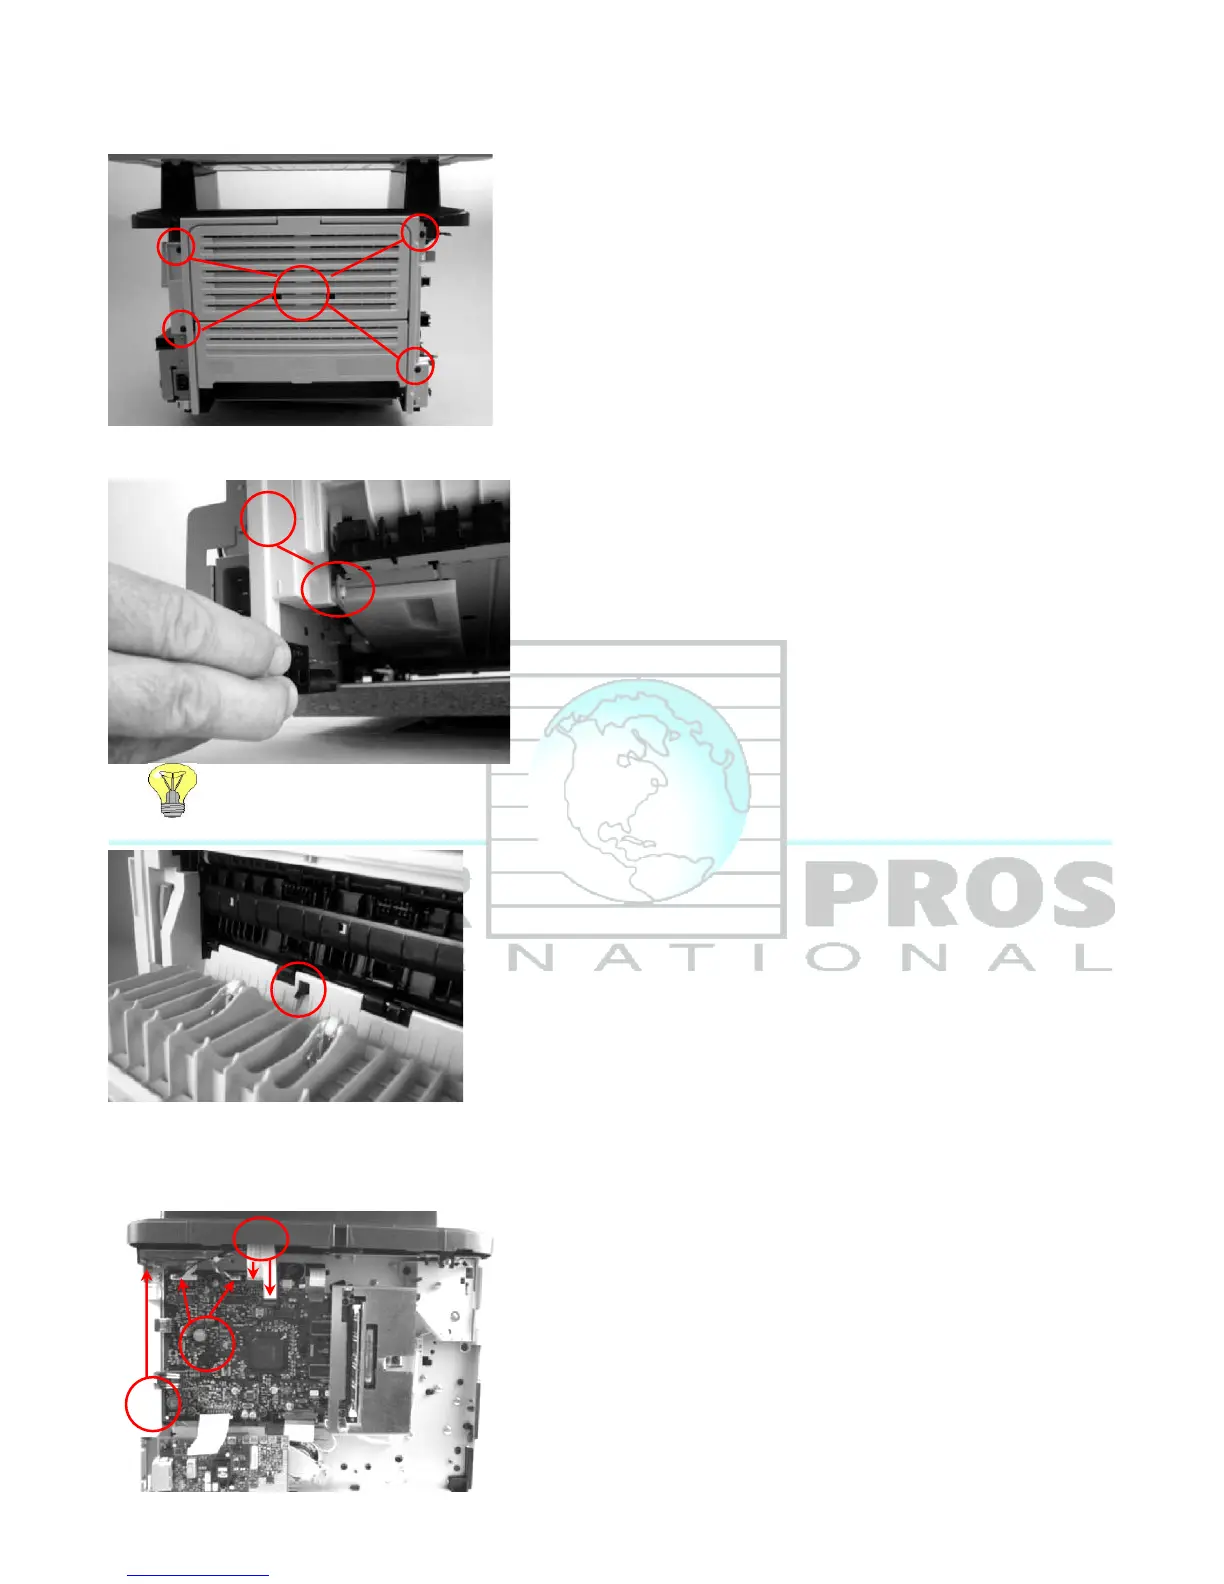
3. Remove rear cover
a.) Remove four screws (callout 5)
b.) Use a small flat blade screwdriver to release the duplex-pan assembly hinge (callout 6) at the power plug
side of the assembly and separate the rear cover from the printer to remove it
c.) Hint; When reinstalling rear cover, make sure the sensor flag is through the opening in rear cover
4. Remove Scanner/ADF assembly
a.) Disconnect two flat ribbon cable (callout 7; J1 & J4), and two wire harness connectors (callout 8; J2 & P2)
from formatter. Disconnect one ground wire lug (callout 9) from all-in-one chassis.
 Loading...