8. Remove one screw (callout 9), and then hold the fan duct (callout 10) and the sub fan (callout 11)
together as you remove them by sliding them slightly to the left.
9
11
10
Figure 5-116 Removing the sub fan (5 of 8)
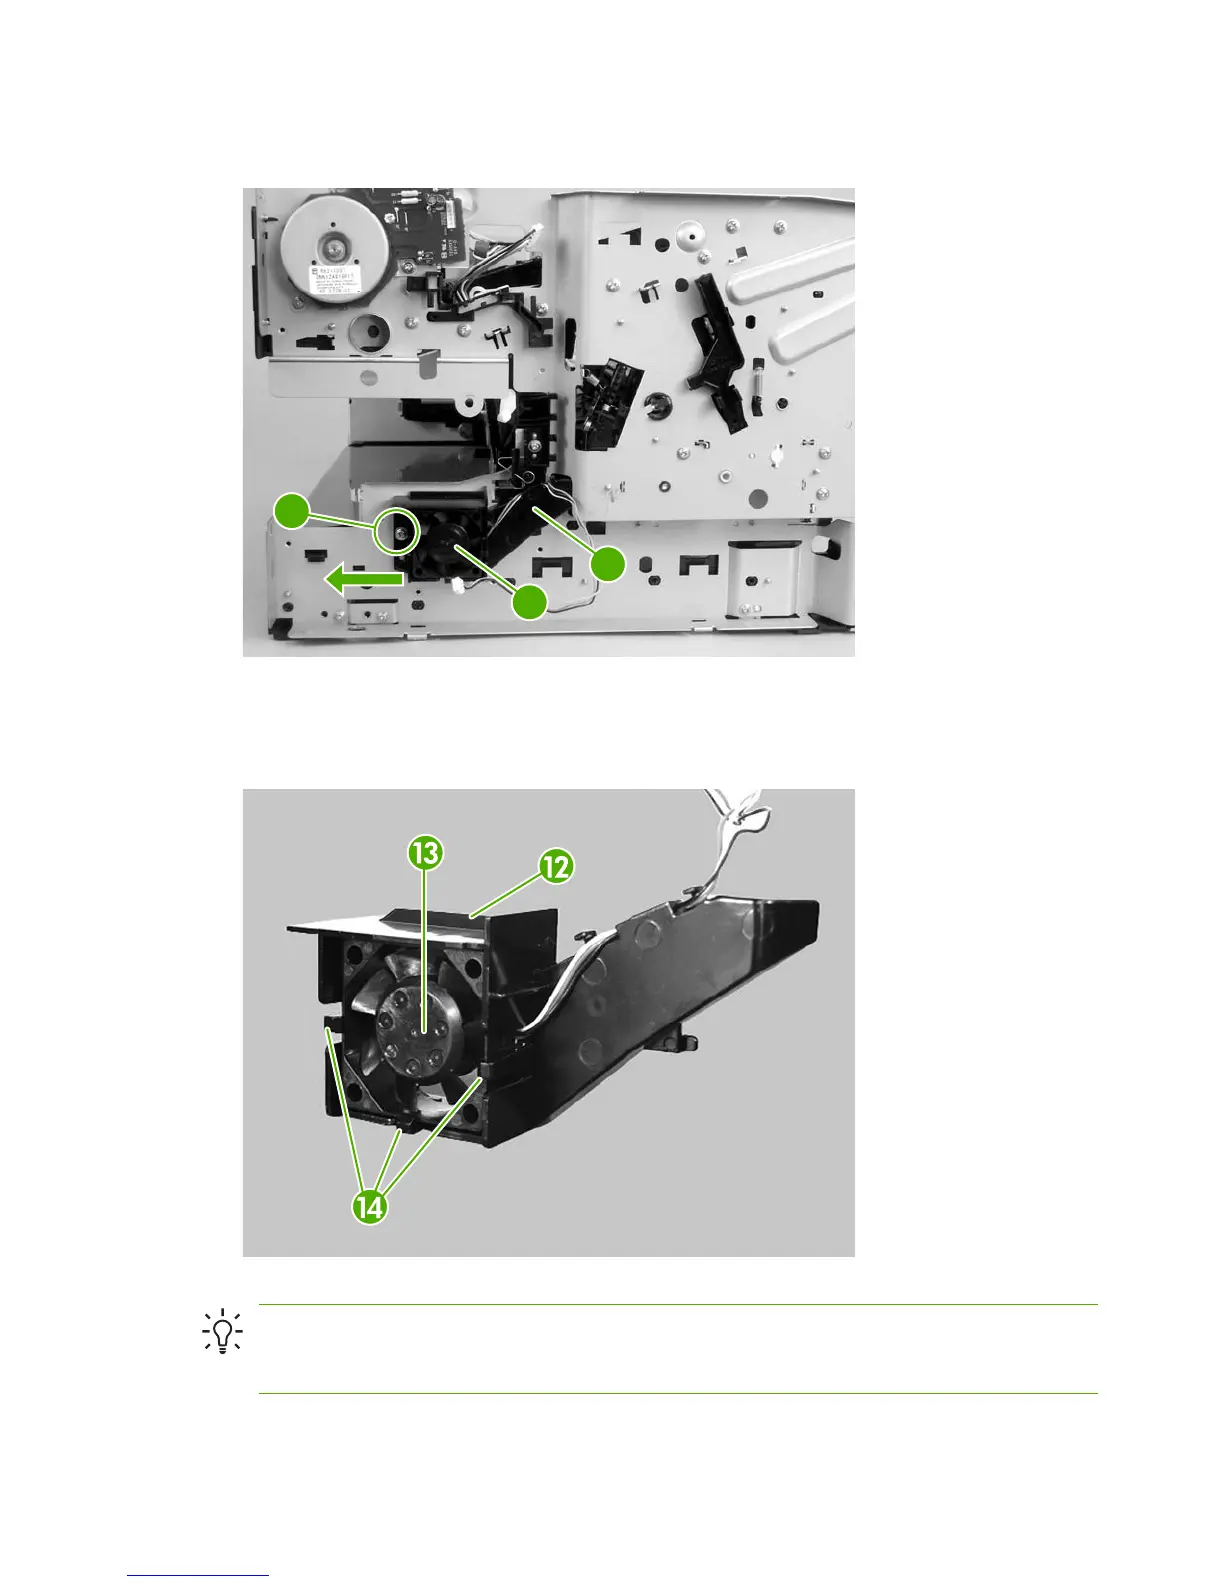
9. Push from the inside of the fan duct (callout 12) while releasing three bosses (callout 13).
10. Remove the sub fan (callout 14) from the fan duct.
Figure 5-117 Removing the sub fan (6 of 8)
Hint When you reinstall the sub fan, guide the cable (callout 15) through the cable guides
(callout 16) while reassembling the fan and the fan-duct guide. Make sure that the label (callout
17) on the sub fan is facing the printer.
132 Chapter 5 Removal and replacement ENWW
 Loading...