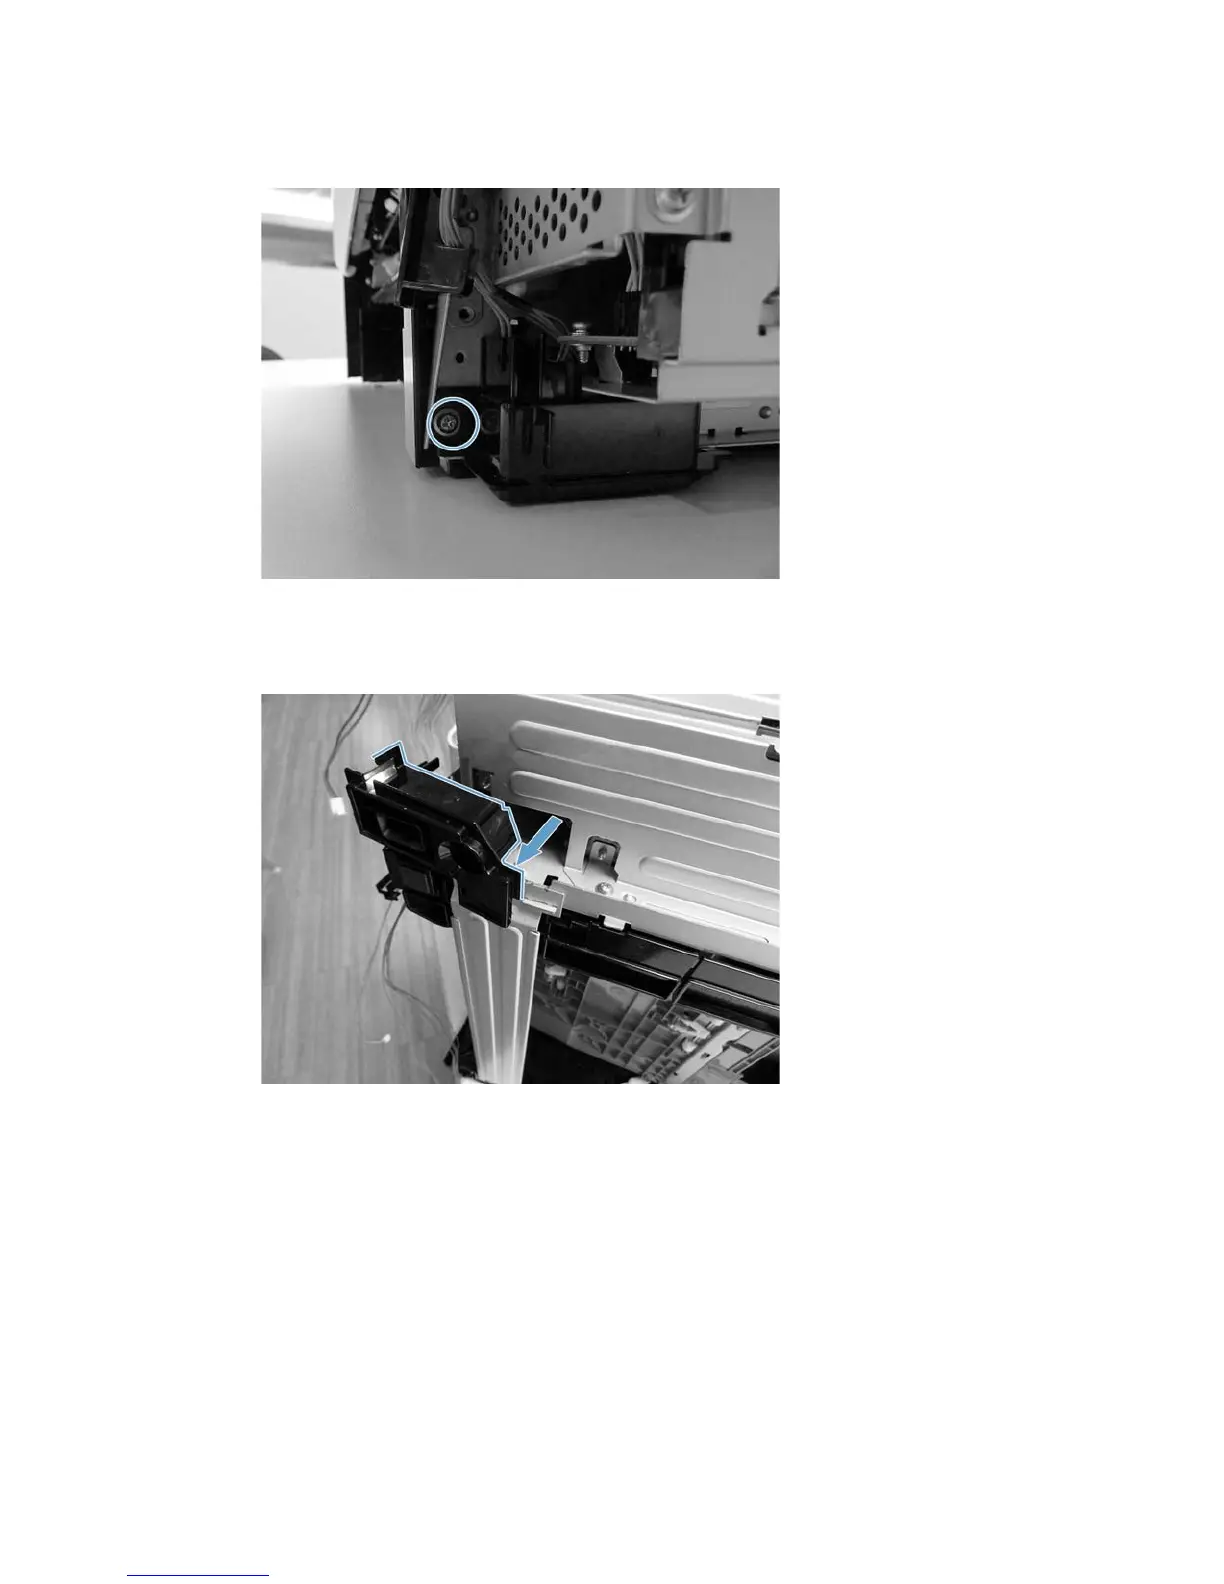
8. Remove the screw holding the tray 3 harness and pin guide in place.
Figure 1-140 Remove the screw holding the tray 3 harness in place
9. Set the printer on its left side or slide the right front corner off a table so the tray 3 harness and pin
guide can be removed, then remove the tray 3 harness and pin guide.
Figure 1-141 Remove the tray 3 harness and pin guide
ENWW Removal and replacement procedures 101
 Loading...