Upgrading and Servicing Guide 3
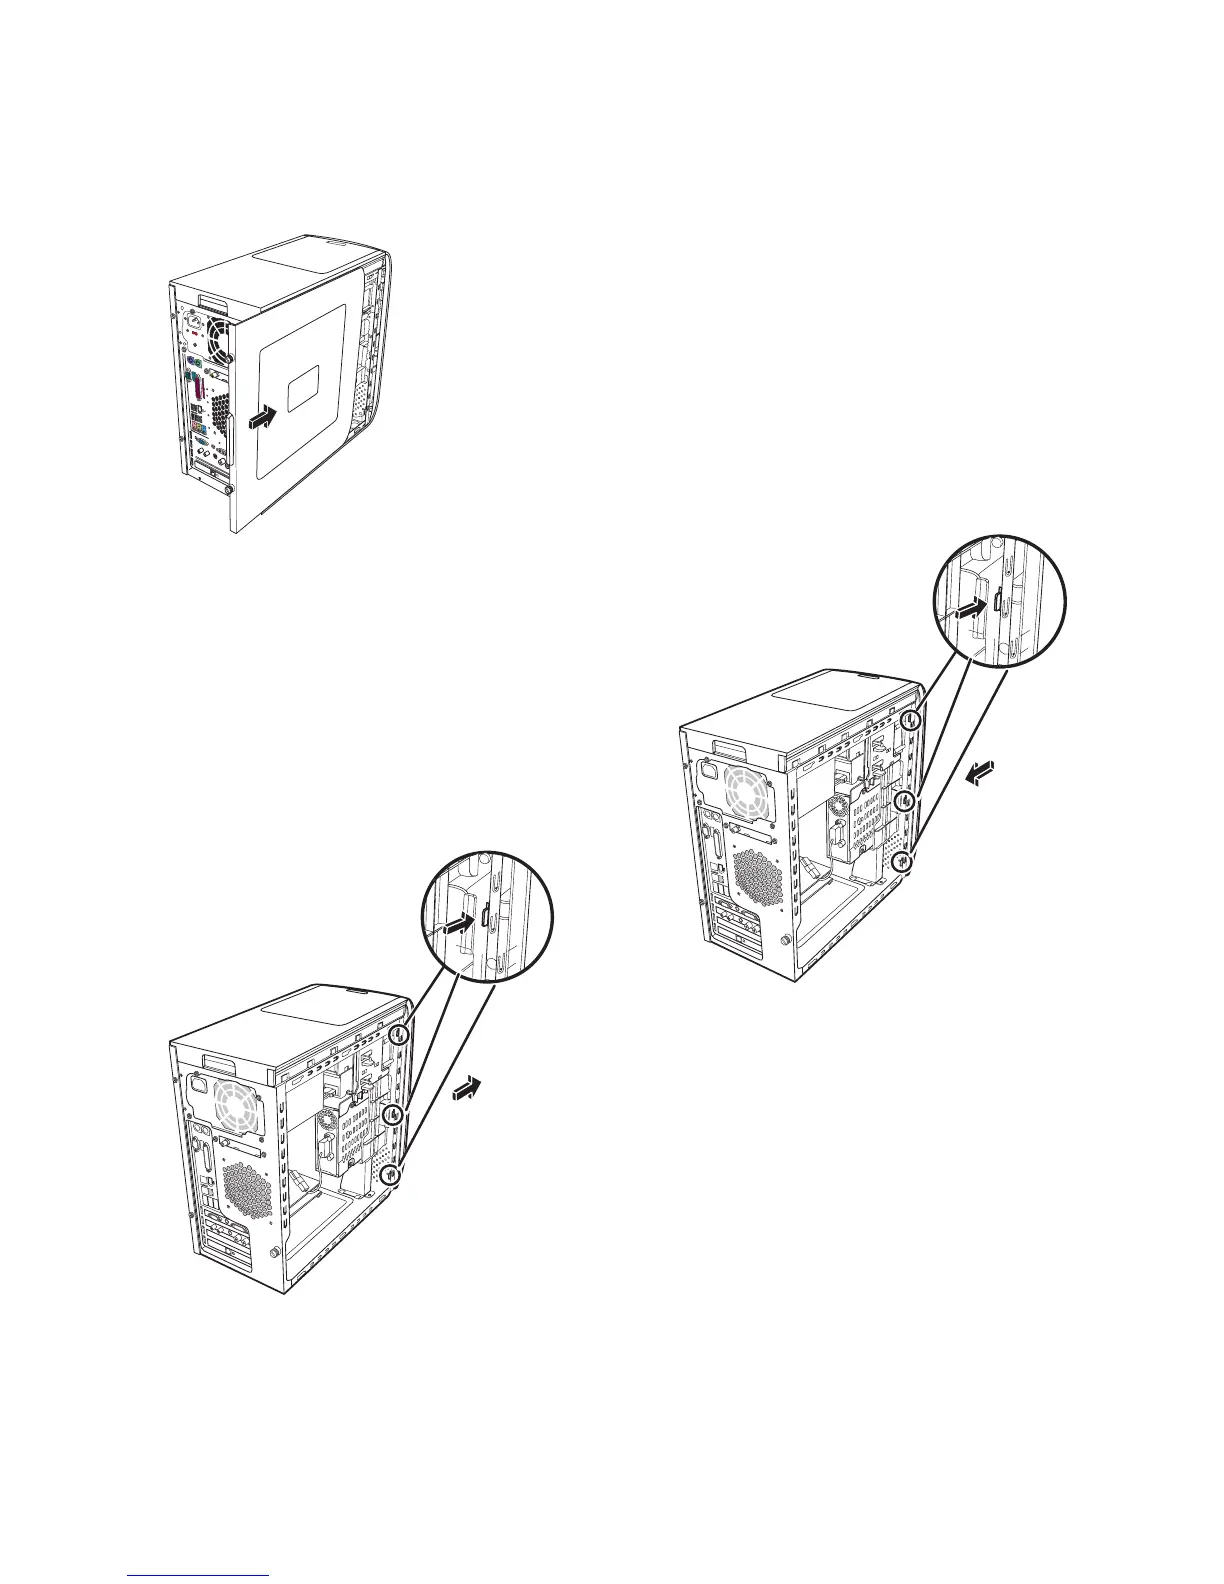
Replacing the Side Panel
ETHERNET
O
UT
I
N
SERIAL
T
V-OU
T
LCD
R
L
S-VID!IN
VID!IN
TV
1 Slide the side panel forward on the frame until it
locks into place.
2 Align the thumbscrews on the side panel with the
holes on the back of the chassis frame, and then
tighten the thumbscrews on the side panel.
3 See “After Closing the PC” on page 2.
Removing the Front Panel
This procedure is necessary only when removing or
replacing an optical drive, a memory card reader, or
a hard disk drive.
1 Locate the three small tabs attached to the front
panel on the side of the chassis.
2 Press each tab away from the center of the chassis.
Press the top, the middle, and the bottom tab, and
then gently remove the front panel.
Replacing the Front Panel
1 Place the chassis upright, and then align the bottom
of the front panel with the ridge on the bottom of
the chassis.
2 Guide the three small tabs on each side of the front
panel into the correct holes until the panel snaps
into place.
 Loading...


