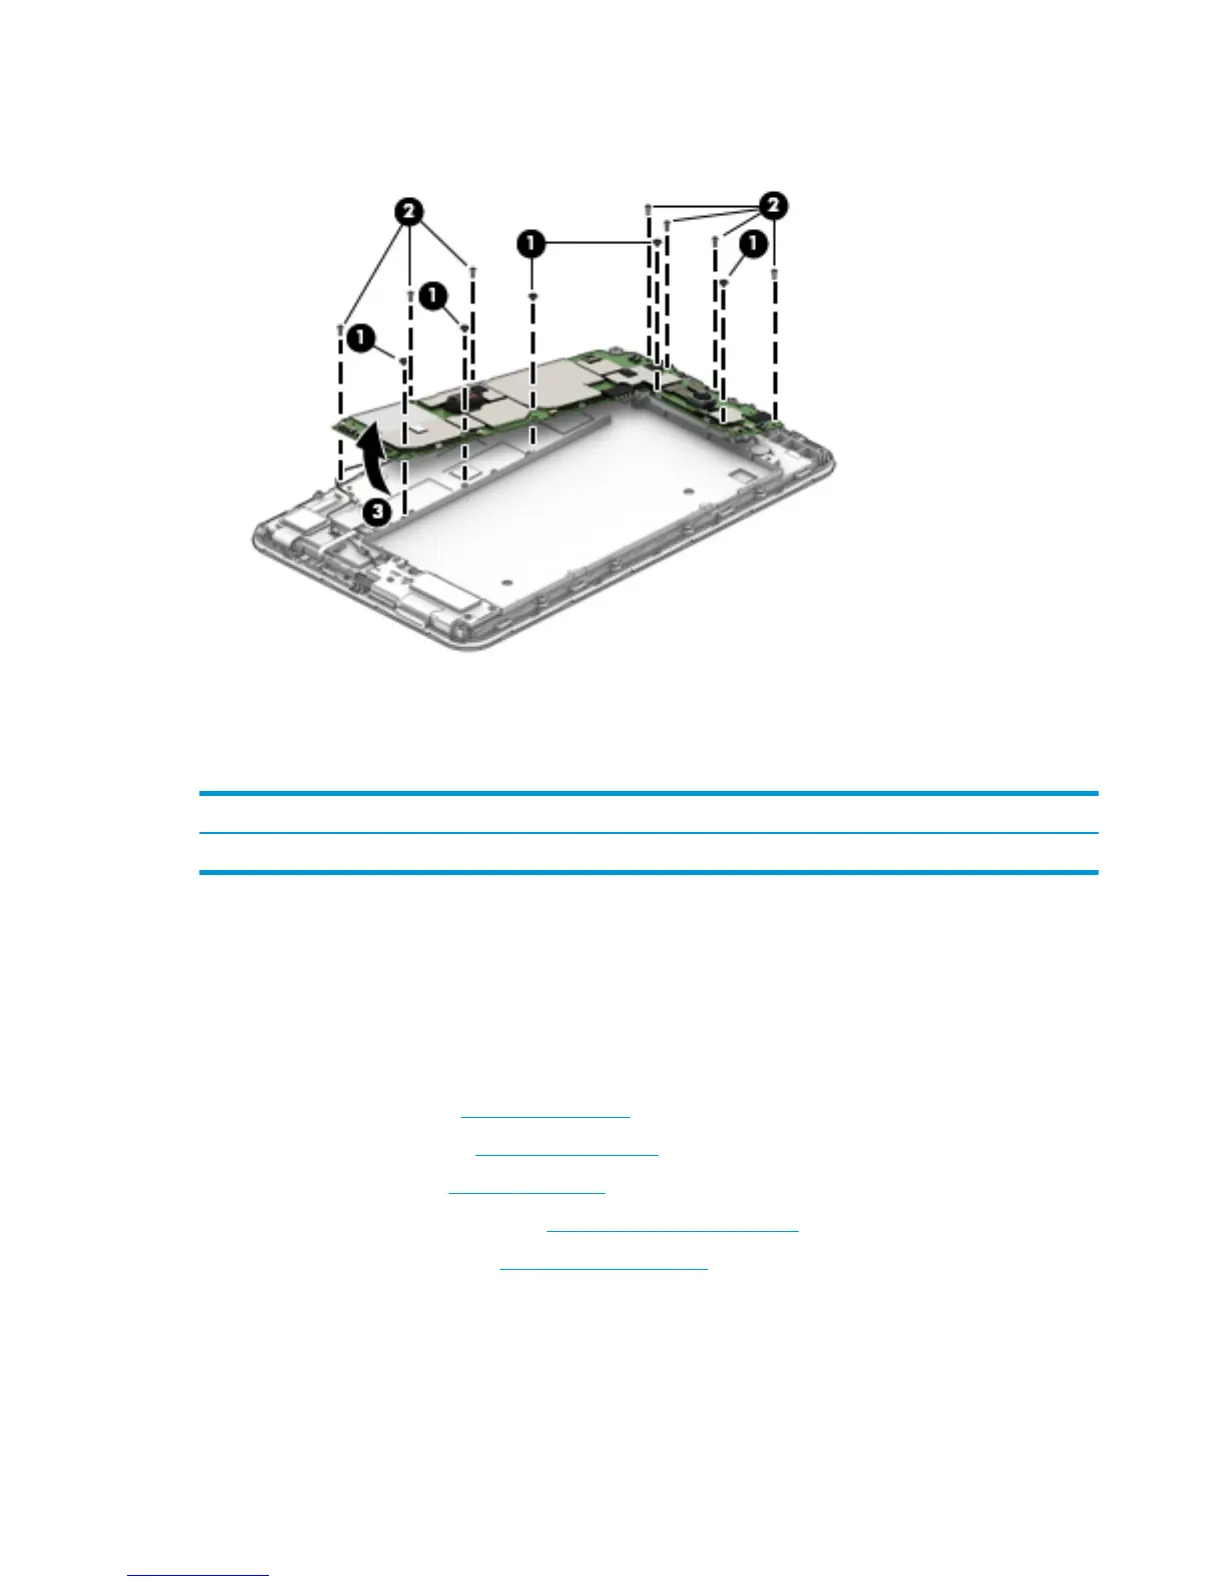
3. Remove the 7 Phillips M00x5 screws (2) that secure the system board to the display panel assembly,
and then remove the system board (3).
Reverse this procedure to install the system board.
Front-facing webcam
Description Spare part number
Front-facing webcam (includes cable) 926165-001
Before removing the front-facing webcam, follow these steps:
1. Turn o the tablet. If you are unsure whether the tablet is o, shut it down through the operating
system.
2. Disconnect the power from the tablet by unplugging the power adapter cord from the tablet.
3. Disconnect all external devices from the tablet.
4. Remove the card tray (see Card tray on page 14).
5. Remove the back cover (see Back cover on page 15).
6. Remove the battery (see Battery on page 16).
7. Remove the middle frame cover (see Middle frame cover on page 17).
8. Remove the system board (see System board on page 24).
Remove the front-facing webcam:
1. Place the system board face down, and then release the zero-insertion force (ZIF) connector (1) to which
the front-facing webcam cable is attached on the rear of the system board.
26 Chapter 5 Removal and replacement procedures