When replacing the system board, be sure to remove the following components (as applicable) from the
defective system board and install on the replacement system board:
● Memory modules (Memory modules on page 33)
● WLAN/Bluetooth module (WLAN/Bluetooth combo card on page 35)
● WWAN module (WWAN module on page 37)
● M.2 solid-state drive (M.2 solid-state drive on page 39)
● Fan/heat sink (Fan/heat sink assembly on page 58)
Remove the system board:
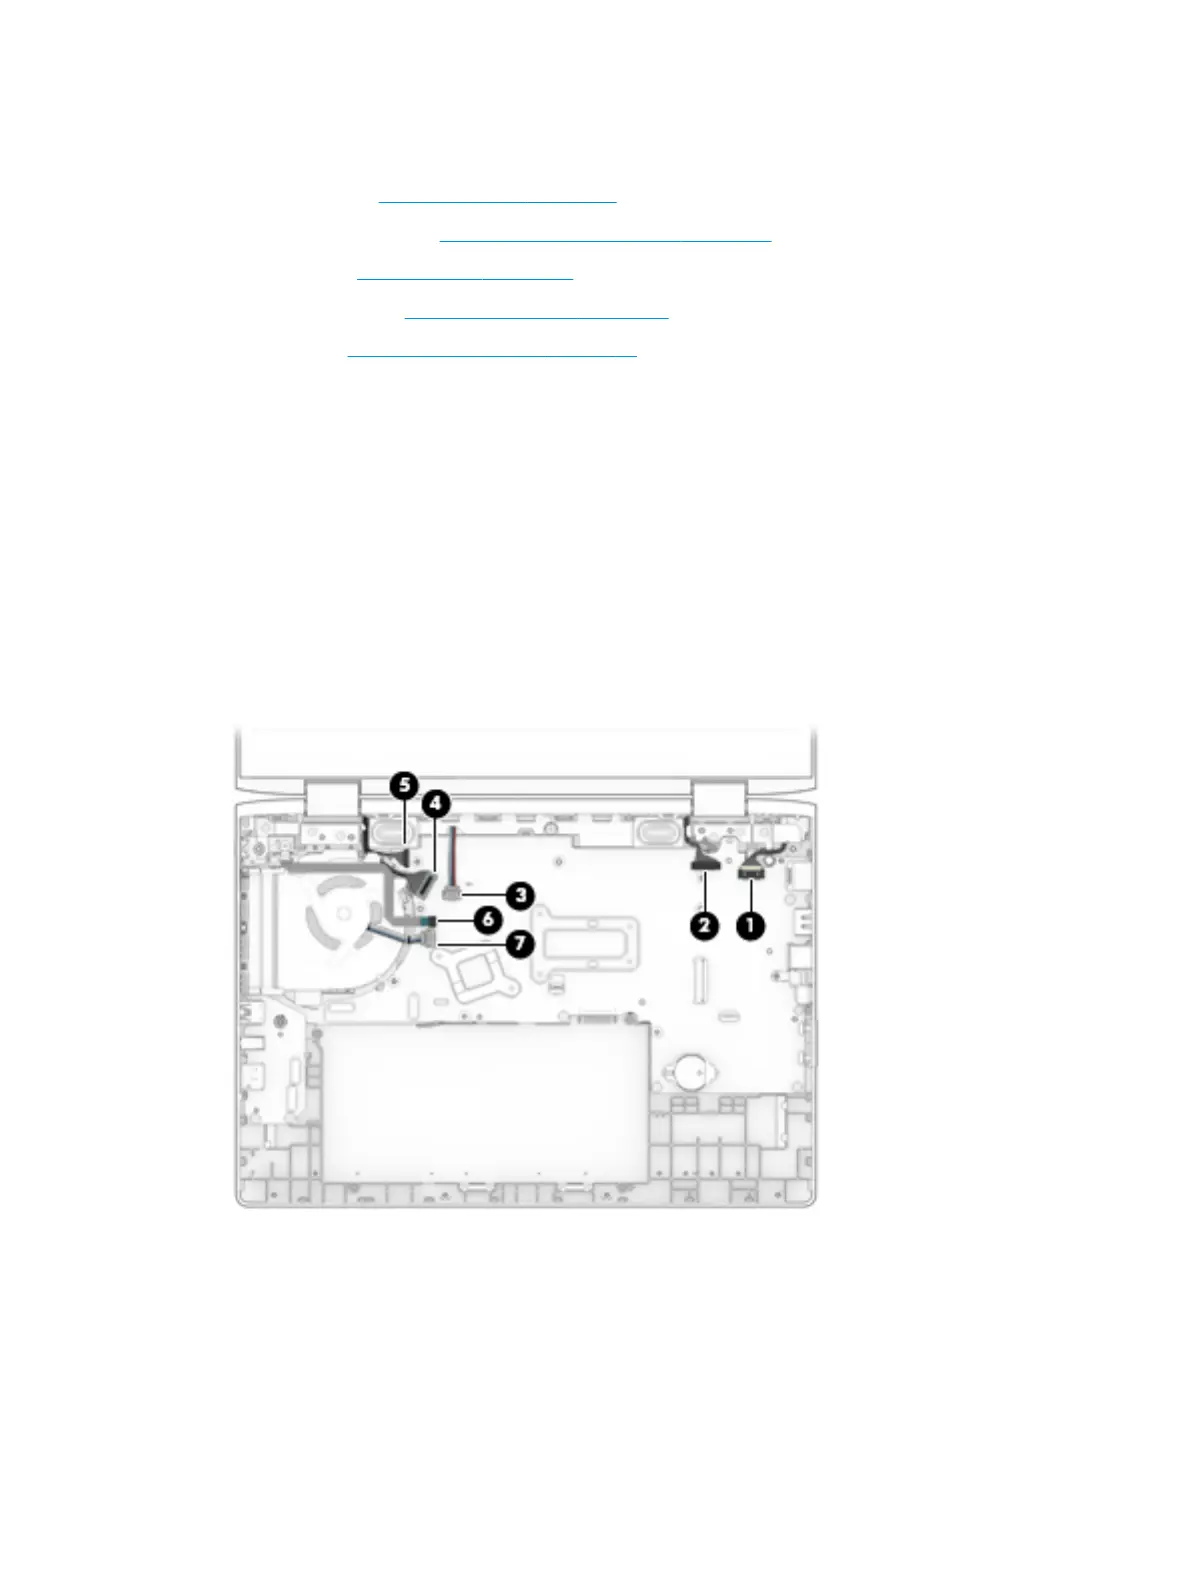
1. Disconnect the following cables from the system board:
(1): Power connector cable
(2): Display cable
(3): Speaker cable
(4): Display cable
(5): Display cable
(6): Power button board cable
(7): Fan cable
2. Remove the ve Torx T8 2.5×4.0 screws (1) that secure the system board to the computer.
3. Remove the Torx T8 2.5×4.0 screw (2) that secures the fan.
4. Lift the bracket from atop the USB-Type C port (3).
The USB bracket is available using spare part number L29057-001.
5. Rotate the left side of the system board upward (4).
56 Chapter 6 Removal and replacement procedures for Authorized Service Provider parts
 Loading...