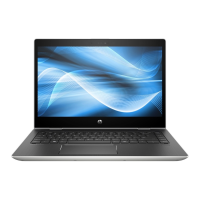
3. Lift the fan/heat sink from the system board (7).
IMPORTANT: If replacing the fan/heat sink, be sure to remove the power button board cable that is
adhered to the fan (8) and reinstall with the new fan/heat sink.
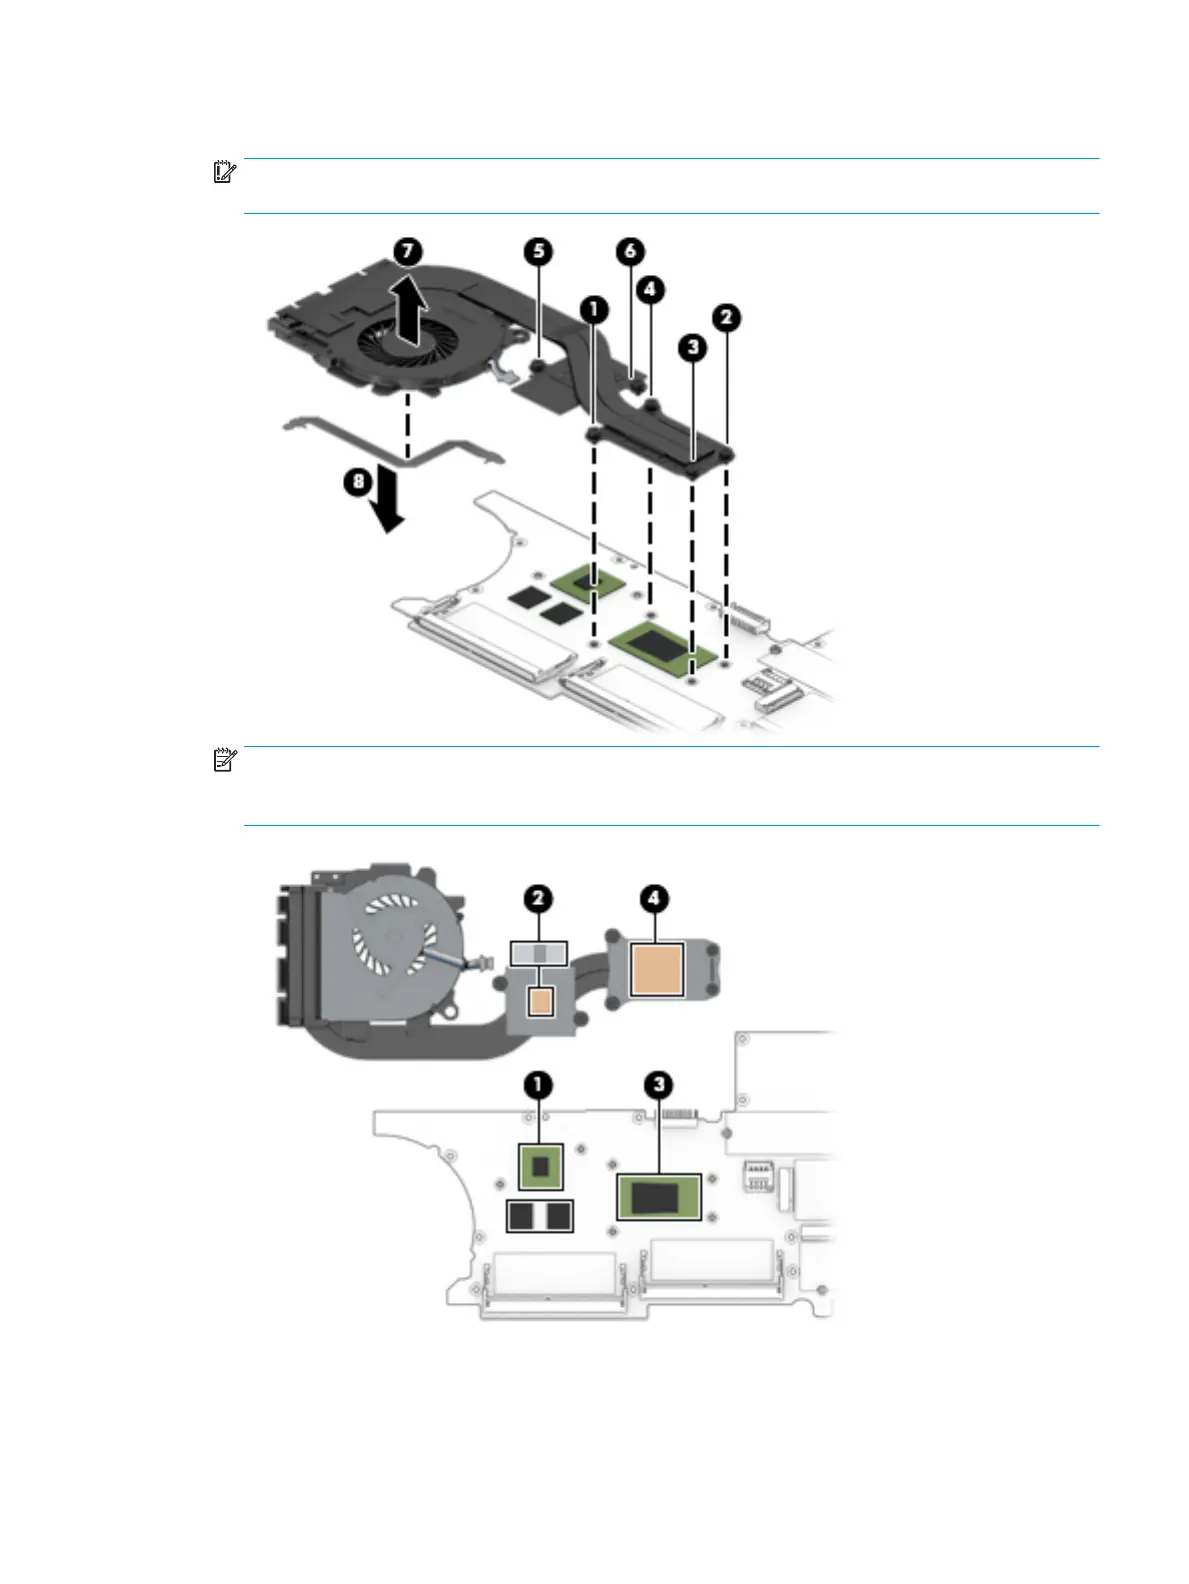
NOTE: Thoroughly clean thermal material from the surfaces of the system board components (1)(3)
and the heat sink (2)(4) each time you remove the heat sink. All fan/heat sink and processor spare part
kits include thermal material.
4. UMA models: In the order indicated on the heat sink, loosen the four captive Phillips screws (1)-(4) that
secure the fan/heat sink to the system board.
Component replacement procedures 59
 Loading...