15
Optical drive
To replace an optical drive:
1. Perform steps 1 through 3 of the Pre-installation instructions.
2. Remove the access panel.
3. Remove the front bezel.
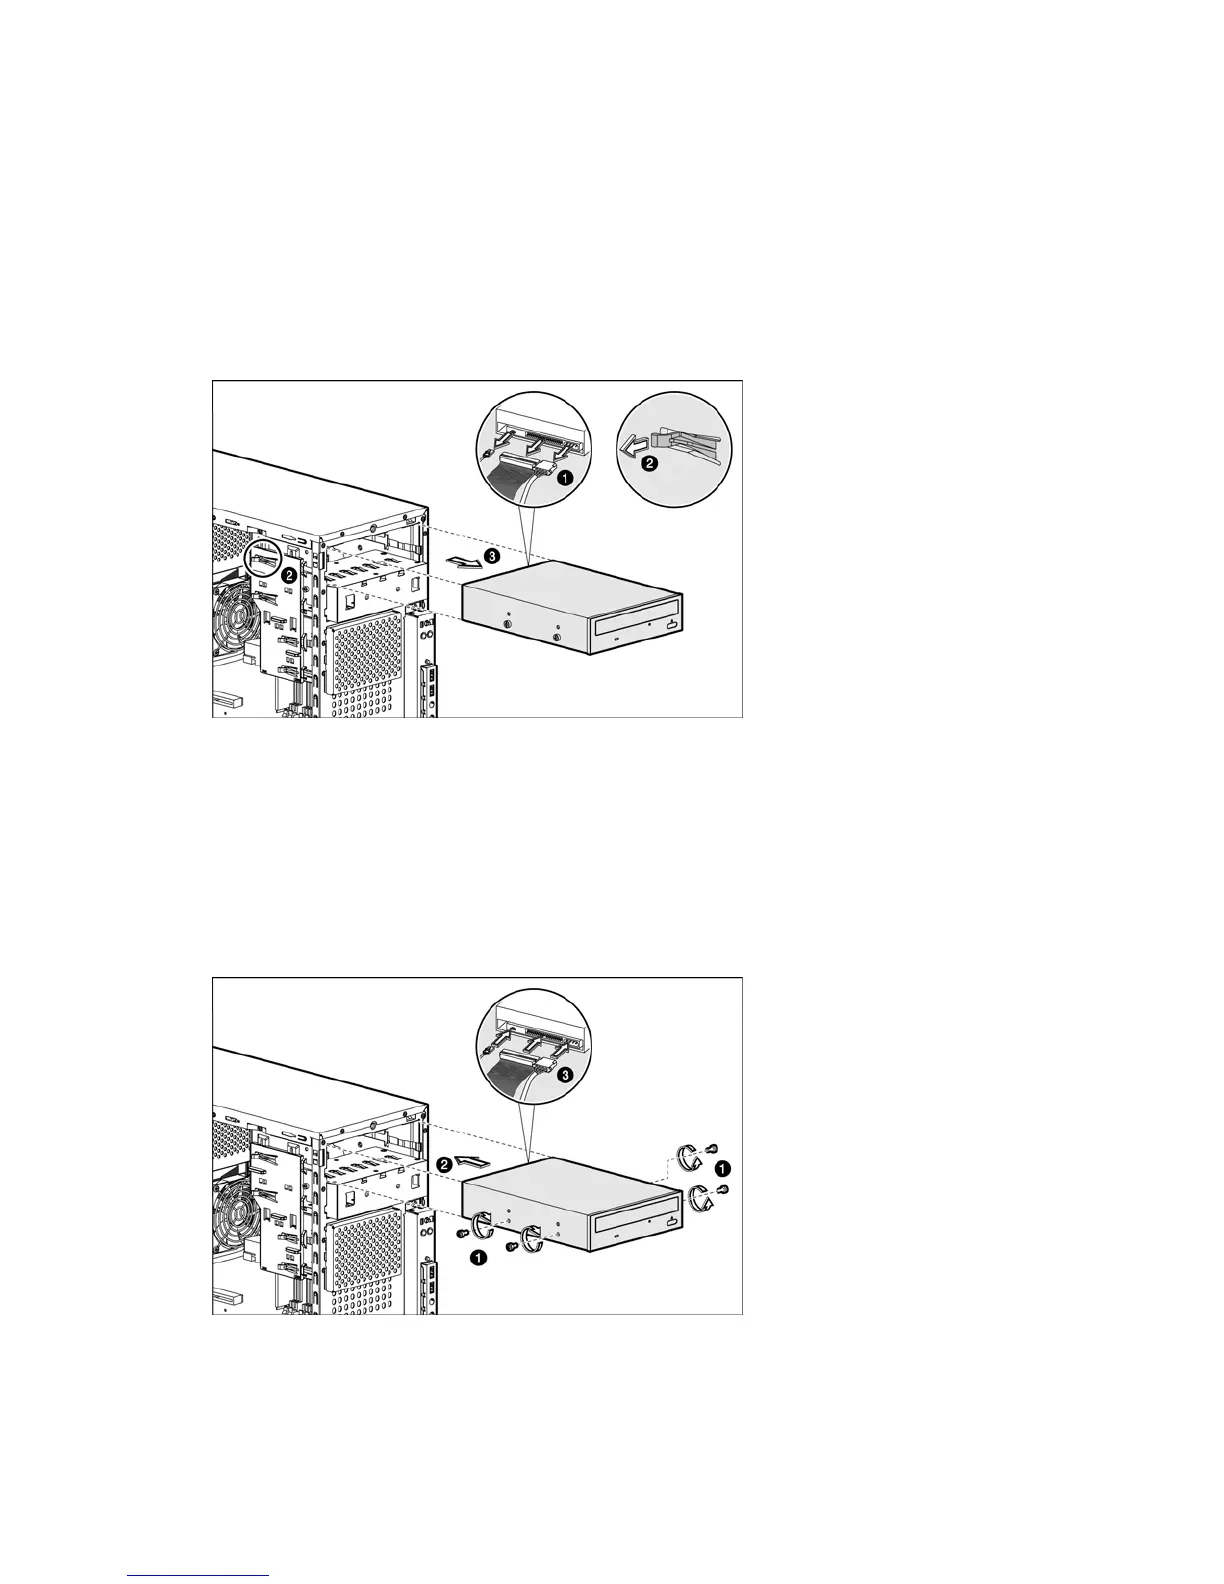
4. Remove the optical drive from the server:
a. Disconnect the power and data cables from the rear of the optical drive.
b. A drive latch with release tabs secures the drives in the drive bay. Lift the release tab on the drive latch.
c. Slide the drive from the drive bay.
Figure -8 [Removing an optical drive]
5. Place the old optical drive on a static-dissipating work surface or inside of an anti-static bag.
6. Remove the new optical drive from its protective packaging.
7. Check that the IDE jumper on the rear section of the optical drive is set to Cable-Select mode.
8. Install the new optical drive:
a. Insert four screws (two on each side) into the new optical drive.
b. Guide the new optical drive into the optical bay, with the cable connectors facing the rear of the
chassis, and then push the drive all the way into the drive bay until the drive clicks into place.
c. Connect the IDE power and data cables to their connectors on the rear of the drive.
Figure -9 [Installing an optical drive]
9. Observe the post-installation procedures.
 Loading...


