16
Optional media device
The lower half-height drive bay may be used for an optical drive or a non-hot-plug SATA or SCSI hard drive. For
more information about installing a hard drive in this bay, see Hard drive bracket later in this chapter.
To install an optional optical drive:
1. Perform steps 1 through 3 of the Pre-installation instructions.
2. Remove the access panel.
3. Remove the front bezel.
4. Remove the drive shield to prepare the bay for drive installation:
a. Remove the screw that secures the drive shield.
b. Pull the shield off of the chassis. Store it for later use.
CAUTION: Do not discard the shield. If the drive is removed in the future, you must reinstall the shield
to maintain proper system function.
Figure -10 [Removing the drive shield]
5. Prepare the new drive for installation. Refer to the documentation that came with the drive for related
installation procedures.
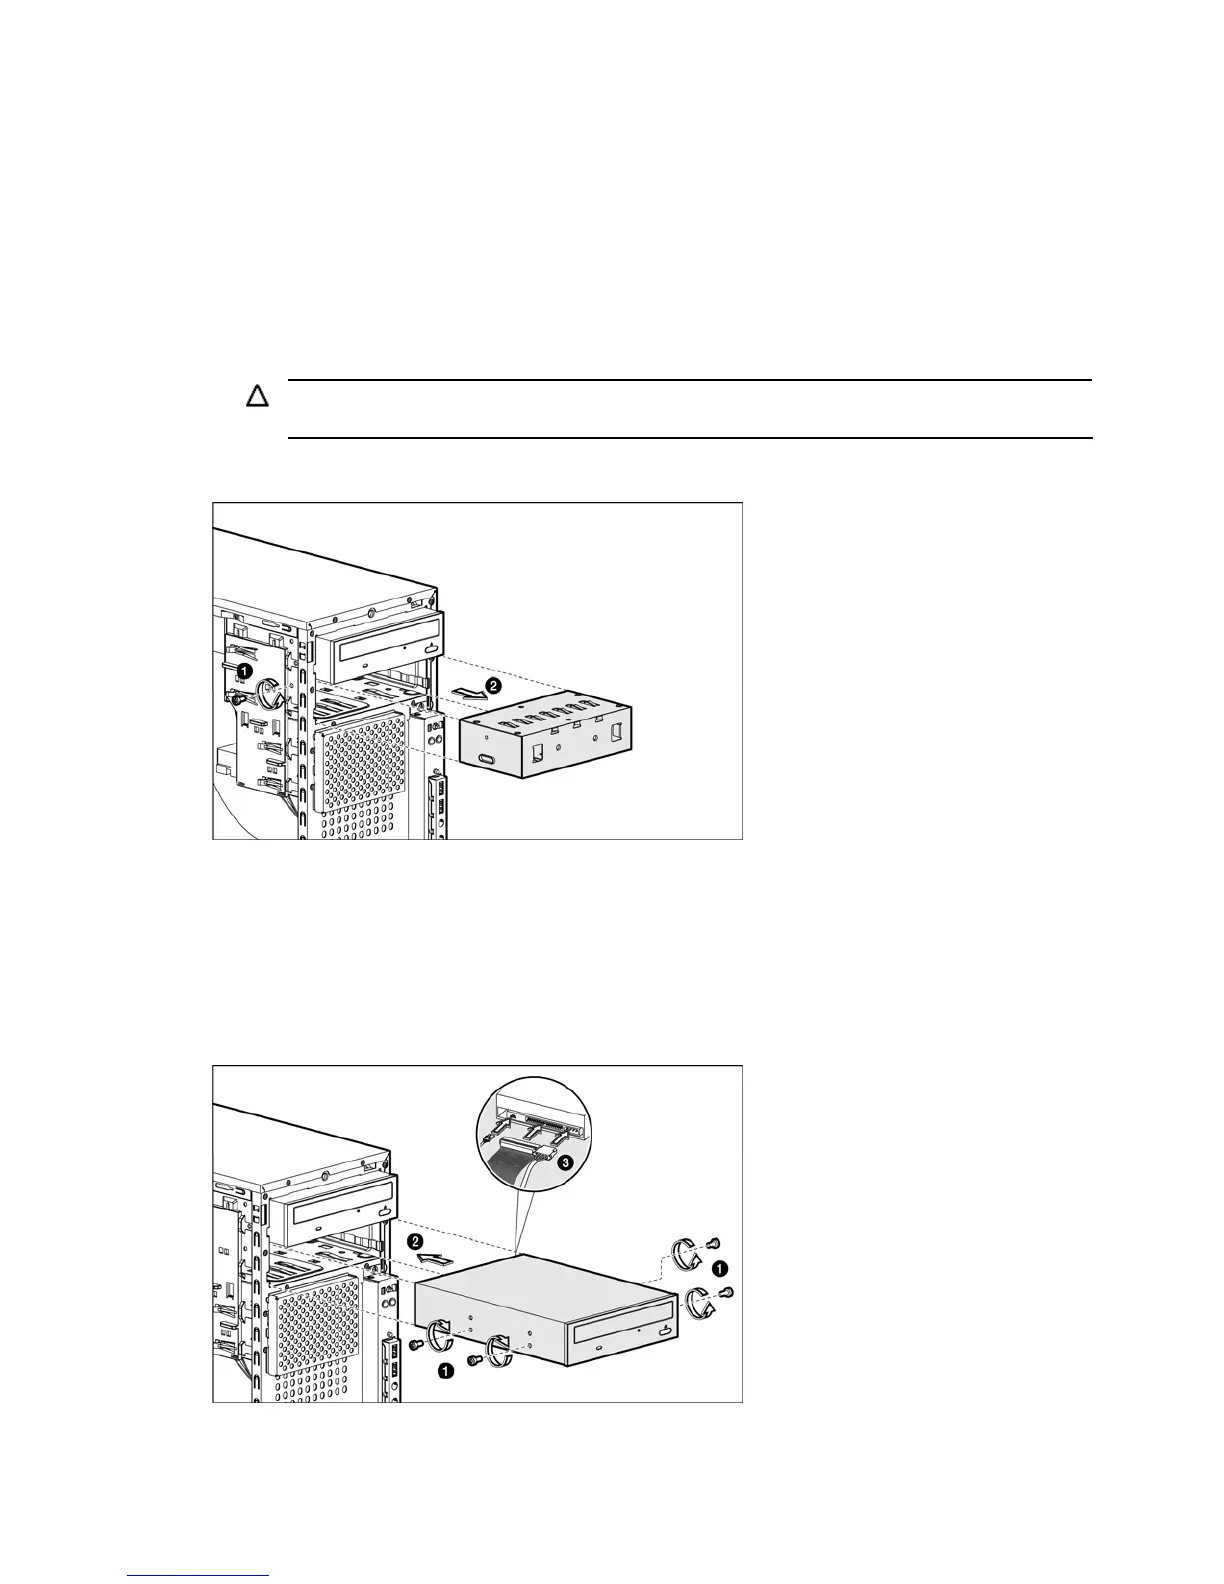
6. Install the new drive:
a. Insert four screws (two on each side) into the new optical drive.
b. Guide the new drive into the bay, with the cable connectors of the drive facing the rear of the chassis,
and then push the drive all the way into the chassis until the drive clicks into place.
c. Connect the power and data cables to the connectors on the rear of the drive.
Figure -11 [Installing an optional media drive]
7. Observe the post-installation procedures.
 Loading...


