28
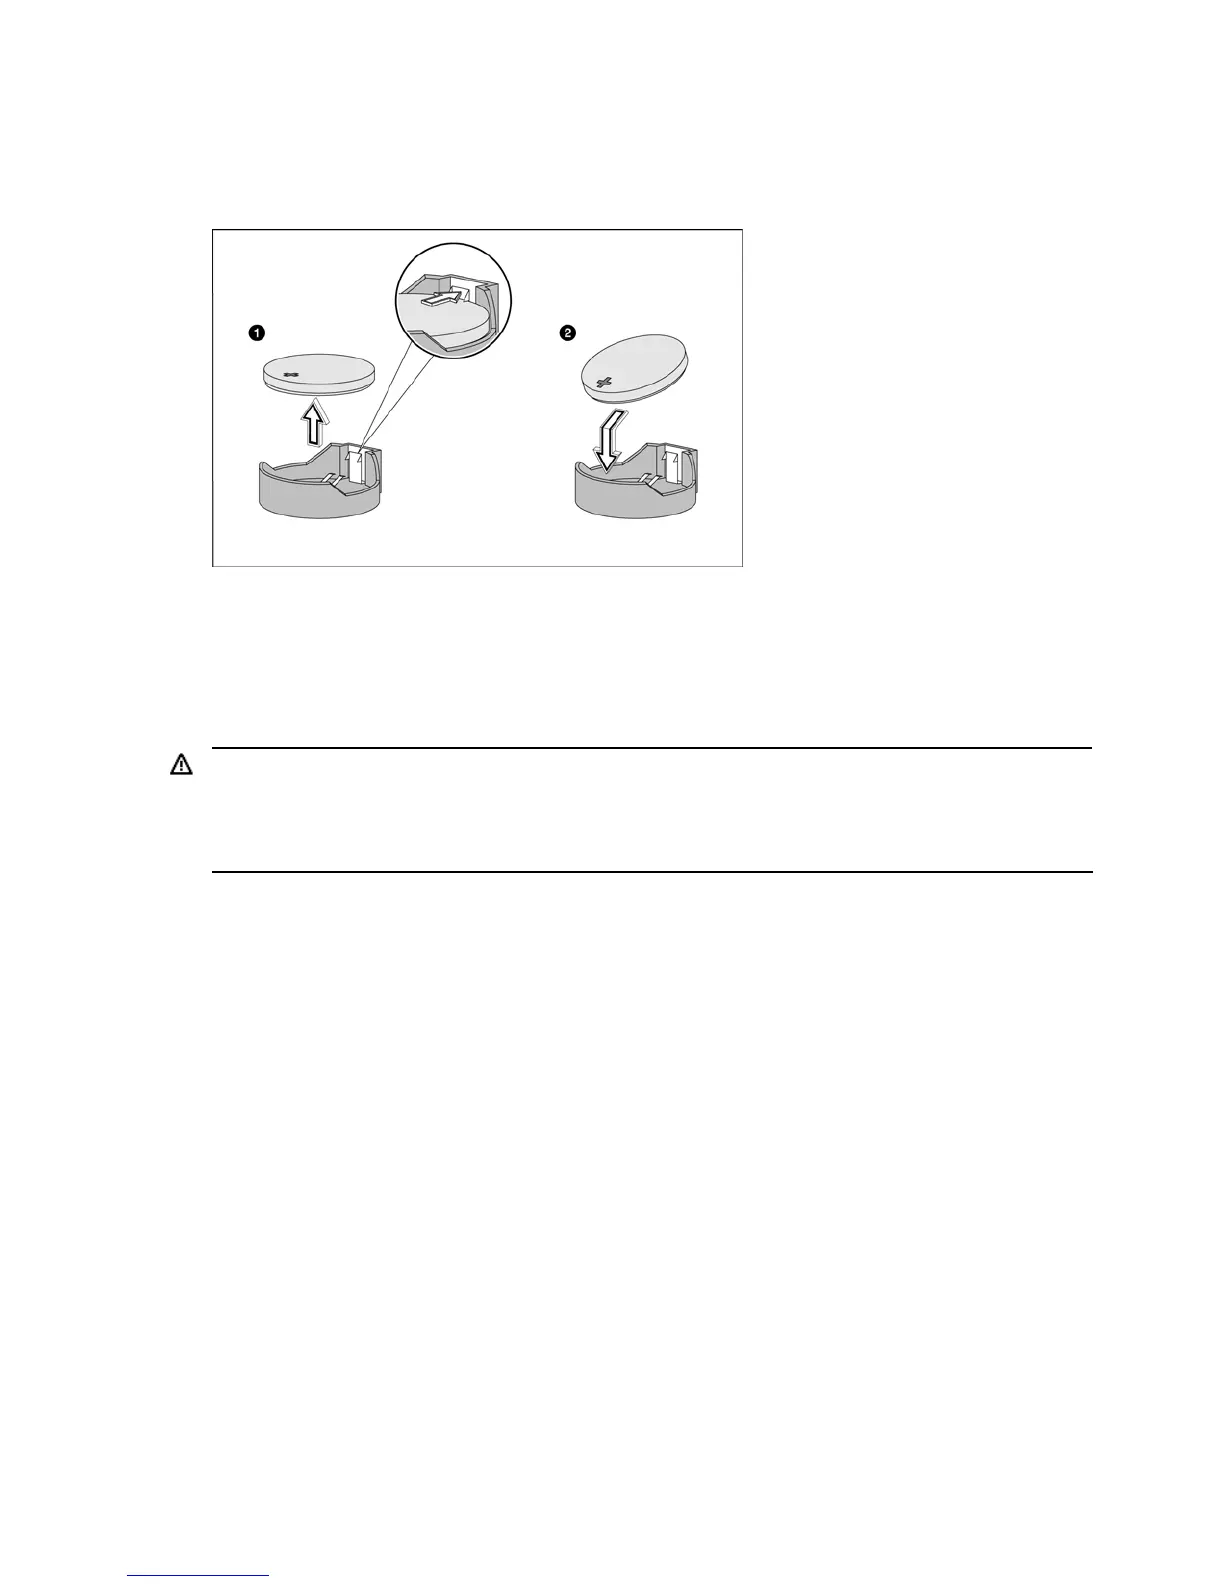
5. Replace the battery:
a. To release the battery from its holder, squeeze the metal clamp that extends above one edge of the
battery. When the battery pops up, lift it out.
b. To insert the new battery, slide one edge of the replacement battery under the holder’s lip with the
positive side up. Push the other edge down until the clamp snaps over the other edge of the battery.
Figure -33 [Replacing the battery]
6. Replace the access panel.
7. Observe the post-installation procedures.
Power supply unit (PSU)
Located on the rear panel of the server power supply is a single standard autoranging 350-watt PSU with PFC
(power factor correction) function.
WARNING! Note the following reminders are to reduce the risk of personal injury from electric shock hazards
and/or damage to the equipment.
• Installation of power supply units should be referred to individuals who are qualified to service server
systems and are trained to deal with equipment capable of generating hazardous energy levels.
• DO NOT open the power supply unit. There are no serviceable parts inside it.
To replace the power supply:
1. Perform steps 1 through 3 of the Pre-installation instructions.
2. Remove the access panel.
3. Lay the server on its side with the open side facing up.
4. Remove the power supply:
a. Disconnect the processor and system board power cables from the system board connectors
(P1 and P2).
b. Disconnect the power cables of all installed drives from the PSU.
c. Remove the four screws that secure the PSU to the chassis.
d. Lift the power supply out of the chassis.
 Loading...


