EasyManua.ls Logo

HP Q2429A User Manual

HP Q2429A
20 pages
To Next Page IconTo Next Page
Page #1 background imageLoading...
Page #1 background image
maintain
maintenance
wartung
manutenzione
mantenimiento
lea esto primero
q2429a
q2430a
q2436a
q2437a
All manuals and user guides at all-guides.com
all-guides.com
Question and Answer IconNeed help?

Do you have a question about the HP Q2429A and is the answer not in the manual?

HP Q2429A Specifications

General IconGeneral
BrandHP
ModelQ2429A
CategoryPrinter Accessories
LanguageEnglish

Summary

Printer Maintenance Kit and Safety

Fuser Cooling Safety Warning

Critical safety instruction to power off and cool the fuser for 30 minutes before proceeding.

Printer Component Replacement Steps

Transfer Roller Replacement (Part 1)

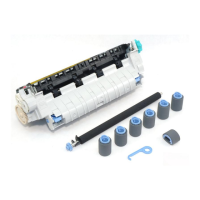
Initial steps for transfer roller replacement, including printer orientation.

Transfer Roller Replacement Continued

Using Transfer Roller Tool

Guidance on using the plastic tool to lift and slide the transfer roller shaft.

Safe Handling of New Transfer Roller

Warning to wear gloves and avoid touching the new transfer roller with bare hands.

Installing the New Transfer Roller

Steps to correctly align and install the new transfer roller into its bracket.

Pickup Roller and Feed Roller Replacement

Replace Tray-1 Pickup Roller (with Feeder)

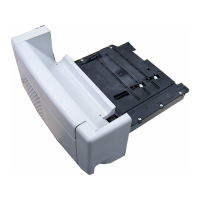
Procedure for replacing the pickup roller when an optional envelope feeder is installed.

Replace Tray-1 Pickup Roller (no Feeder)

Procedure for replacing the pickup roller when no optional envelope feeder is present.

Tray 1 Pickup Roller Installation

Locate Pickup Roller in Tray 1

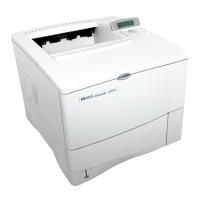
Identifying the pickup roller's position within the printer's tray 1.

Feed Roller Installation and Safety

Printer Positioning for Access (Safety)

Warning about positioning the printer correctly for access to avoid tipping.

Fuser Unit Replacement Procedure

Replace Fuser (Part 1 - Open Bin)

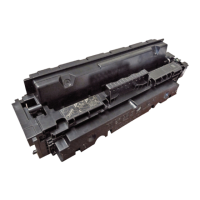
First steps for fuser replacement: opening the rear output bin and extension.

Fuser Unit Replacement Steps

Remove Fuser Unit (with Safety Warning)

Grasping the fuser, releasing levers, and pulling it out with a heat warning.

Fuser Installation and Cable Connection

Install New Fuser Unit

Pushing the new fuser firmly into the printer until levers click into place.

Final Installation and Verification

Related product manuals