EasyManua.ls Logo

HP CF410A - User Manual

HP CF410A
17 pages
To Next Page IconTo Next Page
Loading...
HP
®
COLOR LJ PRO M452/MFP 477
TONER CARTRIDGE REMANUFACTURING INSTRUCTIONS
HP CF410/11/12/13 A/X-HP 410 SERIES TONER CARTRIDGE
© 2017 UniNet Imaging Inc. All trademark names and artwork are property of their respective owners. Product brand names mentioned are intended to show compatibility only.
UniNet Imaging does not warrant downloaded information. Unauthorized sale, reproduction or distribution of this article is prohibited. For additional support, please contact techsupport@uninetimaging.com
www.uninetimaging.com
Question and Answer IconNeed help?

Do you have a question about the HP CF410A and is the answer not in the manual?

HP CF410A Specifications

General IconGeneral
BrandHP
ModelCF410A
CategoryPrinter Accessories
LanguageEnglish

Summary

HP Color LaserJet Pro M452;MFP 477 Toner Cartridge Remanufacturing Instructions

Supported Printers and Cartridges

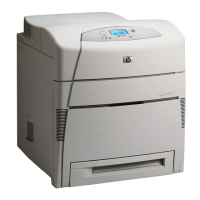
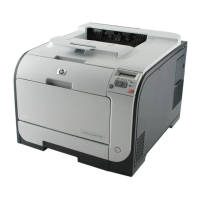
Lists compatible HP LaserJet Pro M452/MFP 477 printers and HP 410A/X series toner cartridges.

Preparation for Toner Cartridge Remanufacturing

Required Tools for Remanufacturing

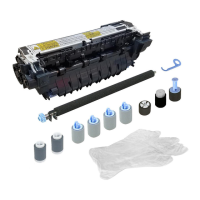
Lists essential tools needed for the toner cartridge remanufacturing process.

Required Supplies for Remanufacturing

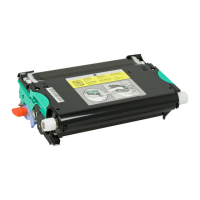
Lists necessary consumable supplies for the toner cartridge remanufacturing.

Toner Cartridge Disassembly and Component Replacement Steps

Initial Cartridge Disassembly

Remove spring, pry out top of end cap, and separate cartridge halves.

Separating Drum and Waste Chamber

Details separating cartridge halves and removing the waste chamber using a tab.

Removing Drum, PCR, and Wiper Blade

Steps for removing the drum, PCR, and wiper blade from the cartridge assembly.

Cleaning Waste Toner and Installing Wiper Blade

Clean waste toner chamber, ensure seals are clean, and install new wiper blade.

Installing PCR and Applying Conductive Grease

Install the cleaned PCR and apply conductive grease to the PCR holder.

Removing Supply Chamber End Cap and Gears

Remove screws, end cap, and gears from the supply chamber side.

Removing Developer Roller and Gears

Remove large and small gears and slide out the developer roller.

Removing Doctor Blade and Vacuuming Toner

Remove doctor blade screws, blade, and vacuum waste toner from the hopper.

Filling the Toner Hopper

Fill the toner hopper with toner for specific printer models.

Cleaning Foam Seals and Installing Doctor Blade

Clean doctor blade foam seals and install the doctor blade with screws.

Reinstalling Developer Roller and Gears

Install the developer roller and re-install the small and large gears.

Installing Inner End Cap and Drive Gear

Press inner end cap, install drum drive gear, and install end cap with screws.

Replacing Chip and Installing Drum

Remove and replace the chip, then install the drum into the waste hopper.

Reassembling Cartridge Halves

Align and join the two halves, secure the end cap with tape.

Final Spring Installation

Install the spring to complete the toner cartridge reassembly process.

Post-Remanufacturing Procedures

Taking Test Prints

Steps to navigate the printer menu and print a Supplies Status Page.

Repetitive Defect Chart

Lists key component dimensions for identifying repetitive defects.

Related product manuals