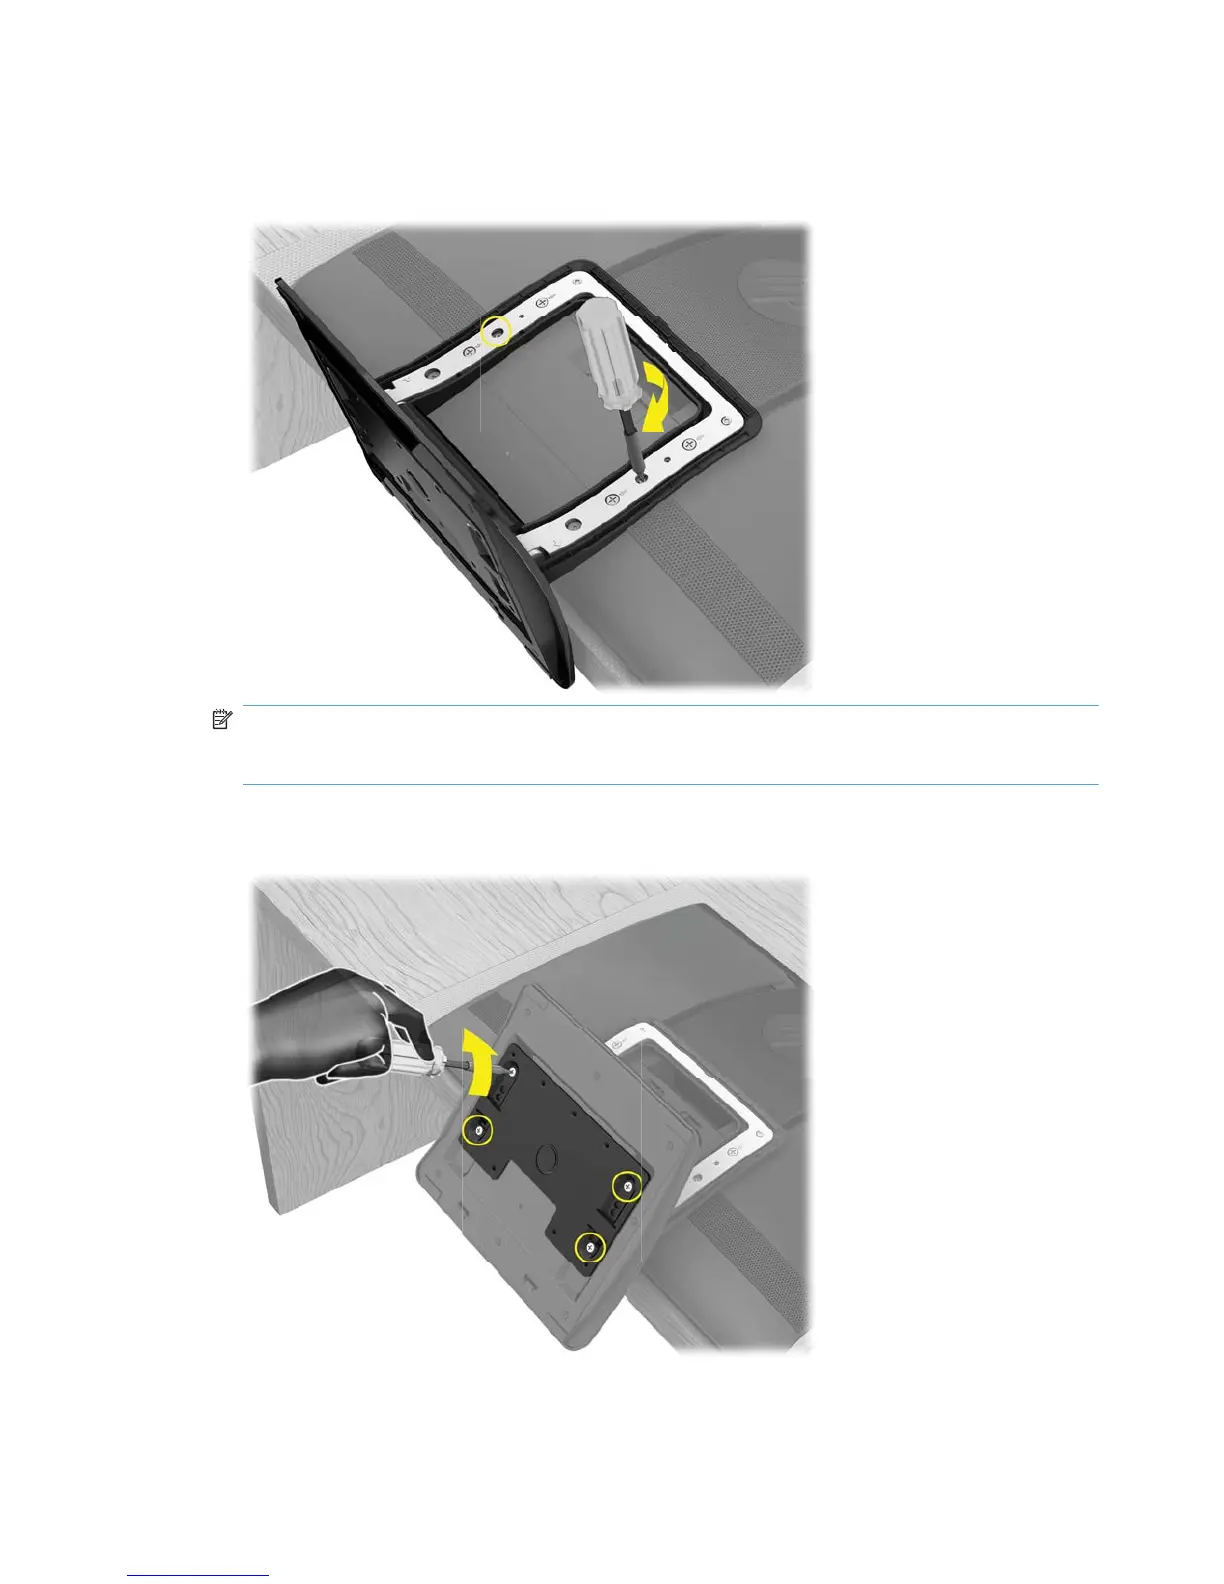
4. Use a Phillips screwdriver to tighten the recessed two brake screws (for the rails) on the computer.
It should take about 5–10 turns of the screwdriver to secure the screws. Take care not to
overtighten the screws.
NOTE: The tightened brake screws will hold the VESA adapter plate in the locked position, so
that the computer does not slide down once it is mounted on a wall. These screws must be tighten
before placing the VESA adapter plate on the back of the computer.
5. While the stand is still on the computer, use a Phillips screwdriver to remove the four screws
attaching the VESA adapter plate to the bottom of the computer stand. Save the screws.
4 Chapter 1 Preparing your HP TouchSmart PC for wall-mounting Wall-Mounting your HP TouchSmart