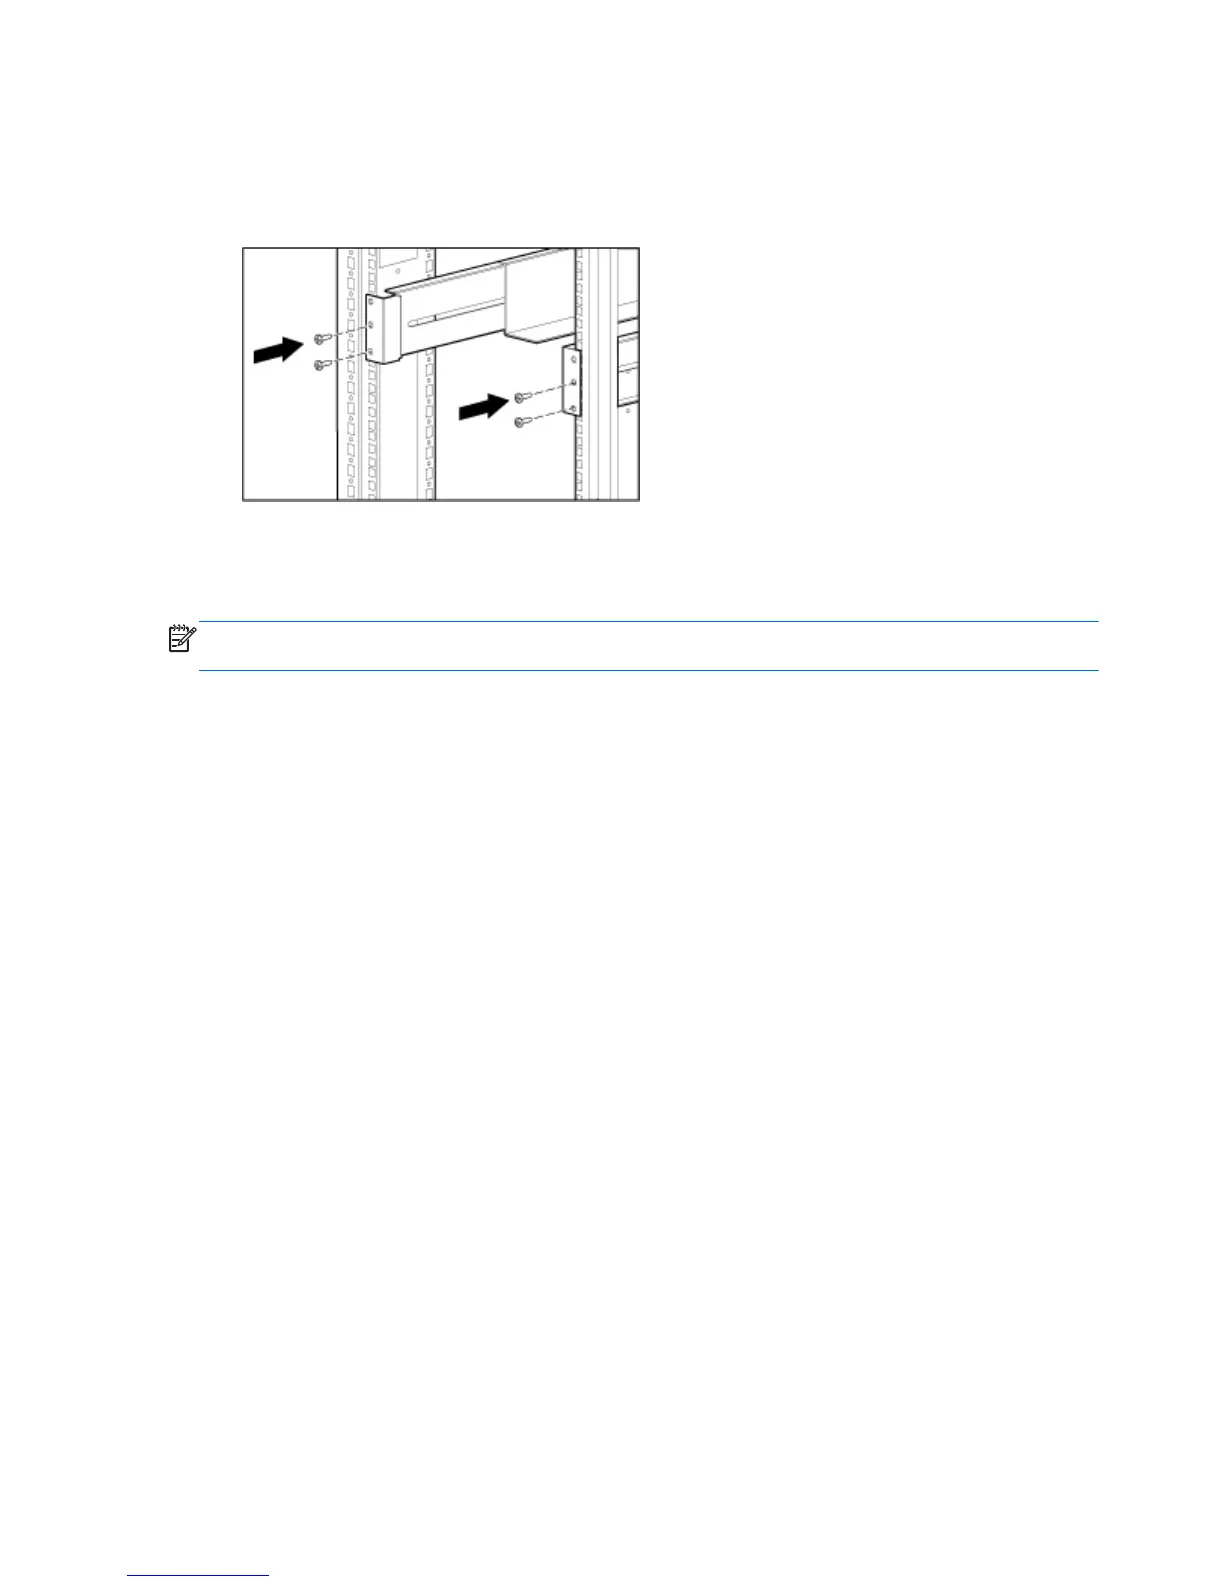
4. Install cage nuts into the rear locations of the rack that best align with the bottom two holes at the
rear of the depth-adjustable fixed rail, ensuring they are installed level with the front.
5. Insert two screws through each depth-adjustable fixed rail and into the cage nuts installed earlier,
securing the rail to the rear of the rack.
6. Retighten the wing nuts on the depth-adjustable fixed rails.
The rails are now ready for component installation. Refer to the documentation included with the
component for complete installation instructions.
NOTE: After installing the component, insert additional screws into the front depth-adjustable fixed
rails for component support.
10 Appendix A HP Depth-Adjustable Fixed Rails Rack Option Kit installation instructions ENWW

 Loading...