Procedure
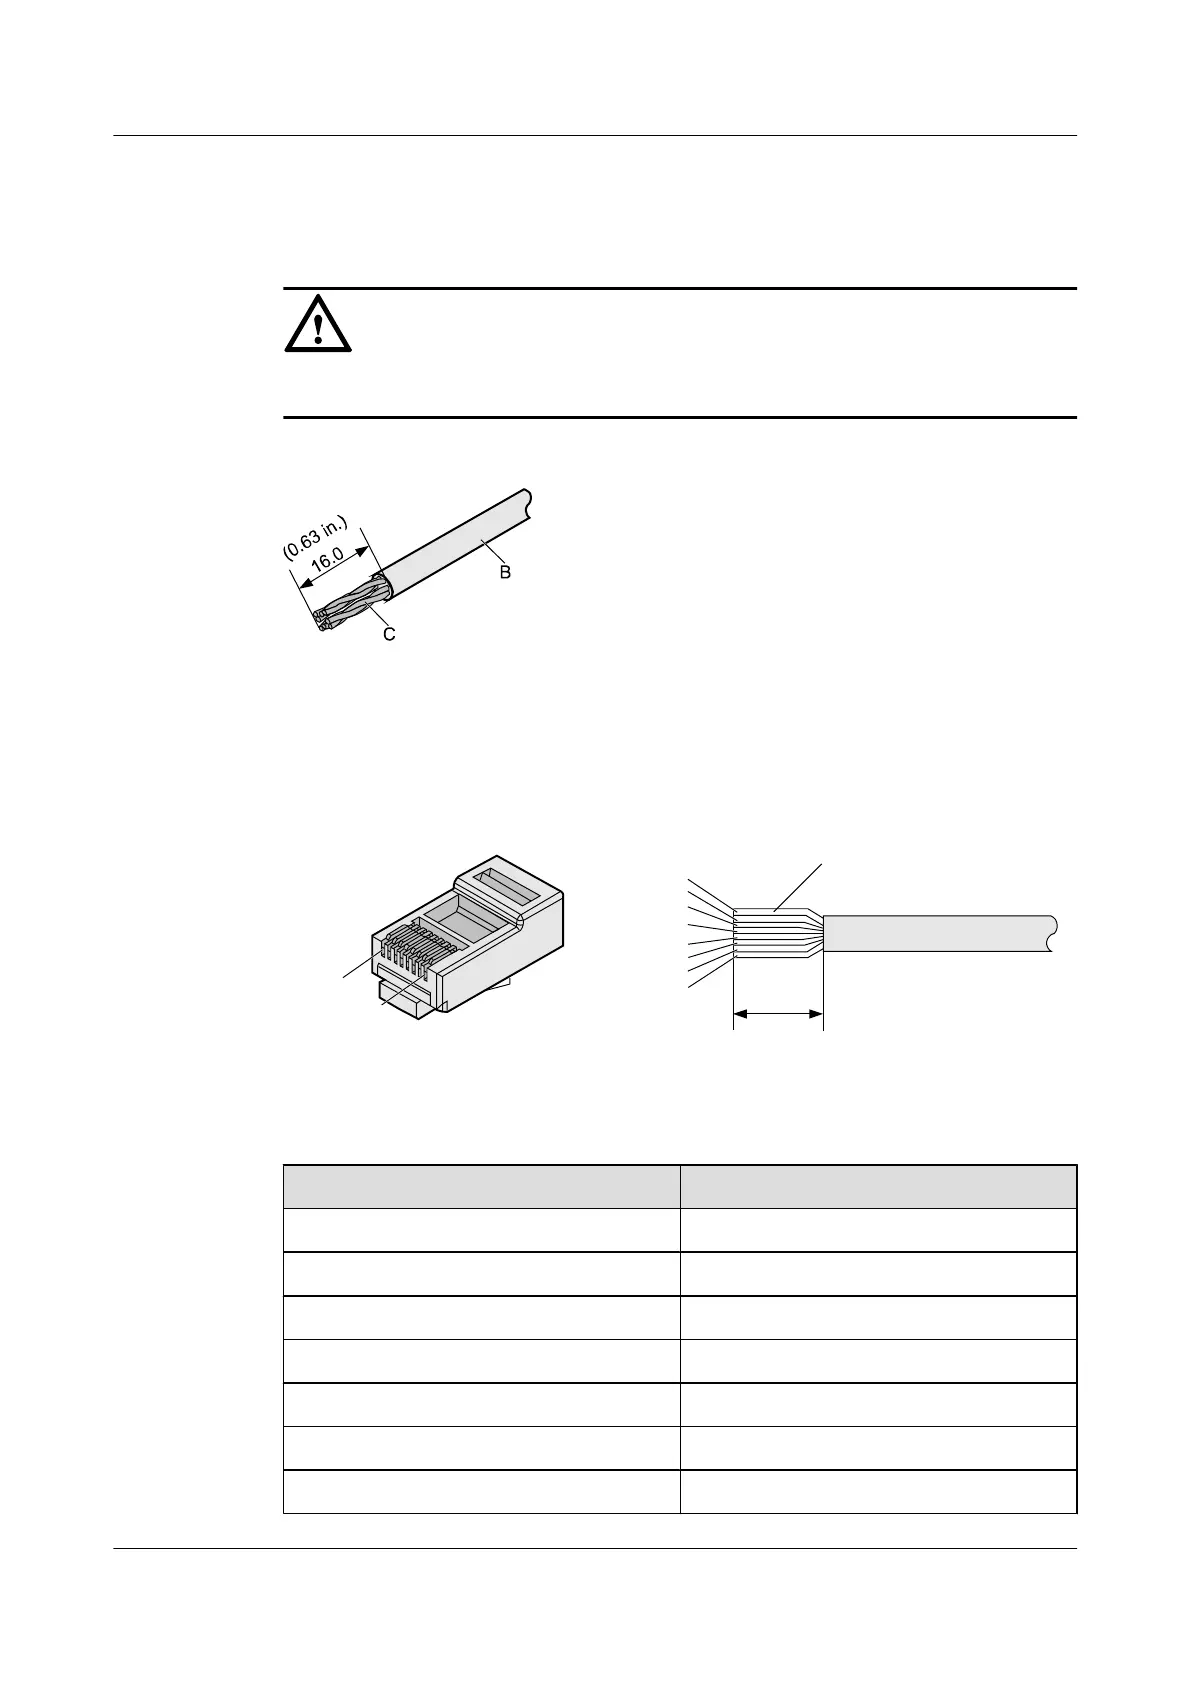
Step 1 Remove a 16-mm (0.63 in.) long section of the jacket, as shown in Figure 5-29.
NOTICE
When you remove the shield layer, do not damage the insulation of the twisted-pair cable.
Figure 5-29 Removing the jacket of a twisted-pair cable (unit: mm (in.))
Step 2 Align the four pairs of wires and cut the ends neatly, as shown in Figure 5-30. The connections
between the wires and the pins are listed in Table 5-6.
Figure 5-30 Connections between wires and pins (unit: mm (in.))
C
16
White-Orange
White-Green
Orange
Blue
White-Blue
Green
White-Brown
Brown
Pin 8
Pin 1
Table 5-6 Connections between wires and pins (using a straight-through cable as an example)
Matching Pins of Wires Wire Color
1 White-Orange
2 Orange
3 White-Green
4 Blue
5 White-Blue
6 Green
7 White-Brown
Huawei AP3x10xN&5x10xN&5x30xN&6x10xN&7x10xN
Hardware Installation and Maintenance Guide 5 Appendix
Issue 11 (2015-05-18) Huawei Proprietary and Confidential
Copyright © Huawei Technologies Co., Ltd.
55
 Loading...