NOTICE
l Do not power on a router before you finish connecting power cables and network cables.
l Each router has its own power cables delivered as accessories. The power cables can only
be used on the router in the same package and cannot be used on any other device.
NOTE
The AC power cable parameters vary in different countries or regions. The figures in this section are for
reference only and may differ from the cables delivered.
Tools and Accessories
l ESD wrist strap
l AC Power Cable
l AC terminal locking latch
Procedure
Step 1 Verify that the router is reliably grounded.
Step 2 Set the power switch to OFF.
Step 3 Wear an ESD wrist strap. Ensure that the ESD wrist strap is grounded and in a close contact
with your wrist.
Step 4 Connect the AC power cable.
1. Connect the one end of the AC power cable to the power socket on the AC power
module.
2. Connect the other end of the AC power cable to an AC power outlet.
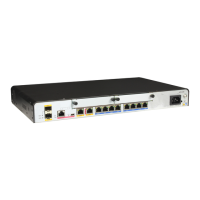
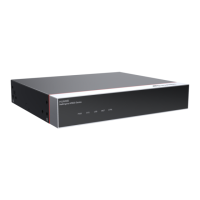
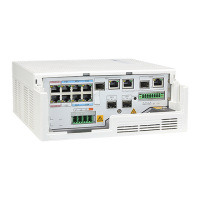
AR2200 Series
FAN
STATUS
10PWR 9PWR
11 SRU
F
A
N
12
STAT US
ON
OFF
~100-240V;50/60Hz;5A
PWR350A
ACT
micro SD
SYS ACT
LINK0 LINK1
ACT0 ACT1
EN EN
CON/AUX RST
GE1
GE0
GE1 GE2
SRU40
AC power outlet
AC Power Cable
Step 5 Connect the AC terminal locking latch.
1. Insert the AC terminal locking latch into the jack beside the power socket.
2. Adjust the AC terminal locking latch to a proper position.
3. Lock the AC power cable with the AC terminal locking latch.
Huawei
AR100&AR120&AR150&AR160&AR200&AR1200&AR
1600&AR2200&AR3200&AR3600 series Enterprise
Routers
Hardware Installation and Maintenance Guide
7 Installing AR2240/AR2240C/AR3260/AR3670 Routers
Issue 05 (2018-07-30) Huawei Proprietary and Confidential
Copyright © Huawei Technologies Co., Ltd.
118
 Loading...