l Marker
l Network cables (separately purchased)
l Network cable labels
Procedure
Step 1 Select Ethernet cables of appropriate quantity and lengths according to the number of ports
and measured cabling distances.
Step 2 Attach temporary labels to both ends of each Ethernet cable and write numbers on the labels
to identify the Ethernet cables. For details, see 9.5.3 Engineering Labels for Network
Cables.
Step 3 Connect one end of an Ethernet cable to an Ethernet interface of the router and the other end
to an Ethernet interface of the remote device.
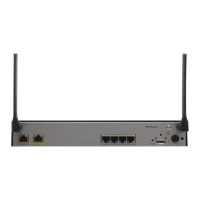
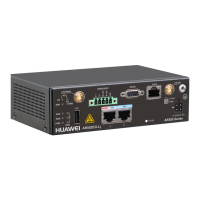
CON/AUX
ADSL
WiFi 1
WiFi 0
FXS 3 FXS 2 FXS 1 FXS 0 FE3FXO FE2 FE1 FE0 WAN
RESET
12V;5A
Power Outage Survival
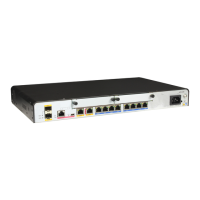
Network cable
Ethernet interface of
the remote device
FE3 FE2 FE1 FE0 WAN
Step 4 Arrange the Ethernet cables to make them parallel, and then bundle them with cable ties. Use
diagonal pliers to cut off redundant cable ties.
Step 5 Remove the temporary labels from the Ethernet cables, and then attach formal labels 2 cm
away from the connectors at both ends.
----End
Follow-up Procedure
Check the following items after connecting Ethernet cables:
l Labels are correctly filled and securely attached to cables, with texts facing the same
direction.
l Cables and connectors are complete, intact, and tightly connected.
4.7.4 Connecting the Power Adapter
Huawei
AR100&AR120&AR150&AR160&AR200&AR1200&AR
1600&AR2200&AR3200&AR3600 series Enterprise
Routers
Hardware Installation and Maintenance Guide
4 Installing AR100/AR120/AR150/AR160/AR200 Series
Routers
Issue 05 (2018-07-30) Huawei Proprietary and Confidential
Copyright © Huawei Technologies Co., Ltd.
30
 Loading...