HES-319M Installation 24
3. Strip away about 1in–3cm of insulation from the ground wire (either the integrated wire or a separate
12AWG ground wire).
4. Slip the cable and ground wire through the unused rubber grommet.
5. Plug the cable into the RJ–45 port on the same side as the grommet.
6. Loosen the brass nut on the unused ground terminal and wrap the stripped wire clockwise around the
brass post, between the two brass washers.
The surge suppressor ships with a ring wiring lug on each ground terminal. You can leave these in place or
discard them, but do not use them.
7. Tighten the nut.
8. Run the cable to the ODU.
Run the cable along horizontal and vertical paths, keeping it out of sight as much as possible. Avoid sharp
bends. Use Xplornet–approved single cable clips every 24in–60cm to secure the cable and integrated
ground wire to the building.
If you are using Xplornet–approved 12AWG ground wire rather than an integrated wire, use single cable
clips on both the cable and wire.
9. Run the cable to the ODU RJ-45 port.
10. Coil any excess cable. When all connections have been made, secure the coil as close to the ODU as is
practical.
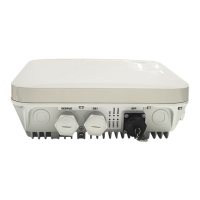
11. At the ODU RJ-45 port, remove the sealing gland assembly.
Referring to the illustration, the sealing gland assembly includes:
o Sealing gland base
o Rubber bushing
o Sealing gland nut
12. Keep the assembly warm until you are ready to reinstall it. The parts are difficult to work with when cold.
The assembly must be reinstalled to weatherproof the ODU.
However, it is often easier to wait until after you have aligned the ODU. Until then, plug
the Cat5e cable directly into the ODU RJ-45 port.
13. When you are ready to reinstall the sealing gland assembly:
a. Unplug the cable from the ODU RJ-45 port.
 Loading...