22
5. To reset any high-limit, no probe, or low water (when in manual reset mode) fault
condition, press the RESET button.
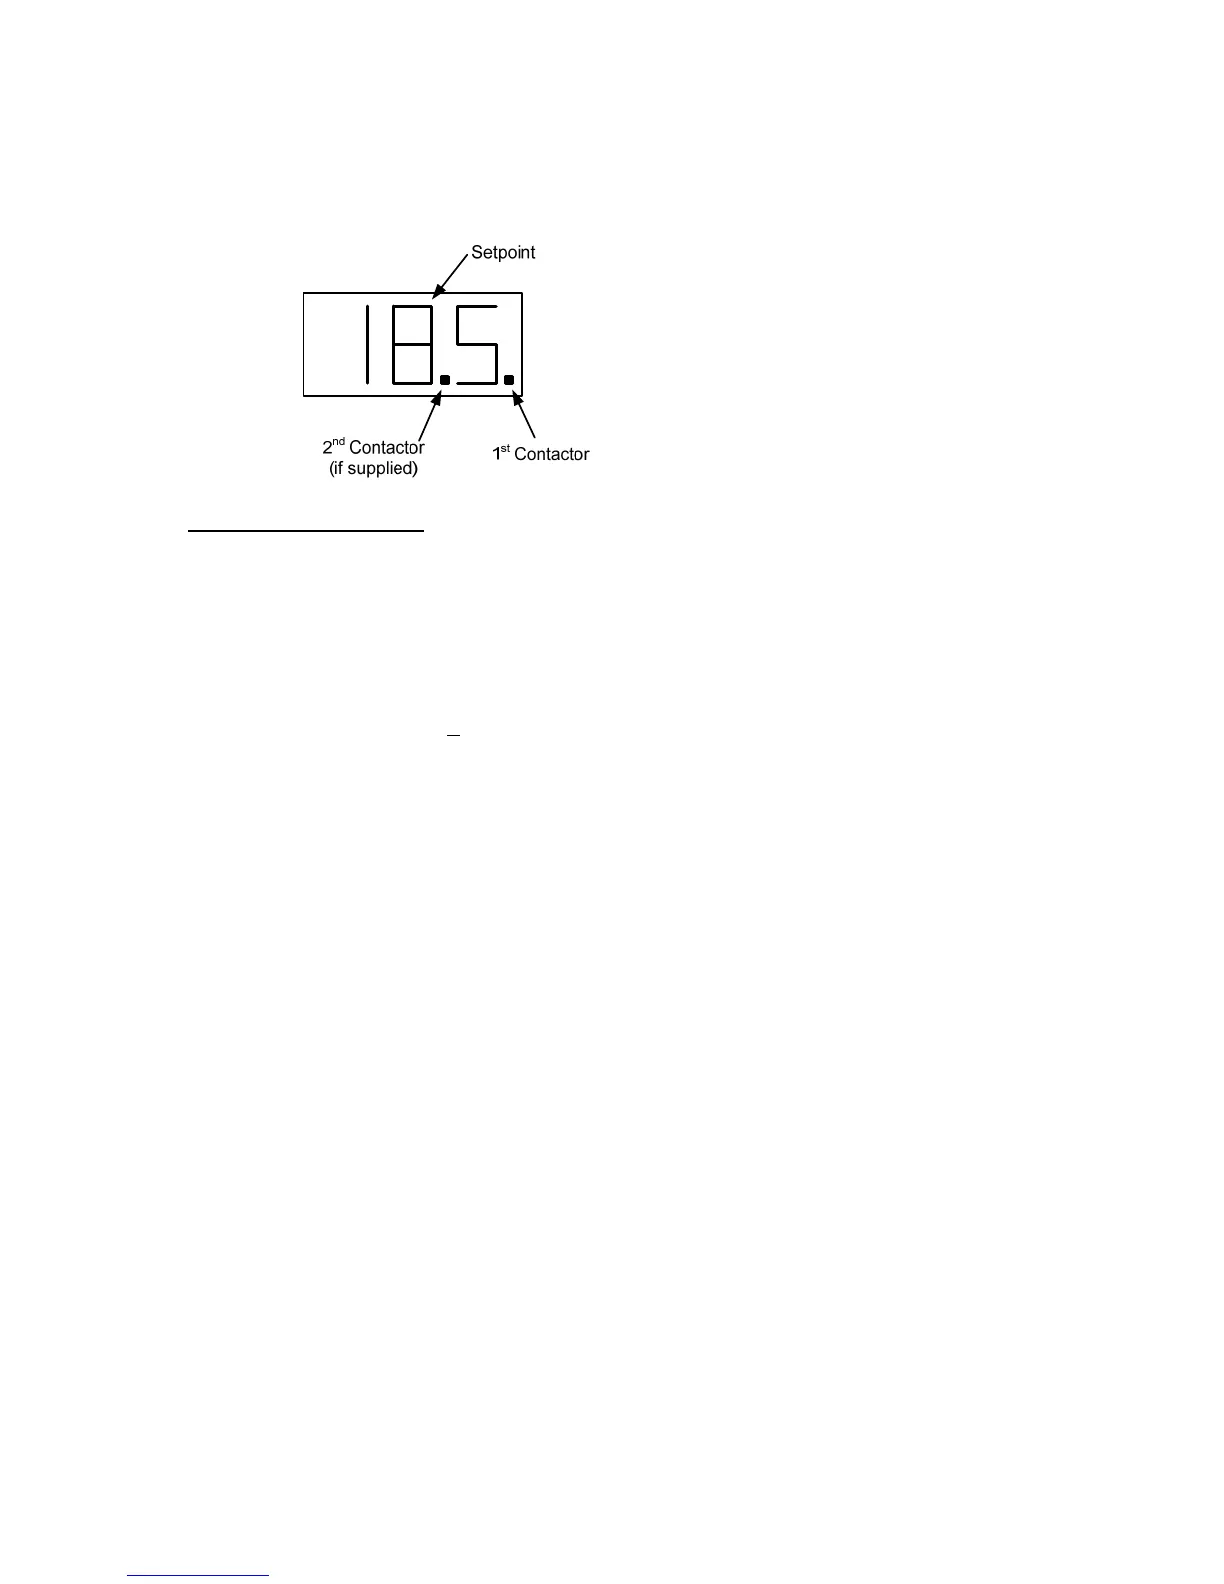
6. Display
a. By default the display will show the setpoint of the heater.
b. The decimal points on the display, as shown below, indicate that the controller
is calling for a contactor to pull in.
ANNUAL INSPECTION
1. Monitor water temperature
a. Let water heater completely heat to a designated temperature setting.
b. After controller satisfies (that is, when the magnetic contactor actually clicks
off), draw water from as close as possible heater outlet and measure the
temperature.
c. Compare the water temperature of outlet water to the temperature setting of
the display when it satisfies. Normal variation between the two points is
approximately +
5°F.
d. If these two readings do not coincide within acceptable tolerances and
verification has been made of the accuracy of the temperature-reading gauge,
replace the control board and/or the sensor probe.
2. Lift test lever on relief valve and let water run through valve for a period of
approximately 10 seconds. This will help flush away any sediment that might build up
in water passageways.
3. Inspect element for leakage as follows:
a. Shut off power supply.
b. Remove front cover.
c. Visually inspect around heating element for evidence of leaks.
d. Rub around the heating element with a rag. Check for any evidence of
moisture. If moisture is present or a water drip is observed, follow procedure
outlined in Section V.
CAUTION: The area around the heating element may be hot.
4. Scale and mineral build-up on heating elements is a normal condition. It is
recommended that the heating element be removed for examination and if scaled,
should be cleaned. In an area of known hard or poor water conditions, the elements
may need to be checked more frequently. This will improve the efficiency of the
heater and increase the element life.
NOTE: Failure of the elements due to scale and mineral build-up is not covered under
warranty. See warranty for complete details.
a. Shut off power supply.
b. Drain the tank.
c. Remove front cover.
d. Disconnect the element wiring. It is recommended that one element at a time
is removed to simplify re-wiring.
e. Unscrew element.
f. Lime scale removal