31
LOW WATER SWITCH
1. Disconnect power from unit.
2. Shut off incoming water supply.
3. Attach hose to drain connection.
4. Lift manual release lever on relief valve to let air into system or break union on
outgoing water line.
5. Drain water from tank.
6. Disconnect the two wires of the low water switch.
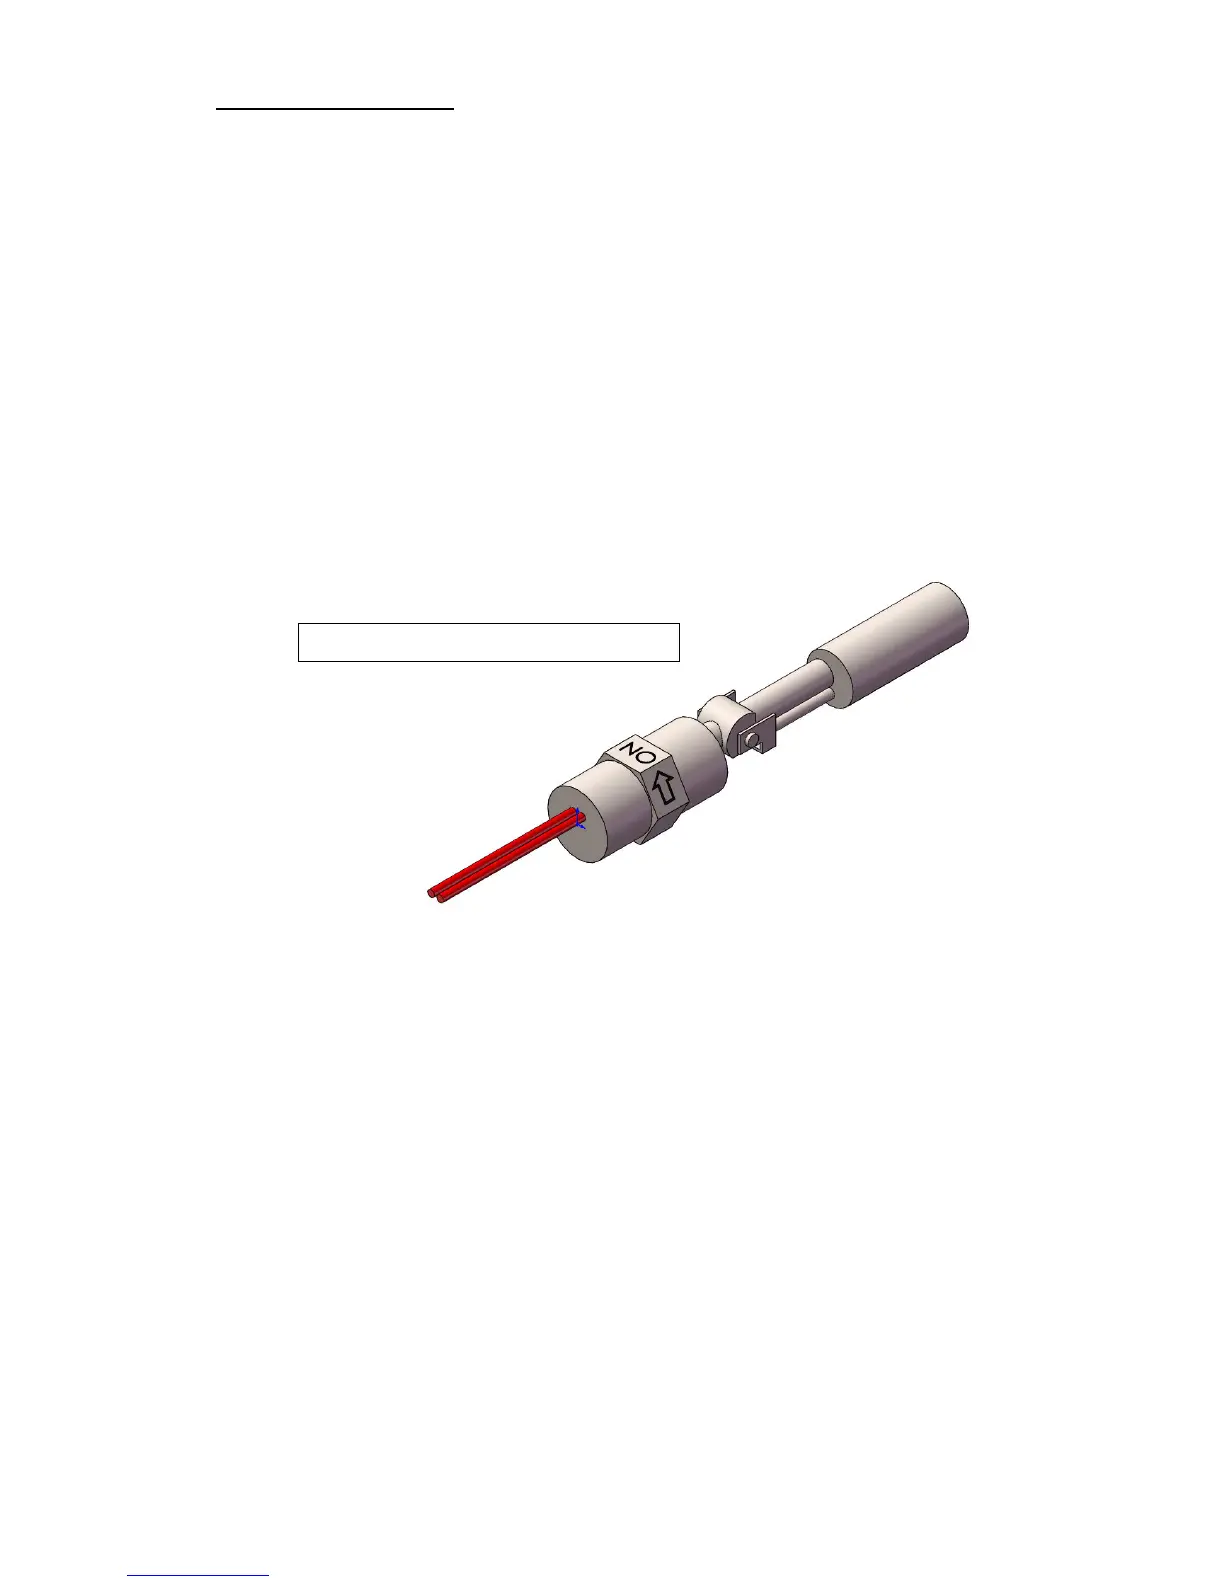
7. Unscrew and remove the low water switch from vessel.
8. Thread new low water switch into vessel.
NOTE: This is an NPT thread and will require Teflon plumbing tape or thread sealant.
NOTE: Etched into the hex of the low water switch is “NO” and “NC” and/or arrows.
“NO” must be facing upward (and/or the arrows must point upward).
9. Connect two wires from low water switch as indicated in the appropriate wiring
diagram.
10. Turn on incoming water supply and check for leaks.
11. Turn on power to the unit.
NOTE: “NO” must face toward the top.