Commissioning
Chapter 2 OPERATION MANUAL
V2.0.0en/09.06.16//15.09 Unistat®
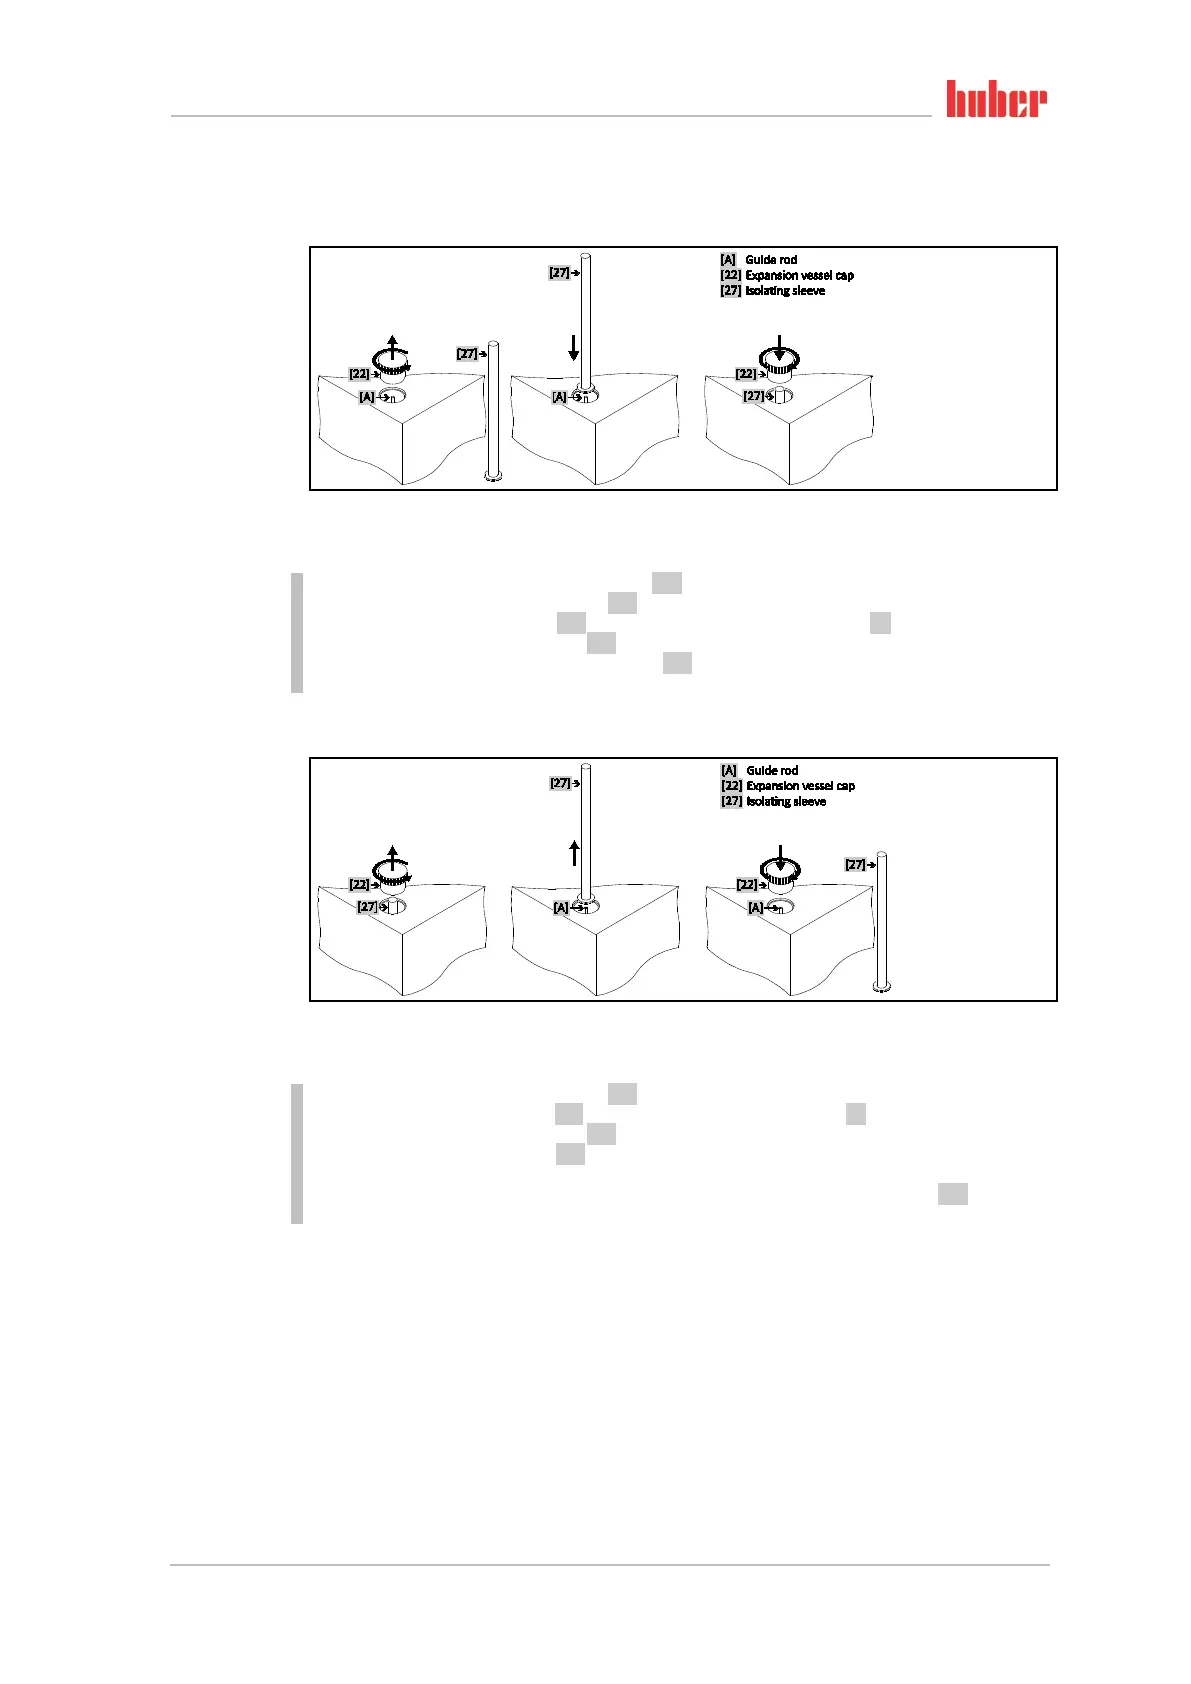
2.10.3 Mounting/removing the isolating sleeve (optional)
2.10.3.1 Mounting the Isolating sleeve (only for externally open applications)
PROCEDURE
Check the O-ring on the >Isolating sleeve< [27] for damage. Replace the O-ring if necessary.
Remove the >Expansion vessel cap< [22].
Mount the >Isolating sleeve< [27] with the aid of the fitted >Guide rod< [A].
Close the >Expansion vessel cap< [22].
Close the >Venting valve expansion vessel< [21] for all stand-alone units by turning them clock-
wise (turn 90° right as far as it will go).
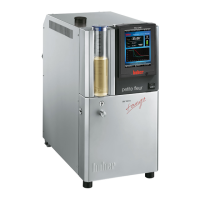
2.10.3.2 Removing the Isolating sleeve (only for externally closed applications)
PROCEDURE
Remove the >Expansion vessel cap< [22].
Remove the >Isolating sleeve< [27]. The permanently fitted >Guide rod< [A] remains in the housing.
Close the >Expansion vessel cap< [22].
Fasten the >Isolating sleeve< [27] at the place provided on the housing-side of the temperature
control unit.
Open all valves, in case of standard devices the >Venting valve expansion vessel< [21] by turning
them anti-clockwise (turn 90° left as far as it will go).
Mounting the
Isolating sleeve
Remove the Isolating
sleeve