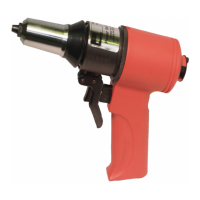
2624 2624HS 2628 2630 Series Tooling Alcoa Fastening Systems
11
GOOD SERVICE PRACTICES (continued)
Sealants, Lubricants, Hydraulic Fluid & Service Kits
• Rub SLIC-TITE TEFLON thread compound, or
equivalent, on pipe threads to prevent leaks and for
ease of assembly. CAUTION: Do not use TEFLON
tape on pipe threads. Particles of shredded tape
cause hydraulic unit valve failure. (SLIC-TITE in
stick form, 503237).
• Smear LUBRIPLATE 130AA, or equivalent, on O-
rings and mating surfaces to prevent damaging O-
rings on rough or sharp surfaces. Also, increases
ease of assembly. (LUBRIPLATE in a tube, 502723).
• Each Service Kit contains perishable parts for your
specific tool. As foreseeable use may indicate, keep
extra kits (O-rings, Back-up Rings, other standard
items) and tool parts in stock. When stock is deplet-
ed, you can get kit items from any regular retailer of
these items. See kit parts list for: O-ring size
(AS568- number); material; durometer. For kit parts
lists and related information, see General Notes.
PREVENTIVE MAINTENANCE
System Inspection
Operating efficiency of the tool is directly related to the
performance of the complete system, including the tool
with nose assembly, hydraulic hoses, trigger switch and
control cord, and POWERIG Hydraulic Unit. Therefore,
an effective preventive maintenance program includes
scheduled inspections of the system to detect and cor-
rect minor troubles.
• Inspect tool and nose assembly for external damage.
• Verify that hydraulic hose fittings and couplings, and
electrical connections are secure.
• Inspect hydraulic hoses for damage and deteriora-
tion. Do not use hoses to carry tool. Replace hoses
if damaged.
• Observe tool, hoses and hydraulic unit during opera-
tion to detect abnormal heating, leaks or vibration.
POWERIG Hydraulic Unit Maintenance
Refer to the applicable POWERIG instruction manual.
Tool Maintenance
Whenever disassembled and also at regular intervals
(depending on severity and length of use) replace all
seals, wipers and back-up rings in tool. Service Kits,
hoses and extra parts should be kept in stock. Inspect
cylinder bore, pistons and piston rods for scored sur-
faces and excessive wear or damage. Replace as nec-
essary.
Nose Assembly Maintenance
Clean nose assembly often. Dip in mineral spirits, or
similar solvent, to clean jaws and wash away metal
chips and debris. At regular intervals, as experience
shows, disassemble nose and use a sharp "pick" to
remove imbedded particles from grooves of jaws.
DISASSEMBLY - ALL MODELS
For component identification and Parts Lists refer
to Figures 8-12.
NOTE:
The following procedure is for complete disassembly of
tool. Disassemble only components necessary to
replace damaged O-rings, Quad-Rings, Back-up Rings,
and worn or damaged components. Always use soft jaw
vice to avoid damage to tool.
1. Disconnect electrical or air connector from Powerig.
Uncouple tool hydraulic hoses.
2. Remove nose assembly.
3. Unscrew coupling nipple and coupling body. Drain
hydraulic hoses into container. Discard fluid.
4. Push rearward on Piston (4) until remaining
hydraulic fluid is drained into container. Discard
fluid.