EasyManua.ls Logo

Huffy Bubble User Manual

Huffy Bubble
10 pages
To Next Page IconTo Next Page
Page #1 background imageLoading...
Page #1 background image
[ In the US ]
PLEASE - BEFORE RETURNING TO STORE,
CONTACT HUFFY CUSTOMER SERVICE. WE
ARE GLAD TO ASSIST YOU WITH ANY PARTS
OR ASSEMBLY PROBLEMS YOU MIGHT
HAVE!
For Fast Customer Service, go to:
http://www.hu ybikes.com/contact
To Order Parts (US only), go to:
http://www.hu ybikes.com/parts
OR TEL: 1 800 872 2453 (US only)
For email, go to http://www.hu ybikes.com/contact
[ CANADA ]
VEUILLEZ NOTER : AVANT DE
RETOURNER AU MAGASIN,
COMMUNIQUEZ AVEC LE SERVICE
À LA CLIENTÈLE DE HUFFY. NOUS
VOUS AIDERONS VOLONTIERS AVEC
TOUT PROBLÈME CONCERNANT LES
PIÈCES OU LE MONTAGE!
Pour un Service à la clientèle rapide, allez sur le
site :
http://www.hu ybikes.com/contact
To Order Parts (CANADA only), go to:
http://www.hu ybikes.com/parts
OU appelez le 1 800 872 2453
(CANADA only)
Pour communiquer par courriel
hu ycanada@hu y.com
[ MÉXICO ]
ANTES DE DEVOLVER EL
PRODUCTO A LA TIENDA,
COMUNÍQUESE CON SERVICIO
AL CLIENTE DE HUFFY. NOS
COMPLACE AYUDARLO CON
CUALQUIER PARTE O PROBLEMA
DE ENSAMBLADO QUE PUDIERA
TENER.
Para obtener Servicio al cliente rápido, visite:
http://www.hu ybikes.com/
O LLAME AL TEL: 01800 1483 391
(Mexico only)
Para comunicarse por correo electrónico:
servicio@hu ymex.com
H-Tri_STOP-Global_022217_i0388
Check http://www.hu ybikes.com/home/globalcontact
for the current contact information
http://www.hu ybikes.com/home/globalcontact
para obtener la información de contacto actual
Véri er http://www.hu ybikes.com/home/globalcontact
pour les informations de contact actuelles
See back page for Customer Service Information
Consulte el reverso para Servicio de Información al Cliente
Voir pages verso pour des renseignements le service à la clientèle
© Copyright Huffy Corporation 2017
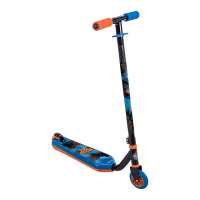
Owner’s Manual
Battery Ride-On
Bubble Scooter
Date Code Label
Here
H-Bub eScooter_EN 052517 m0414
This manual contains important safety,
assembly, operation and maintenance
information.
Please read and fully understand this
manual before operation.
Save this manual for future reference.
EN
BC

Questions and Answers:

Huffy Bubble Specifications

General IconGeneral
BrandHuffy
ModelBubble
CategoryScooter
Number of Wheels3
Frame MaterialSteel

Summary

Customer Service and Contact Information

US Customer Service

Provides contact details and website for US customers.

Canada Customer Service

Provides contact details and website for Canadian customers.

Mexico Customer Service

Provides contact details and website for Mexican customers.

Global Contact Information

Link to find current contact information worldwide.

Manual Introduction

Purpose of Manual

Contains important safety, assembly, operation, and maintenance information.

Reading the Manual

Read and understand before operation; save for future reference.

Safety Warnings

Choking Hazard

Contains small parts, not for children under 3. Keep away during assembly.

Adult Supervision

Required to reduce risk of injury; never use in unsafe locations.

User Age and Weight Limit

User must be 3-5 years and weigh no more than 50 lbs.

Initial Battery Charge

Charge for 8-12 hours (max 20) before first use.

Limited Warranty

Warranty Terms and Conditions

Covers parts, maintenance, and usage guidelines.

Warranty Exclusions and Voiding

Lists conditions not covered or that void the warranty.

Warranty Service and Duration

Procedures for service and duration of coverage.

Critical Safety Warnings

Child Operation and Supervision

Adult responsibility, pre-operation checks, supervision.

Safe Riding Environment

Use on flat surfaces, avoid hazards like water, roads, inclines.

Protective Gear and Clothing

Helmet requirement and keeping clothing away from moving parts.

Vehicle Operation Cautions

Do not overload, avoid extreme weather, electrical system care.

Braking System Limitation

Vehicle uses motor friction for braking; no manual brake.

Helmet Safety

Helmet Usage

Always wear helmet, ensure proper fit and strap adjustment.

Radio Frequency Information

FCC Compliance

Device complies with Part 15 of FCC Rules; conditions for operation.

Interference Correction

Measures to correct harmful interference if it occurs.

Troubleshooting Guide

Vehicle Not Running

Possible causes: poor wiring, dead motor spot.

Grinding/Clicking Noises

Possible causes: damaged motor/gears, partial drive wheel engagement.

Battery Not Recharging

Possible causes: loose connectors, charger issues, dead battery.

Charger Warmth

Normal for charger to feel warm during charging.

Bubble Blower Troubleshooting

No Bubbles Produced

Possible causes: power off, empty solution, clogged outlet, motor issue.

Troubleshooting Guide

Vehicle Not Running

Possible causes: low battery, thermal fuse, loose wires.

Vehicle Runs Briefly

Possible causes: dead battery, damaged system/motor, undercharged battery.

Vehicle Runs Sluggishly

Possible causes: old battery, low power, overloaded, harsh conditions.

Loud Noise When In Use

Possible cause: dry chain (on chain drive models).

Drive Motor Battery Charging Warnings

Charger and Battery Safety

Use only supplied battery/charger; avoid overheating, fire, explosion.

Charging Environment

Charge in ventilated area away from heat/flammable materials.

Terminal Safety

Avoid contact with terminals; handle battery by case, not wires.

Battery Leakage Hazard

Lead acid leakage causes injury; flush with water if contact occurs.

Battery Components Hazard

Contains lead; avoid opening battery, keep dry.

Electrical System Tampering

Tampering causes shock/fire/explosion; keep charger closed.

Initial Charge Requirement

Charge 8-12 hours (max 20) before first use.

Drive Motor Battery and Fuse

Battery Handling

Adults must handle/charge battery; follow safety warnings.

Battery Fuse Function

Thermal fuse trips on overload; resets automatically.

Fuse Bypass Warning

Do not bypass fuse to avoid fire risk and electrical damage.

Battery Re-charge Interval and Time

Pre-Charge Procedure

Inspect battery/charger; charge 8-12 hours (max 20) before first use.

Recharge After Depletion

Recharge for 8-12 hours (max 20) after battery is depleted.

Short Circuit Warning

Do not connect red and black wires together or terminals.

Post-Charge Procedure

Unplug charger from wall and disconnect from port when fully charged.

Battery Maintenance

Charge when depleted or monthly; failure causes damage and voids warranty.

Maintenance: Drive Battery Replacement

Battery Replacement Steps

Detailed steps for removing and installing the drive battery.

Thermal Fuse Note

Thermal fuse attached to red wire resets if battery is overloaded.

Battery Storage and Disposal

Battery Storage Guidelines

Do not store in extreme temperatures; wipe clean with dry cloth.

Battery Disposal Requirements

Must be recycled environmentally; do not dispose in fire or trash.

Assembly Introduction

Manual Variations

Manual may cover different product styles; illustrations may vary slightly.

Assembly Instructions

Follow instructions completely; check for special instructions.

Small Parts Warning

Keep small parts away from children during assembly.

Directional Reference

Directions (right, left, front, rear) are from the rider's perspective.

Packaging Disposal

Do not dispose of carton/packaging until assembly is complete.

Maintenance Repair and Service

General Vehicle Checks

Check for damage/wear before use; discontinue if not operating properly.

Fastener Tightness

Check fastener tightness before each use; replace damaged fasteners.

Frequent Inspection

Inspect product frequently; repairs prevent injury.

Wheel Tightness

Ensure drive wheel is tight for gear engagement.

Storage Recommendations

Store indoors away from heat; keep product clean and dry.

Cleaning Instructions

Clean with soft cloth; use non-wax polish for shine; avoid water.

Water Damage Warning

Water will damage motor, electrical system, and battery.

Operation

Starting and Stopping

Turn ON/OFF scooter power using the Power Button.

Engaging Motor

Push Motor Engage-Lever DOWN to engage motor; UP to disengage.

Self-Propelled Mode

Disengaging motor allows the scooter to be self-propelled.

Bubble Maker Usage

Fill tray with designated solution; turn switch ON to activate.

Bubble Maker Maintenance

Keep bubble outlet clean and free of debris.

Bubble Feature Operation

Bubble feature functions if switch is ON, even with motor disengaged.

Power Button Warning

Firmly grip handlebar before pushing power button to avoid injury.

Assembly: Installing Rear Wheels

Rear Wheel Installation Steps

Steps for inserting axle, wheels, washers, locknuts, and drive gear.

Assembly: Front Wheel and Handlebar

Front Wheel Assembly Steps

Steps for assembling front wheel, steering rod, fork, and clamp.

Handlebar Alignment

Ensure handlebar turns freely and wires are not pinched.

Assembly: Handlebar Connectors and Clamp Cover

Connector and Wire Routing

Connect power plugs, tuck excess wire, ensure no pinching.

Clamp Cover Installation

Place clamp covers securely, ensuring supports fit inside clamp gap.

Related product manuals