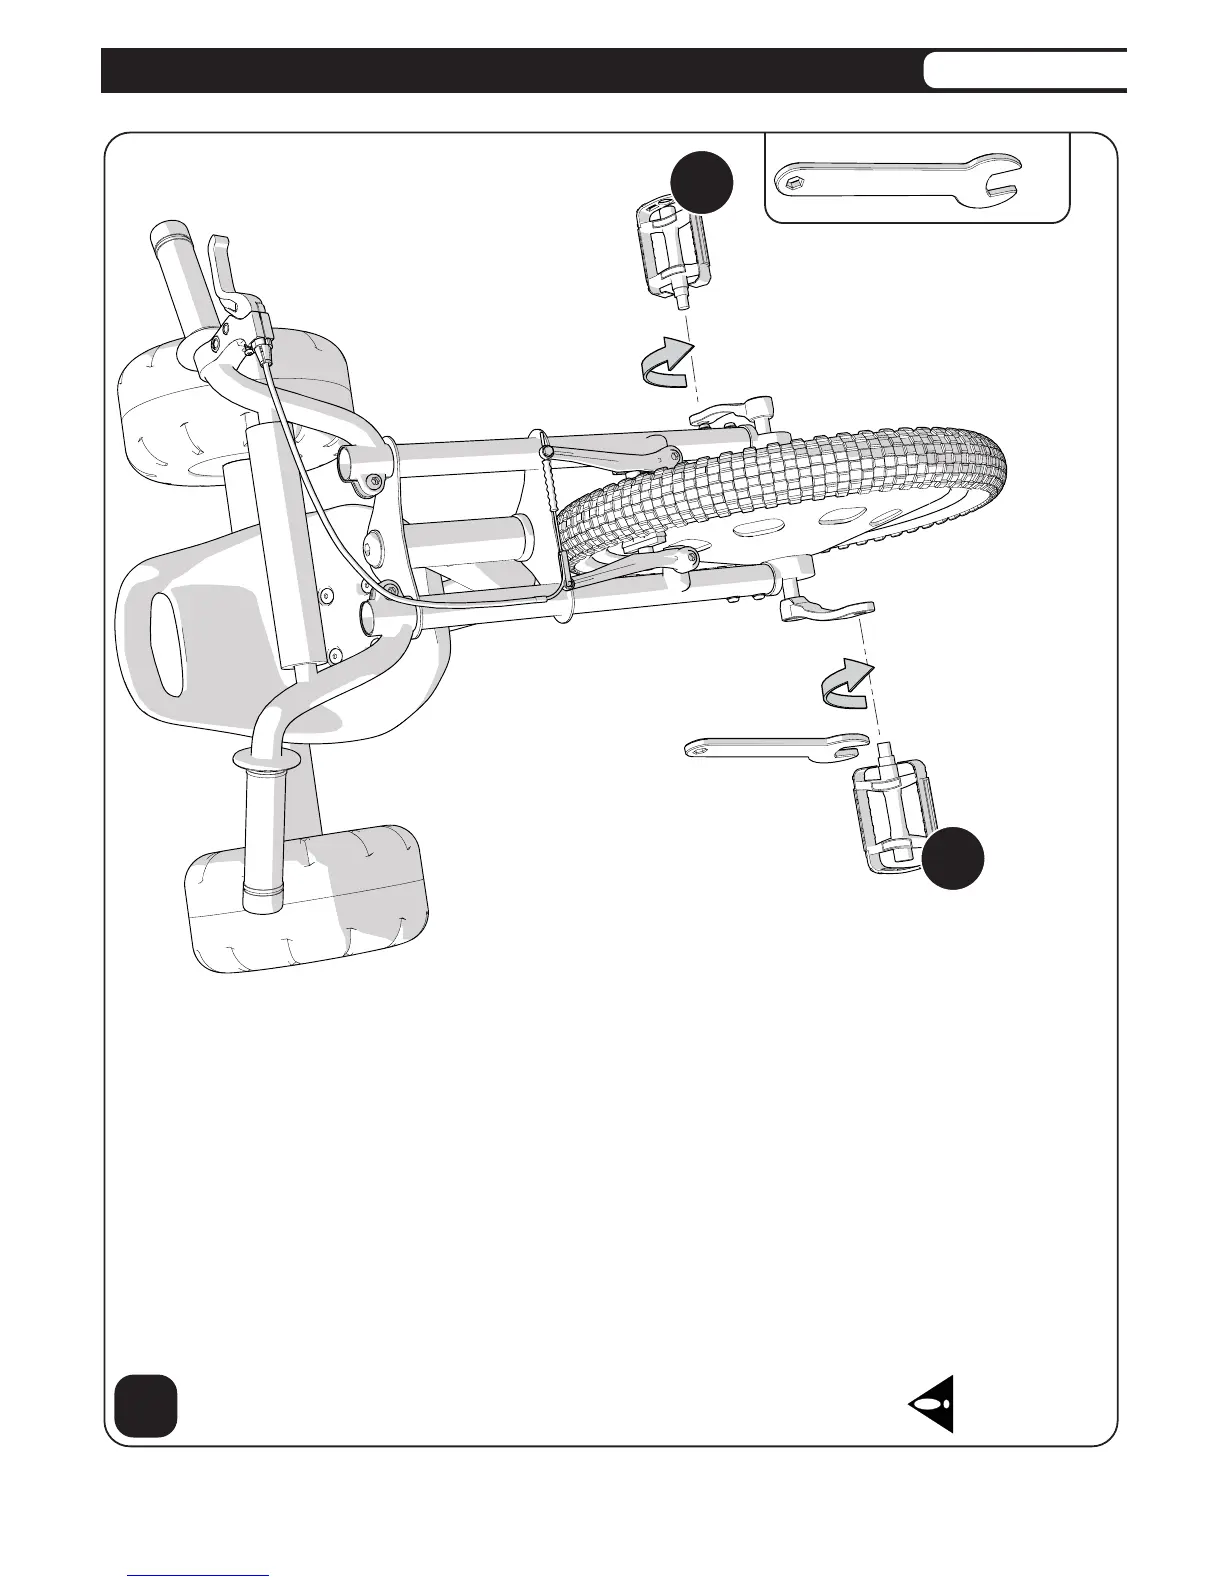
12
7
15mm
x 10mm
R
L
Pedal Installation
• Assembly
NOTE: There is a pedal marked “R” and a
pedal marked “L”.
• The pedal marked “R” has right hand
threads. Insert it into the crank arm on
the right side. Tighten it in a clockwise
direction.
• The pedal marked “L” has left hand
threads. Insert it into the crank arm on the
left side. Tighten it in a counterclockwise
direction.
• Make sure both pedals are threaded fully
into the crank arm. Tighten the pedals to
ensure they will not come loose.
WARNING: Pedals must be suffi ciently
tightened to ensure they do not come loose.