2
532594-2_A
SOLIX® SERIES IN-DASH MOUNTING Installation Guide
4. Carefully begin cutting toward the cut line, and continue cutting to the inside of the line around
the template.
5. Test the Mounting Hole: Install the control head in the mounting hole to test the fit. Make
adjustments to the mounting hole as needed. Remove the template when finished.
6. Thoroughly clean and deburr the mounting hole.
3
|
Install the Studs
1. Place the control head on a towel or cloth, with the screen facing down, on a stable and level
surface.
2. Determine which size stud to use based on the thickness of your dashboard. The hardware bag
includes four 2" studs and four 2.5" studs. Studs should protrude no more than 1/4" from the
surface of the bracket.
3. Install the 4 studs (#10-24) into the threaded holes on the control head until they contact the
bottom of the hole.
4. Back out each stud 3 full revolutions to prevent it from contacting the back of the control head
housing.
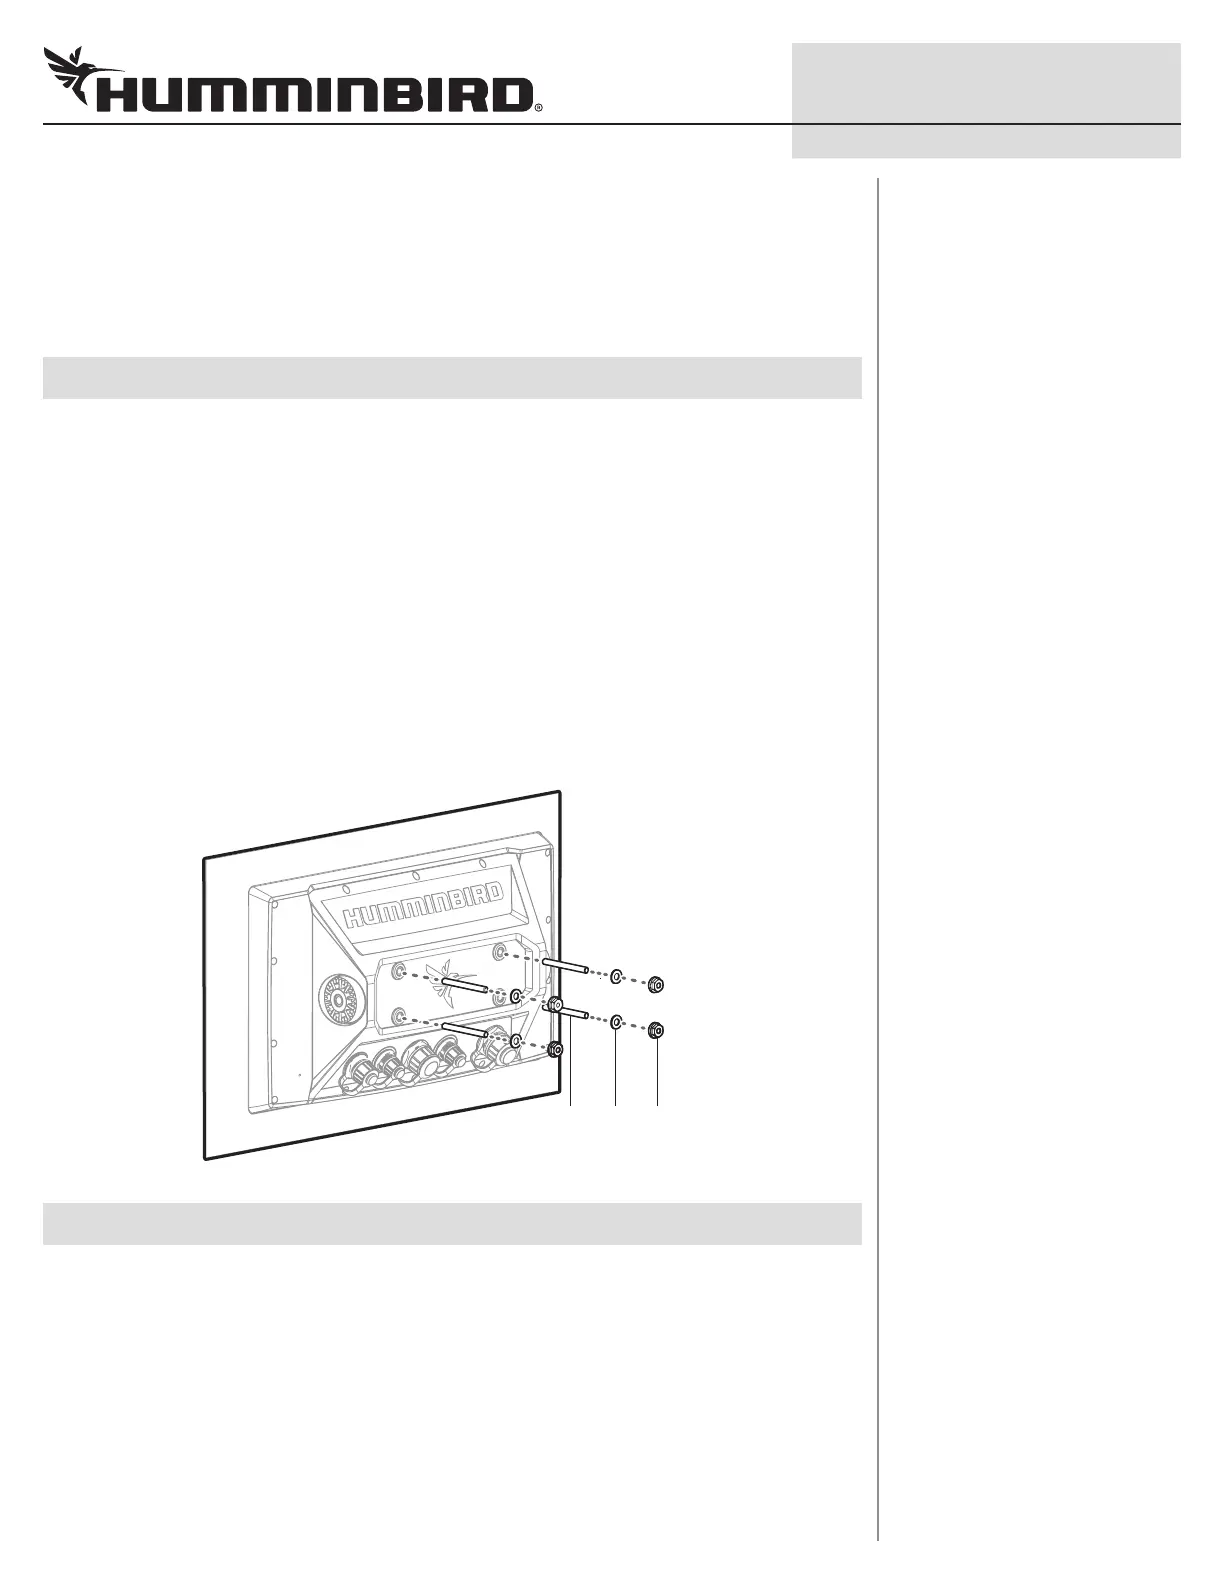
5. Install a flat washer (#10) and serrated hex nut (#10-24) onto each stud. See the illustration
Installing the Studs. Hold each stud in place, and finger-tighten the assembled nut until
secured. Then, use a 3/8" wrench to tighten the assembled nut an additional 1/2 revolution.
Hand-tigthen only!
Installing the Studs
serrated
hex nut
flat
washer
stud
4
|
Install the Bracket
1. From the front of the dashboard, with the control head screen facing out, carefully lower the
control head into the mounting hole.
2. Press down lightly on the control head. Confirm the control head is seated flush against the
dashboard. Make adjustments, as needed.
3. From under the dashboard, insert the vertical bracket holes over the studs. Ensure the top and
bottom of the vertical bracket is evenly aligned with the horizontal edges of the cutout and is
flush against the dash.
4. Install a flat washer (#10) and nylon insert hex nut onto each stud. See the illustration Installing
the Vertical Bracket. Use a 3/8" adjustable socket or wrench to hand-tighten the nuts until they
contact the washers. None of the washers should be loose. Then tighten the nuts an additional 2
full revolutions. Hand-tighten only!

 Loading...