Do you have a question about the Hunter Douglas Horizontal Aluminum Blinds and is the answer not in the manual?
Position end brackets 2-6 inches from headrail ends, spacing others evenly.
Check mounting surface levelness and ensure minimum 7/8" depth for bracket attachment.
Requires flat vertical surface at least 5/8" high for bracket attachment.
Used to project brackets 23/4" to 41/8" from mounting surface.
Available in 1/2" and 7/8" sizes to add clearance between bracket and surface.
Tilt headrail into bracket on sloped tab, then secure with locking screw.
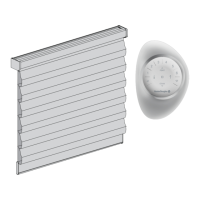
Attach wand tilter to the metal shaft using hook or snap-on method.
Insert pins into bottom rail end caps and attach brackets to align with pins.
Use wand or cords to tilt slats fully closed in one direction or the other.
Pull cords toward center to raise/lower; pull outward to lock position.
Safety component designed to break apart if child or pet becomes entangled in cords.
Use soft cloth, vacuum brush, or damp cloth for cleaning slats.
Keep cords out of reach of children to prevent entanglement and strangulation.
This document provides installation, care, and troubleshooting instructions for Hunter Douglas 1/2" and 1" Horizontal Aluminum Blinds. These blinds are custom-built from high-quality materials, designed for beauty and trouble-free use.
The Hunter Douglas Horizontal Aluminum Blinds are window coverings designed to provide light control, privacy, and aesthetic appeal. They feature adjustable slats that can be tilted to regulate the amount of light entering a room and can be raised or lowered to fully expose or cover the window. The blinds are operated using either a wand or cords for tilting, and cords for raising and lowering.
Before installation, users should remove the blind from its packaging and keep the packaging until the blind operates to their satisfaction. It's important to check the diagram to ensure all necessary parts are present, as hardware contents may vary based on mounting options.
The blinds offer various mounting options, including inside mount and outside mount.
For optimal support, the two end brackets should be positioned between 2" and 6" from the ends of the headrail. If additional brackets are required (based on blind width and square footage), they should be spaced evenly between the end brackets. It's crucial not to position any bracket directly above a string ladder, cordlock, or wand tilter, allowing 1" space on the side whenever possible. For blinds larger than 60 square feet, an extra bracket should be positioned at the cordlock end for added support. For two-on-one headrail blinds, an extra bracket should be placed near each cordlock.
End mounting is used when the headrail needs to span an open space, such as an arched window opening. The short side of the end mount brackets is attached to the mounting surface with two screws, ensuring they are aligned at the same height. Installation brackets are then attached to the end mount brackets with screws through the top two holes.
Extension brackets can be used with outside mounts to project the installation brackets from 2 3/4" to 4 1/8" from the mounting surface, providing clearance for obstructions like window cranks or handles. These brackets can be fastened together in different ways to achieve the desired wall extension using #6 self-tapping screws. They are then mounted to the window frame or wall using two diagonally located screws, and mounting brackets are bolted to them with appropriate fasteners.
Bracket spacers (1/2" and 7/8" versions) can be used to add clearance. They attach to the installation brackets using two provided screws.
The headrail is installed by tilting it back and sliding it into the bracket on the sloped tab. The back lip of the headrail should fit behind the rear leg of the installation bracket. A locking screw is then tightened to secure the rail. To remove the headrail, the locking screw is loosened, the headrail tilted back, and slid out of the brackets.
The tilt mechanism inside the headrail has a metal shaft. There are two types of wands: hook and snap-on.
Metal hold-down brackets are used to secure the bottom rail. A hold-down pin is inserted into each bottom rail end cap. The brackets are attached to the jamb, sill, or outside mounting surface. When the blind is fully lowered, the holes in the hold-down brackets must align with the pins in the bottom rail end caps, and the pins are then inserted into the holes.
This component is designed to break apart if a child or pet becomes entangled in the lift cords, enhancing safety.
To reassemble, any loose cords are reinserted into the top notches of the tassel (one on each side). The right and left sides of the tassel are then lined up and snapped back together.
Regular cleaning helps maintain the appearance and longevity of the blinds.
The manual provides solutions for common issues:
A warning is included about the risk of entanglement and strangulation for young children from cords. Users are advised to keep all cords out of reach of children. Hunter Douglas provides cord cleats and recommends their use to manage cords safely.
| Material | Aluminum |
|---|---|
| Style | Horizontal Blinds |
| Slat Sizes | 1 inch, 2 inch |
| Lift Systems | Cordless |
| Operation | Motorized |
| Light Control | Adjustable |
| UV Protection | Yes, helps protect against UV damage |
| Custom Sizing | Available |
| Special Features | spring-tempered alloy ensures slats bounce back even when bent or crimped, MagnaView® tilt option (offers twice the view-through of ordinary horizontal blinds) |
| Colors | Wide range of colors available |