HUNTER
closed usually indicates a leak somewhere
in the lines. Trace the lines to locate the
leak and correct.
STOVE OPERATION
Follow the operating instructions sup-
plied with the unit installed with your
boat.
TOILET
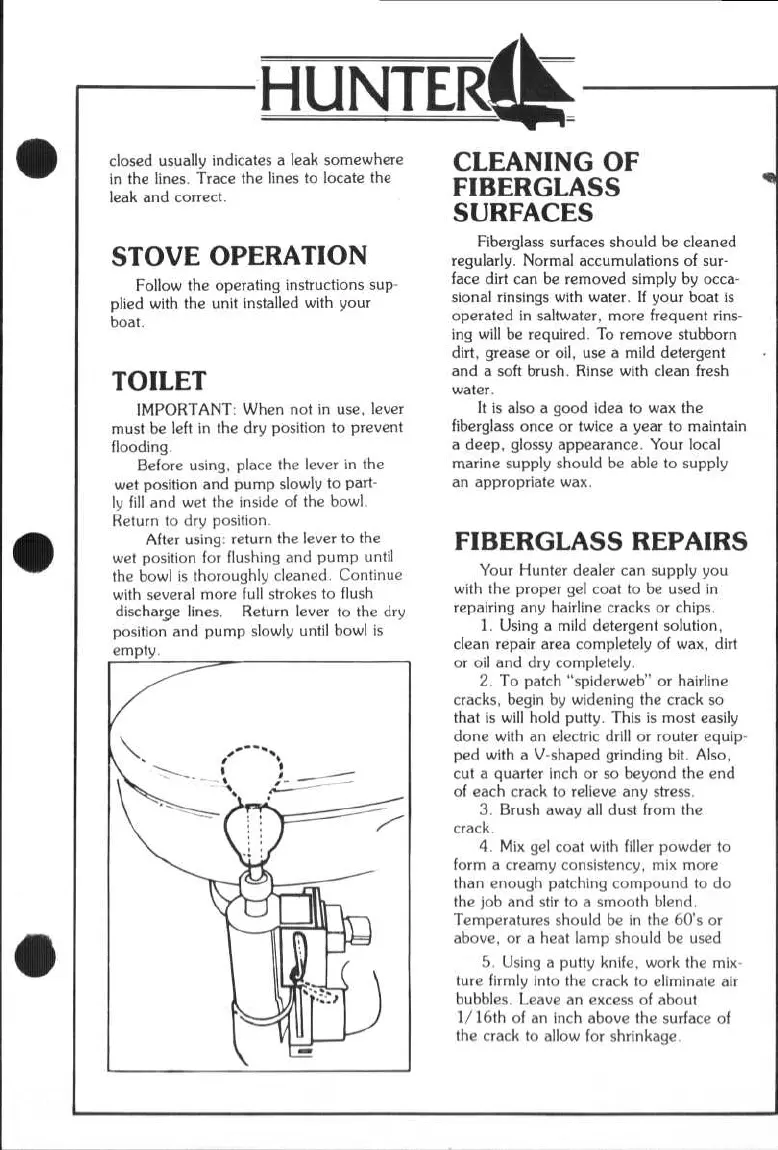
IMPORTANT: When not in use, lever
must be left in the dry position to prevent
flooding.
Before using, place the lever in the
wet position and pump slowly to part-
ly fill and wet the inside of the bowl.
Return to dry position.
After using: return the lever to the
wet position for flushing and pump until
the bowl is thoroughly cleaned. Continue
with several more full strokes to flush
discharge lines. Return lever to the dry
position and pump slowly until bowl is
empty.
CLEANING OF
FIBERGLASS
SURFACES
Fiberglass surfaces should be cleaned
regularly. Normal accumulations of sur-
face dirt can be removed simply by occa-
sional rinsings with water. If your boat is
operated in saltwater, more frequent rins-
ing will be required. To remove stubborn
dirt, grease or oil, use a mild detergent
and a soft brush. Rinse with clean fresh
water.
It is also a good idea to wax the
fiberglass once or twice a year to maintain
a deep, glossy appearance. Your local
marine supply should be able to supply
an appropriate wax.
FIBERGLASS REPAIRS
Your Hunter dealer can supply you
with the proper gel coat to be used in
repairing any hairline cracks or chips.
1.
Using a mild detergent solution,
clean repair area completely of wax, dirt
or oil and dry completely.
2.
To patch "spiderweb" or hairline
cracks, begin by widening the crack so
that is will hold putty. This is most easily
done with an electric drill or router equip-
ped with a V-shaped grinding bit. Also,
cut a quarter inch or so beyond the end
of each crack to relieve any stress.
3.
Brush away all dust from the
crack.
4.
Mix gel coat with filler powder to
form a creamy consistency, mix more
than enough patching compound to do
the job and stir to a smooth blend.
Temperatures should be in the 60's or
above, or a heat lamp should be used
5.
Using a putty knife, work the mix-
ture firmly into the crack to eliminate air
bubbles. Leave an
excess
of about
1/16th of an Inch above the surface of
the crack to allow for shrinkage.