Do you have a question about the Hunter 59126 and is the answer not in the manual?
Critical safety instructions and warnings for fan installation and use.
Explanation of Hunter's flexible 2-position mounting system.
Guidance on using optional accessories for enhanced fan performance.
List of essential tools required for ceiling fan installation.
Unpacking fan components and preparing the installation location.
Resolving issues when the fan fails to start or move.
Diagnosing and fixing problems causing fan noise.
Correcting excessive wobbling for stable fan operation.
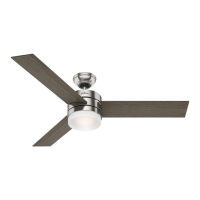
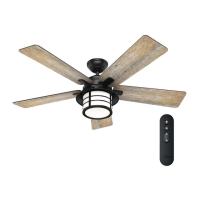
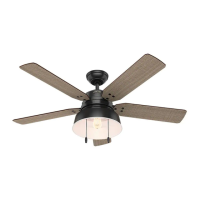
This document is an installation and operation manual for Hunter Ceiling Fans, specifically for TYPE 5 Models. It provides comprehensive instructions for setting up, using, and maintaining the fan, ensuring comfort and performance for many years.
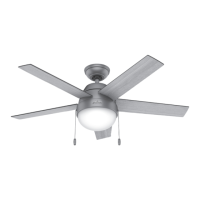
The Hunter ceiling fan is designed to provide air circulation and comfort in homes or offices. It operates by rotating blades to create airflow, which can be adjusted for different seasons and preferences. The fan features a patented 2-position mounting system, offering flexibility for installation in various ceiling heights and types, including standard flat ceilings and vaulted or angled ceilings. This system allows for Low Profile, Standard, or Angled mounting configurations. The fan's operation is controlled via a pull chain, which offers four settings: High, Medium, Low, and Off, allowing users to easily adjust the fan speed to their desired level of comfort. For enhanced functionality, the fan can be customized with optional accessories such as wall-mounted or remote speed controls, and various light kits. The fan is designed to work efficiently in both warm and cold weather conditions by allowing users to reverse the blade rotation direction, optimizing air distribution for cooling or warming a room.
The manual outlines a step-by-step process for installing the fan, starting with preparing the fan site and installing the ceiling plate. It emphasizes safety precautions, such as disconnecting power before installation and using only supplied hardware. For standard or angle mounting, the downrod is inserted through the canopy and canopy trim ring, with wires fed through the downrod. The fan is then hung onto the ceiling plate using a hook and U-shaped hole in the rim. Wiring instructions are provided for both dual switch and single switch configurations, ensuring proper electrical connection according to national and local electrical codes. The manual stresses the importance of secure wire connections, with no bare wire or strands visible.
After the main fan body is installed, the blades are assembled by attaching them to the motor using blade mounting screws. The switch housing is then installed, connecting the upper and lower plug connectors, which are polarized to ensure correct alignment and prevent damage. The manual notes that Hunter fans can be customized with various accessory light kits.
Operating the fan is straightforward: once electrical power is turned on, the pull chain controls the fan's speed settings. Users are instructed to pull the chain slowly to change settings and release it slowly to prevent it from recoiling into the blades. A breakaway connector is incorporated into the pull chain for safety, allowing it to separate if jerked and easily reinserted.
A key usage feature is the fan's ability to optimize air circulation for different seasons. In warm weather, the fan should operate with downward airflow (counterclockwise blade rotation) to create a direct breeze and cool the room. In cold weather, the fan should draw air upward (clockwise blade rotation) to distribute warmer air trapped at the ceiling around the room without causing a draft. This seasonal adjustment enhances energy efficiency and comfort.
The manual provides clear guidelines for maintaining the Hunter ceiling fan to ensure its longevity and aesthetic appeal. For cleaning the fan's finishes, users are advised to use a soft brush or a lint-free cloth to prevent scratching. Heavier dust can be removed with a vacuum cleaner brush nozzle. For surface smudges or accumulated dirt, a mild detergent and a slightly dampened cloth are recommended. The manual explicitly warns against using abrasive cleaning agents, as they can damage the fan's finish.
For wood finish blades, maintenance involves cleaning with a furniture polishing cloth. Occasionally, applying a light coat of furniture polish is suggested for added protection and to enhance the beauty of the wood. Painted and high-gloss blades should be cleaned in the same manner as the fan finish, using non-abrasive methods.
Troubleshooting tips are included to address common issues. If the fan does not move, users are advised to check the power, fuses, circuit breakers, and all wiring connections. They should also ensure the motor reversing switch is engaged and the pull chain is on, and remove any shipping bumpers. For noisy operation, tightening blade bracket screws and checking for cracked blades are recommended. Excessive wobbling can be resolved by using the enclosed balancing kit, tightening all blade iron screws, and ensuring the hanger ball is properly seated.
The manual also emphasizes the importance of using only Hunter replacement parts for repairs and maintenance to ensure the fan's safety and performance. For any parts or service assistance, contact information for Hunter Technical Support Department and their website is provided, facilitating easy access to help and resources. This comprehensive approach to maintenance helps users keep their Hunter ceiling fan in optimal condition for many years.
| Model | 59126 |
|---|---|
| Type | Ceiling Fan |
| Blade Span | 52 inches |
| Number of Blades | 5 |
| Control Type | Pull Chain |
| Number of Speeds | 3 |
| Finish | Brushed Nickel |
| Wall Control Included | No |
| Motor Type | AC |
| Mounting Type | Downrod |
| Warranty | Lifetime Motor Warranty |