EasyManua.ls Logo

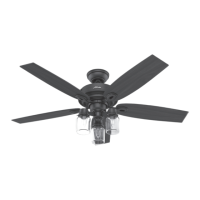
Hunter Lantern Bay 59581 User Manual

Hunter Lantern Bay 59581
14 pages
To Next Page IconTo Next Page
Page #1 background imageLoading...
Page #1 background image
Installation Manual
©2018 Hunter Fan Co.
Lantern Bay
Model: 59581 Matte Black
59582 Onyx Bengal
Fan weight ±2 lbs: 26.5 lbs (12 kg)
PG3634 r041718

Questions and Answers:

Hunter Lantern Bay 59581 Specifications

General IconGeneral
BrandHunter
ModelLantern Bay 59581
CategoryFan
LanguageEnglish

Summary

Choosing the Right Installation Location

Check the Room Dimensions

Ensure adequate clearance from blade tips to walls and floor for safe operation.

Check the Outlet Box

Verify secure mounting to building structure or fan-rated outlet box for fan support.

Checking the Ceiling Angle

Standard Mounting

Instructions for mounting a ceiling fan on a flat ceiling.

Angled Mounting

Instructions for mounting a ceiling fan on angled or vaulted ceilings.

Angled Mounting Kit Requirement

Guide to determine if an angled mounting kit is needed for ceilings over 34 degrees.

Installing the Ceiling Bracket

Machine Screw Installation

Securing the bracket using machine screws with the outlet box.

Wood Screw Installation

Securing the bracket to a support structure using wood screws.

Angled Ceiling Bracket Mounting

Orient the bracket opening towards the peak for angled ceilings.

Installing the Downrod

Remove Downrod Setscrew

Remove the pre-installed setscrew to allow downrod insertion.

Route Wires and Tighten Downrod

Route wires and hand-tighten the downrod into the motor assembly.

Secure Downrod Setscrew

Securely tighten the setscrew with pliers, avoiding hand tightening.

Hanging the Fan

Position Canopy and Wires

Slide the canopy over the downrod and wires.

Proper Fan Lifting Technique

Important notice on how to lift the fan to prevent damage during installation.

Seat Downrod Ball in Bracket

Ensure the downrod ball is correctly seated in the ceiling bracket slot.

Wiring the Fan

Wire Connection Technique

Guide on connecting wires using wire nuts for a secure connection.

Connect Ceiling to Receiver Wires

Connect black and white ceiling wires to the receiver and fan.

Connect Receiver to Fan Wires

Connect yellow and blue receiver wires to the fan.

Connect Grounding Wires

Connect all grounding wires (green, green/yellow, bare copper) from ceiling, downrod, and bracket.

Installing the Canopy

Secure Canopy with Screws

Insert and tighten two canopy screws to secure the canopy.

Installing the Blades

Prepare Blade Screws

Place blade washers onto blade screws before attaching blades to arms.

Attach Blade Arms to Motor

Lightly attach blade arms to motor with screws, then tighten securely.

Blade Arm Mounting Orientation

Ensure blade arms are mounted with the ridge facing downward for correct function.

Preparing the Light Fixture

Remove Light Kit Hardware

Remove pre-installed fixture screw and red flag from the light kit assembly.

Installing the Light Fixture Hood

Install Initial Mounting Screws

Partially install two fixture mounting screws into the motor housing.

Secure Light Fixture Hood

Feed wire plug through hood, align keyhole slots with screws, and twist to lock.

Final Hood Screw Installation

Insert and tighten the third fixture mounting screw to secure the hood.

Installing the Light Fixture

Partially Install Fixture Screws

Partially install three fixture screws into posts, leaving one empty.

Connect Wire Plugs

Connect upper and lower switch housing plugs, ensuring colored markings align.

Align and Secure Light Kit

Align keyhole slots in light kit, lift, and twist to lock it into place.

Install Final Fixture Screws

Install the fourth fixture screw and tighten all four screws securely.

Install Light Bulbs

Install a bulb into each socket, replacing with same wattage if needed.

Installing the Glass and Light Fixture Cage

Lower Glass into Fixture Cage

Carefully lower the glass into the light fixture cage until it rests in place.

Install Fixture Screws

Partially install two fixture screws halfway into the light fixture.

Align and Secure Fixture Cage

Align keyhole slots in cage with screws, lift, and twist to lock.

Install Third Fixture Screw

Install the third fixture screw and tighten all three screws securely.

Preparing the Remote

Access Battery Compartment

Remove Phillips head screw to access battery compartment for CR2032 battery.

Installing the Remote Control Cradle

Option 1: Using Adhesive Strip

Attach cradle bracket to wall using adhesive strip and hold for 30 seconds.

Option 2: Using Screws

Install cradle bracket using screws, with drywall anchors if needed.

Slide Cradle onto Bracket

Slide the remote cradle onto the mounted bracket.

Troubleshooting

Fan Doesn't Work

Steps to diagnose and fix a fan that is not powering on or operating.

Excessive Wobbling

Troubleshooting steps for excessive fan wobble.

Remote Control Issues

Solutions for erratic remote control operation or limited range.

Noisy Operation

Checks for common causes of noisy fan operation.

Multiple Remote Issues

Guidance for resolving interference with multiple remote fans on one circuit.

Wireless Issues

Steps to reset the Wi-Fi module for wireless connectivity problems.

Reversing the Fan

Locate Reversing Switch

The reversing switch is inside the light fixture cage.

Change Fan Direction

Slide the switch to the opposite position to change airflow direction.

Limited Lifetime Warranty

Obtaining Warranty Service

Steps to obtain warranty service, including contact information.

Warranty Coverage Details

Details on what the motor and other parts are covered under warranty.

What Warranty Does Not Cover

Exclusions from warranty coverage, including labor and specific damages.

State Law Affects Warranty

Explanation of how state law may affect specific warranty rights.

Downrod Installation Guide

Remove Standard Downrod

Follow steps 1-5 to remove the standard downrod pipe.

Reassemble with New Downrod

Follow steps 6-10 to reassemble the fan with a new downrod.

Related product manuals