EasyManua.ls Logo

Hunter ceiling fan - Wiring; Connecting Remote Control Wires; Connecting Ground Wires; Connecting Ceiling to Receiver;Fan Wires

Hunter ceiling fan
20 pages
To Next Page IconTo Next Page
To Previous Page IconTo Previous Page
Loading...
www.HunterFan.com
1.888.830.1326
Remote Control Settings
Receiver
DIP
Switches
Transmitter
Jumpers
Battery
CFL Toggle
Switch
Dip Switches
Set to 01110
Dip Switches
Set to 01001
Dip Switches
Set to 01110
Dip Switches
Set to 01001
Receiver 1
Receiver 2
Transmitter 2Transmitter 1
Example DIP Switch Settings
DIP Switches
Set to 0111
DIP Switches
Set to 0100
DIP Switches
Set to 0100
DIP Switches
Set to 0111
4321
4321
4321
4321
4 = off
3 = on
2 = on
1 = on
4 = off
3 = on
2 = off
1 = on
Example Jumpers Settings
Receiver 1 Receiver 2
Transmitter 2Transmitter 1
4321
4321
4321
4321
4 = off
3 = on
2 = on
1 = on
4 = off
3 = on
2 = off
1 = on
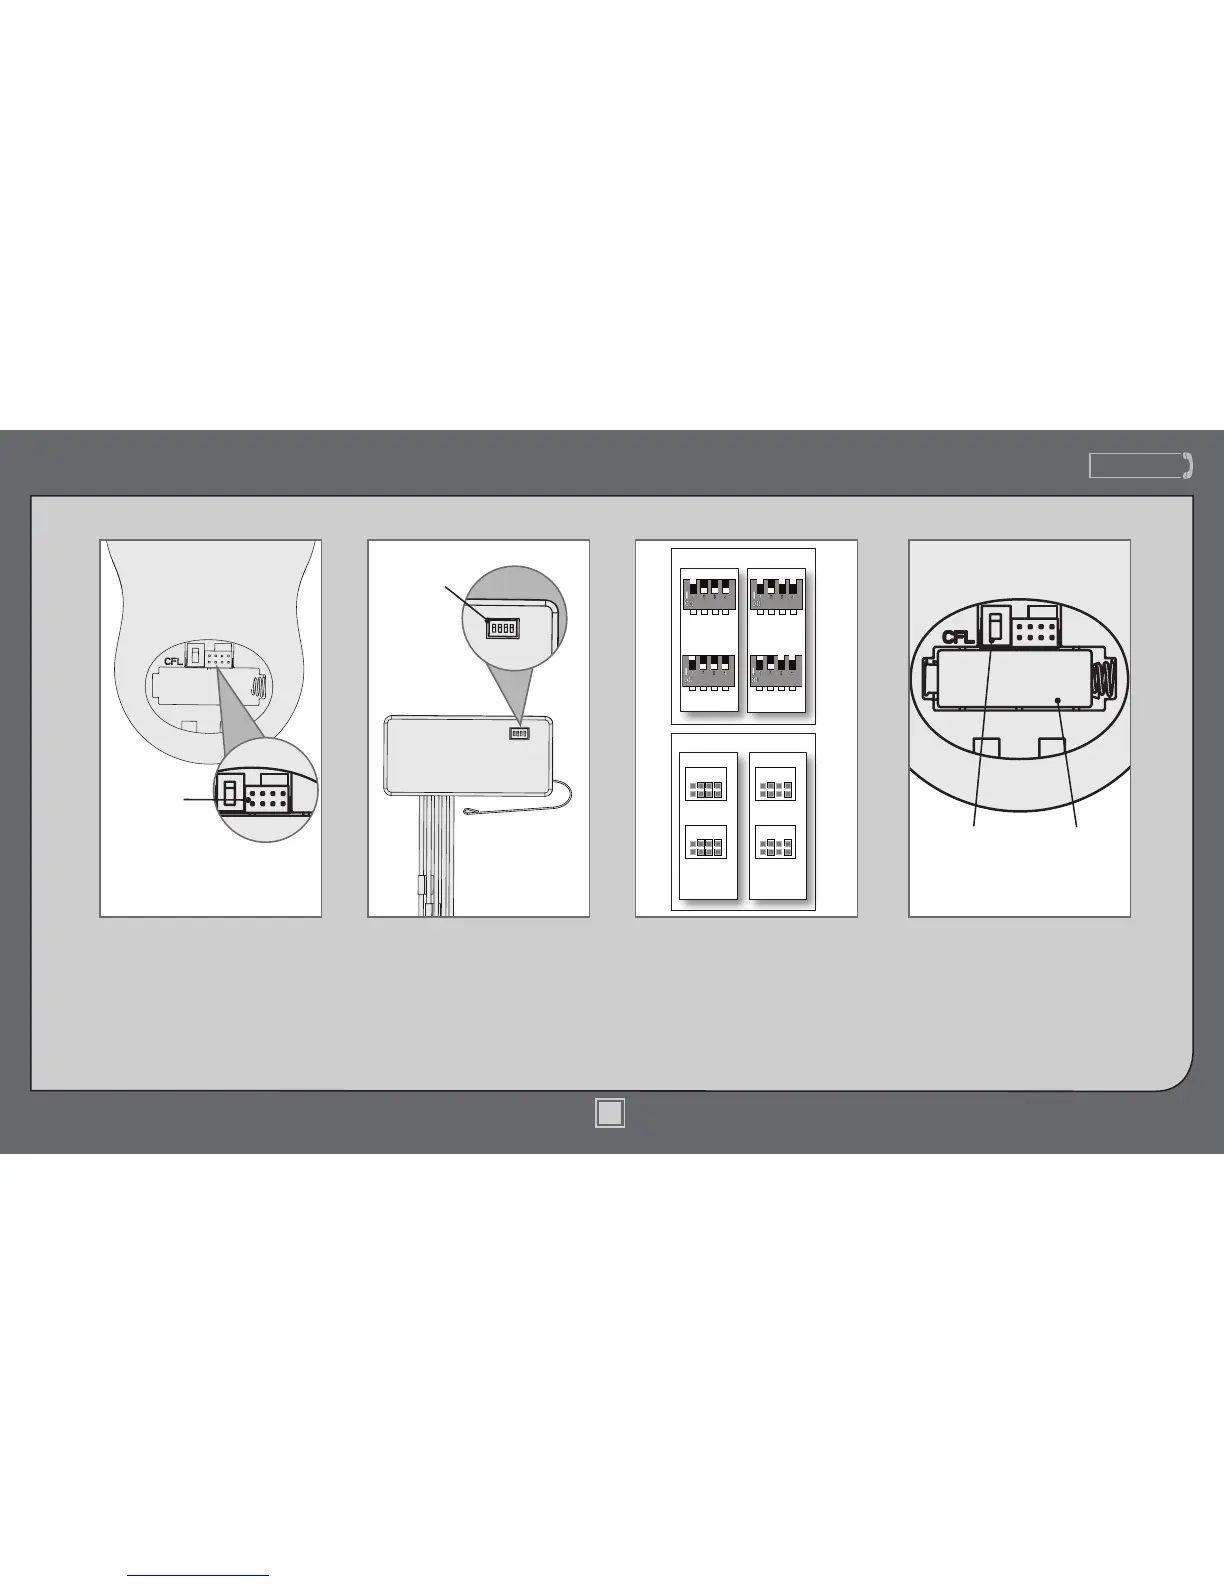
Set the DIP switches in the
receiver to match the jumper
settings in the transmitter. If they
don’t match, the controller will
not function.
IMPORTANT! Before you change
the jumper settings, make sure
the battery is not connected to
the transmitter. Then change the
position of the jumpers in the
transmitter.
Note: When two or more fans are
located near each other, you may
desire to have the receiver and
transmitter for each fan set to a
different code, so that the operation
of one fan does not affect the
operation of the other fans.
Set the CFL toggle switch
down in the direction that
reads “CFL.” Install the
included 12-volt battery into
the transmitter.
+
_
(Shown with transmitter door removed)
10
M3500-01 •11/30/12 • © Hunter Fan Company

Other manuals for Hunter ceiling fan

Related product manuals