Do you have a question about the Hunter Crown Canyon II and is the answer not in the manual?
Essential safety warnings for installation and operation, including electrical shock and injury prevention.
Important cautions regarding wiring, parts, FCC rules, and UL certification for safe operation.
List of essential tools required for installing the ceiling fan, including ladder, screwdriver, pliers, and wire strippers.
Optional tools for mounting to a support structure, such as a drill and drill bit.
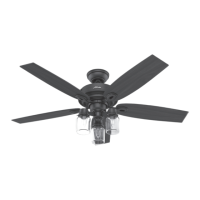
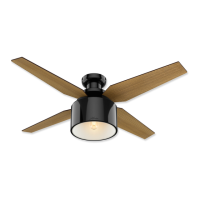
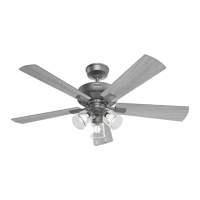
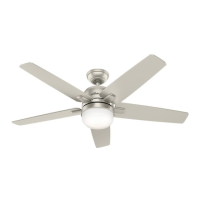
Detailed list and illustration of all components and hardware included in the fan package for identification.
Crucial reminder to remove shipping blocks from the motor and save screws for blade installation.
Specifies minimum clearance requirements for fan blades from walls and the floor for safe operation.
Ensures the outlet box is securely fastened to the building structure and rated for fan support.
Guidance on assessing ceiling type for standard or angled mounting and identifying necessary accessories.
Instructions for hanging a fan on a flat ceiling using a standard or shorter downrod.
Guidance for angled/vaulted ceilings, recommending longer downrods and angled mounting kits.
A practical tip to determine if an angled mounting kit is required based on ceiling pitch.
Critical safety step to turn off power at the circuit breaker before starting installation.
Instructions for securing the ceiling bracket using machine screws and washers to a rated outlet box.
Instructions for securing the ceiling bracket using wood screws to a support structure.
Guidance on orienting the ceiling bracket opening towards the peak for angled ceilings.
Instruction to remove the pre-installed setscrew to allow for downrod insertion.
Guide for feeding wires and hand-tightening the downrod onto the motor assembly.
Instruction to securely tighten the downrod setscrew using pliers, emphasizing not to hand-tighten.
Crucial warning about fan fall hazards and proper setscrew tightening to prevent serious injury or death.
Instruction to slide the canopy over the downrod and wires before attaching the fan to the bracket.
Visual reference to confirm the fan assembly is correctly positioned before proceeding.
Important notice advising to lift the fan by the housing or downrod to prevent damage during assembly.
Instruction to place the downrod ball securely into the slot in the ceiling bracket for hanging.
Identifies the necessary wire nuts for completing the fan's electrical connections.
Tips on how to properly connect wires using wire nuts for a secure and safe electrical connection.
Step-by-step instructions for wiring the fan when using a single wall switch.
Mandatory warning emphasizing the necessity of proper fan grounding for electrical safety.
Advice on organizing and securing excess wires within the outlet box for a clean installation.
Step-by-step instructions for wiring the fan when using dual wall switches for fan and light.
Instruction to slide the canopy over the downrod and wires before attaching the fan to the bracket.
Guidance on aligning the canopy's screw holes with the mounting bracket for secure attachment.
Instructions for fastening the canopy to the mounting bracket using the provided screws.
Step-by-step guide for inserting grommets and securing blades to blade arms using specific hardware.
Reminder to use the saved screws from shipping blocks for attaching blade arms to the motor.
Instructions for loosely attaching blade arms to the motor, followed by secure tightening of screws.
Instructions for attaching light kit screws to the adapter and securing the upper switch housing.
Guide for feeding the wire plug through the housing and connecting it to the screws.
Steps for securing the upper and lower switch housings together using screws.
Warning about ensuring all screws are tight for the switch housings to prevent fan fall.
Instructions to connect plugs from upper and lower switch housings, matching colored markings.
Guide for attaching the lower switch housing to the upper housing by aligning notches and tightening screws.
Instructions for installing bulbs into the light fixture sockets.
Information on how to install the fan without attaching a light kit.
Steps for installing the glass shades by loosening thumb screws, raising, and tightening.
Warning to ensure glass is properly secured to prevent injury or death.
Instructions for feeding pull chains through switch housing and attaching pendants.
Explanation of how pull chains control fan speed and light fixture.
Explanation of downdraft (cooling) and updraft (air circulation) modes.
Procedure for changing fan rotation direction using the reversing switch.
Common solutions for fan not working, including checking power, pull chains, and wiring connections.
Steps to address fan wobbling, including blade installation checks and using the balancing kit.
Tips for resolving noisy operation, such as checking blade installation and for cracks.
Recommendations for cleaning the fan using soft materials to prevent scratching or damage.
Instructions on how to obtain warranty service, including required proof of purchase.
Outlines coverage for motor, other parts (one-year), and light kits, specifying exclusions.
Lists items and conditions not covered by the warranty, such as labor and accidental damage.
Explains how state laws affect warranty coverage and consumer rights.
Steps 1-5 detail the process of disassembling and removing the standard downrod pipe.
Steps 6-10 guide the reassembly process with a different length downrod.
Instruction to verify downrod assembly correctness by firmly pulling the hanger ball.
Warning about following downrod assembly instructions exactly to prevent fan fall.