www.HunterFan.com
1.888.830.1326
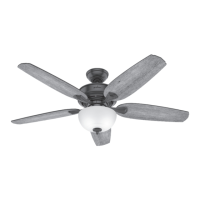
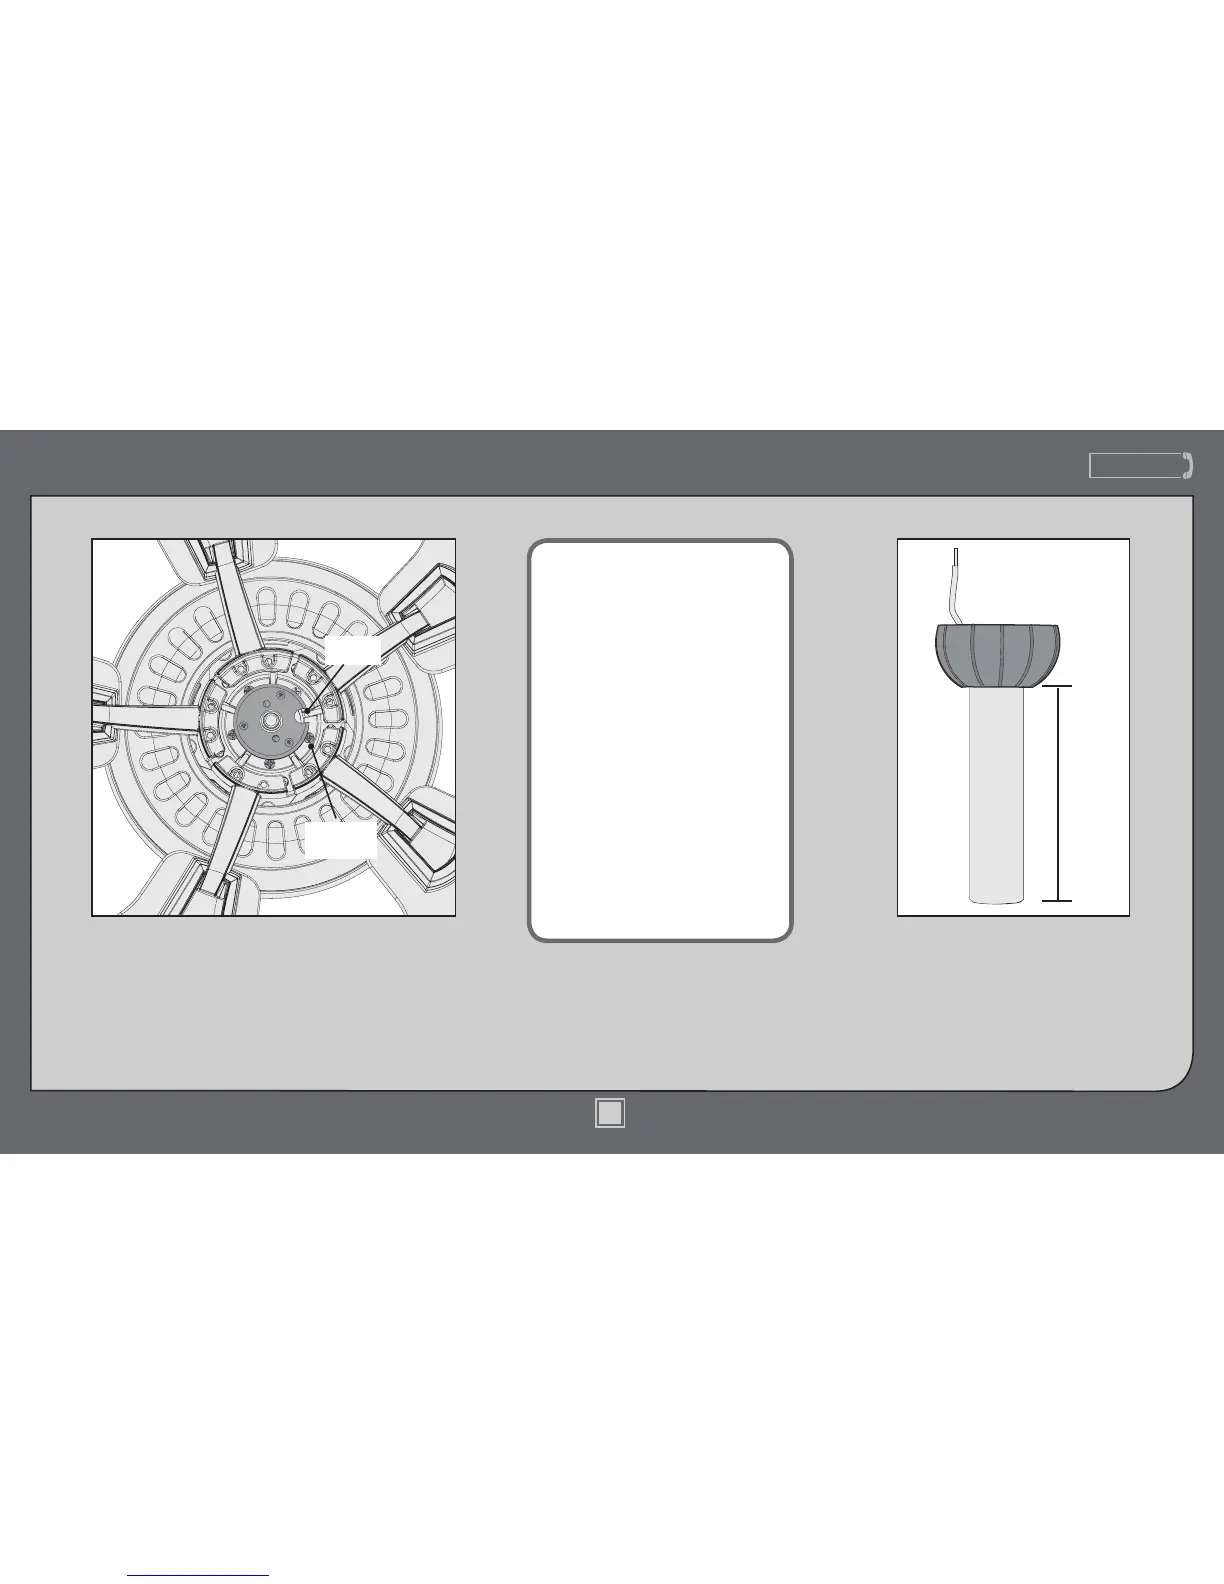
Auto Balance™
Retaining
Screw
Notch
Auto Balance
If you are using one of the
enclosed downrod assemblies,
it is now time for you to activate
the Auto Balance system by
removing the ve red retaining
screws. Rotate the blades slowly
until one of the red retaining
screws is visible through the notch
in the mounting plate. Remove
the retaining screw from the
bottom of the fan housing using a
screwdriver. Repeat this process for
all 5 retaining screws.
Note: After the retaining screws
are removed, the blades will feel
loose. This is normal, as loose
blades are a characteristic of the
Auto Balance system.
Note: If you are using a downrod
assembly longer than 6 inches,
leave the retaining screws in
their place and continue the
installation process.
14
M3500-01 •11/30/12 • © Hunter Fan Company
 Loading...