18
45019-01 • 06/03/11 • Hunter Fan Company
9 • Completing Your Installation With or Without a Bowl Light Fixture (Continued)
Installing the Glass Bowl
9-3. If you want to install the light fixture,
proceed with Step 9-4 now.
If you do not want to install the light
fixture, you need to uninstall it now. See
“Uninstalling the Light Fixture” in Step
9-9. Once you have uninstalled the light
xture, continue with step 9-1 and 9-2.
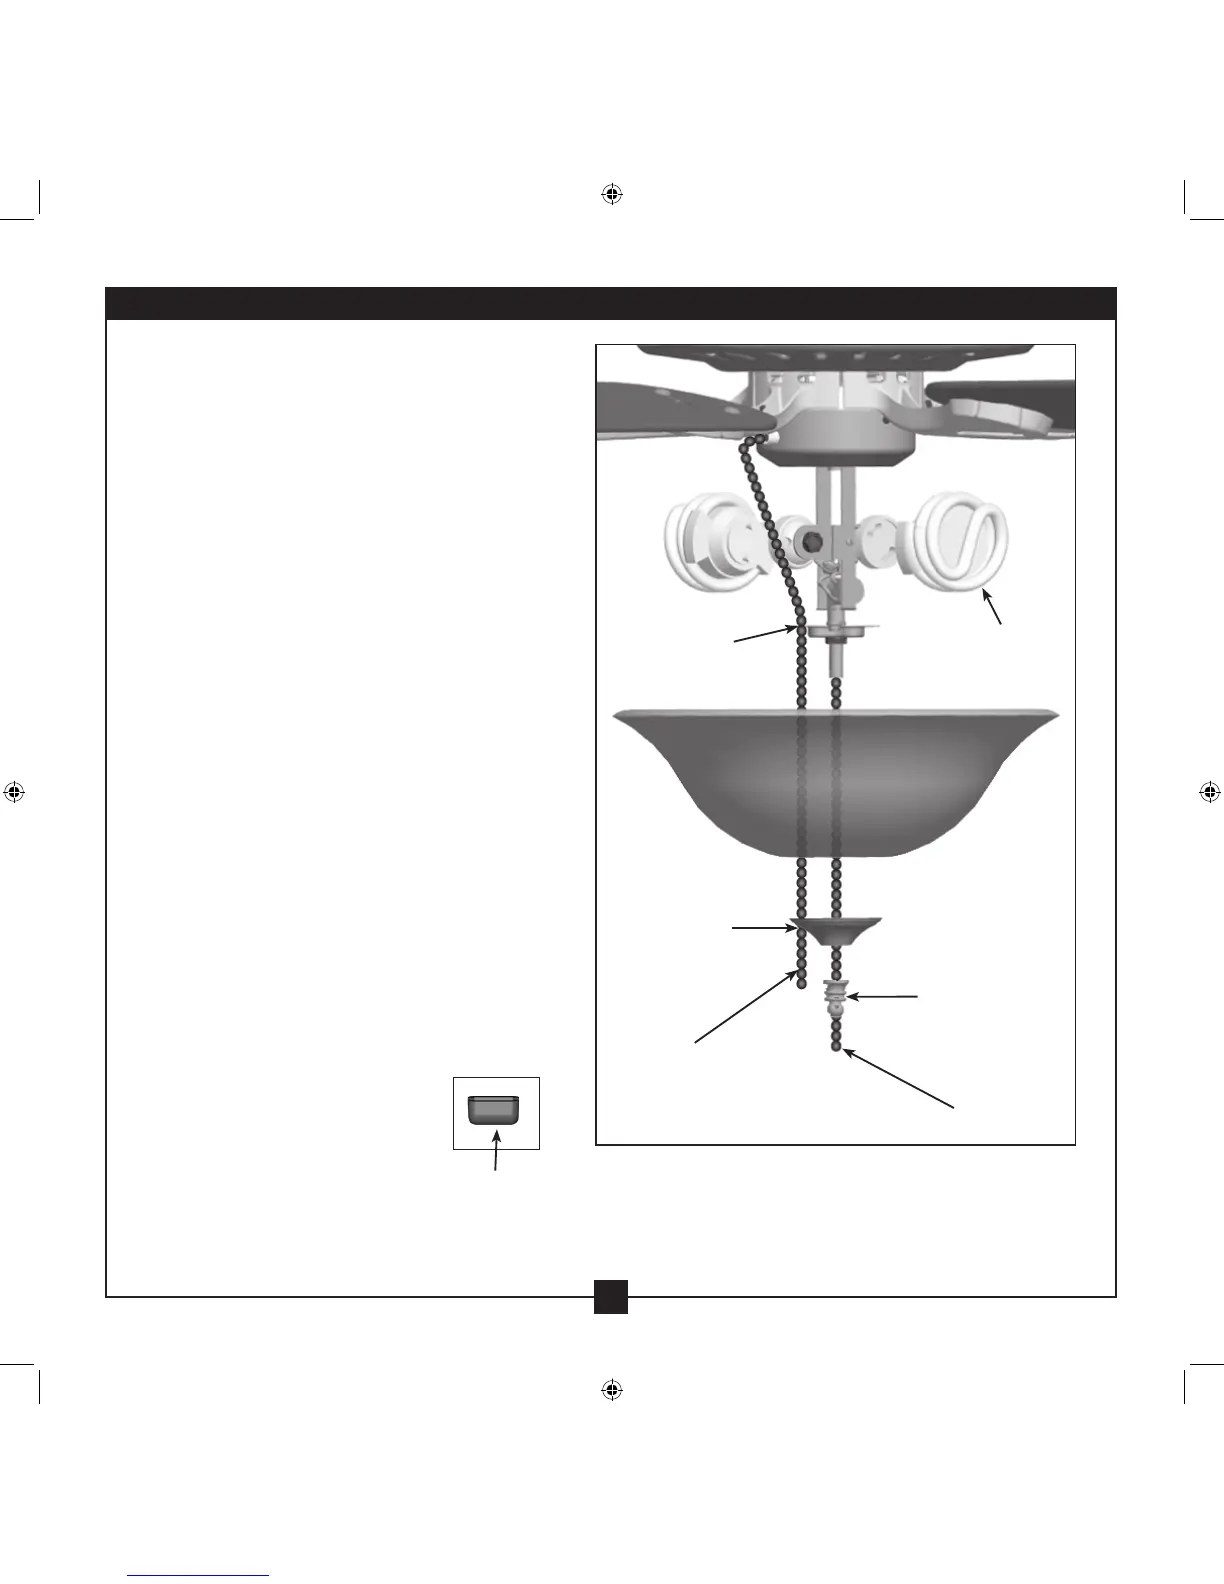
9-4. Attach the extra pull chain (included) to
the fan pull chain using the breakaway
connector. (You may nd the breakaway
connector on the end of the extra chain.)
9-5. Feed the fan and light pull chains as
shown in illustration.
9-6. Install both Pin Base CFLs (13 Watt
Maximum each, included) into the
sockets.
9-7. Place the cover plate up against the glass
bowl. Align the holes in the cover plate
with the grommet hole of the metal disc.
9-8. Screw the nial onto the threaded rod end
until tight.
Grommet Hole
(Metal Disc)
Finial
Breakaway
Connector
Step 9-5
Hole (Cover Plate)
Light
Pull Chain
Fan
Pull Chain
Light Bulbs (2),
included
(Pin Base CFL)