12
41847-01 • 08/12/09 • Hunter Fan Company
7 • Completing Your Installation With or Without a Bowl Light Fixture (Continued)
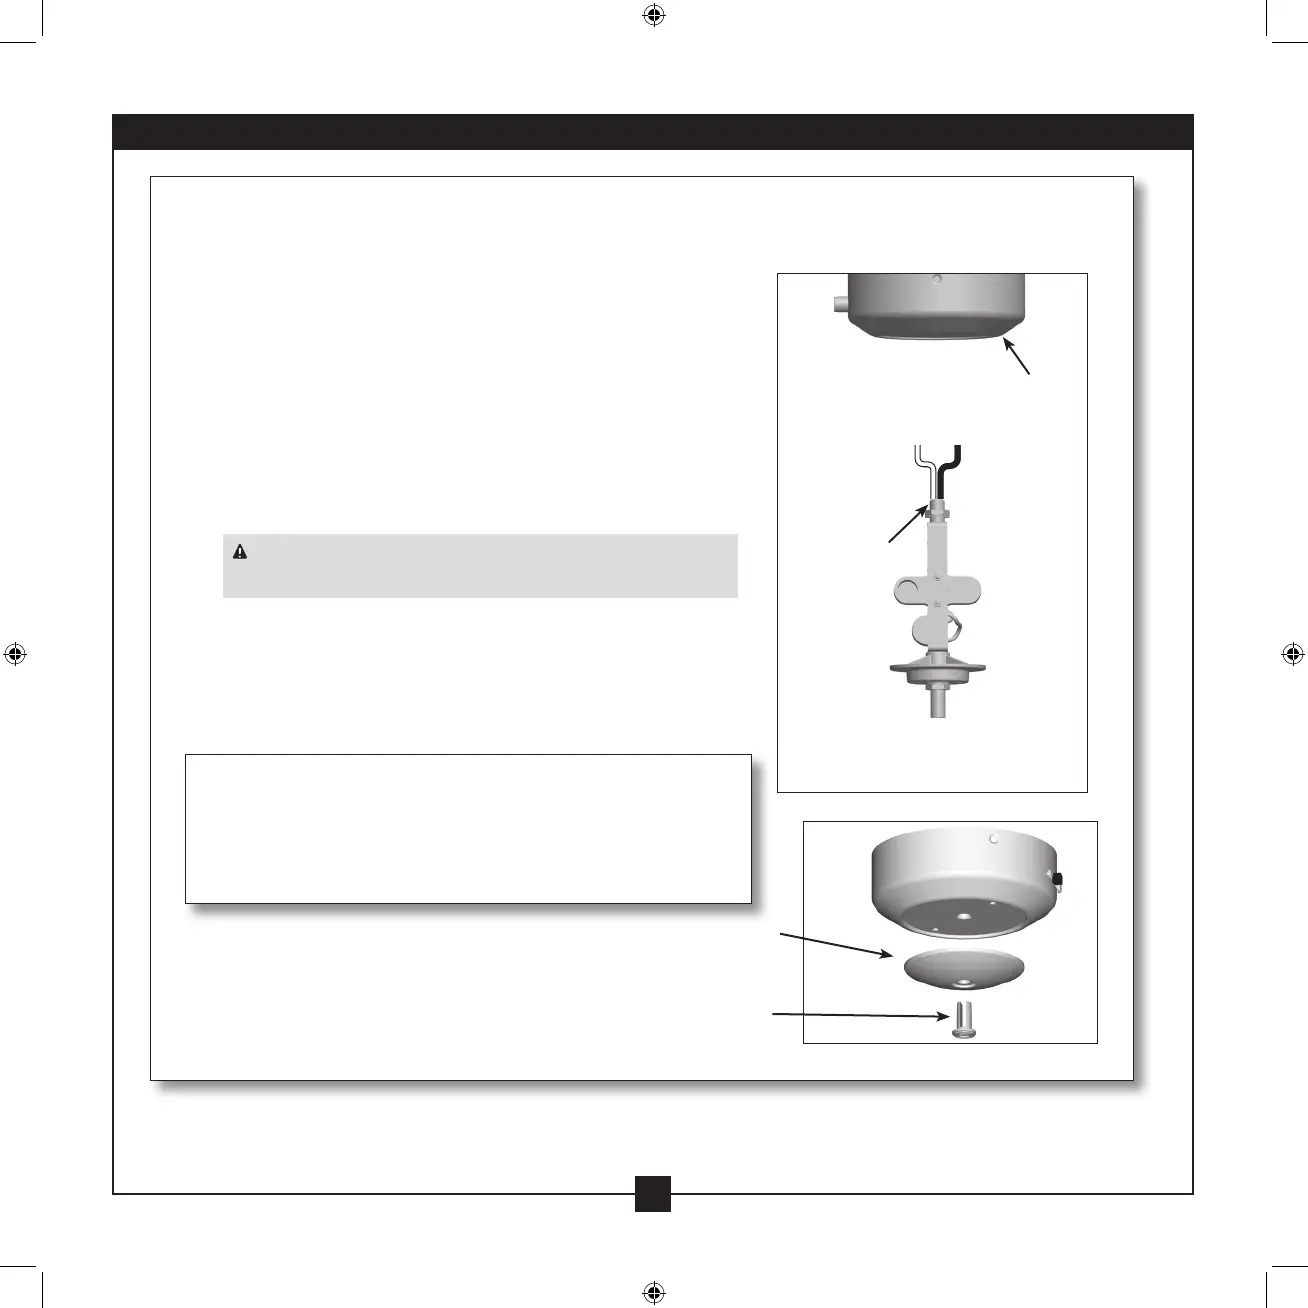
Installing the Light Fixture
7-9. Remove the switch housing cap and plug button from the lower
switch housing.
7-10. Push the wires from the light kit through the hole in the
center of the lower switch housing.
7-11. Screw the threaded rod of the light xture into the lower
switch housing.
7-12. Install the nut and washer from the end of the light xture
inside the lower switch housing.
7-13. Remove the wire connectors from the white wire and the
red wire in the lower switch housing.
7-14. Connect the white wire from the lower switch housing to
the white wire from the light xture.
7-15. Connect the red wire from the lower switch housing to the
black wire from the light kit xture.
Lower Switch
Housing
readed Rod
Steps 7-17 – 7-19
Step 7-21
Cap
Plug Button
CAUTION: Be sure no bare wires or wire strands are visibl e
after making connections.
Note: In compliance with US federal energy regulations, this
ceiling fan contains a device that restricts the light kit to a
maximum of 190 Watts. Exceeding that limit or the marked
limit on this product may result in re hazard or improper
operation.