All Products limited to Vehicle Tow Rating, see Vehicle Owner’s Manual. Visit www.huskytow.com for Warranty Information / Tech Support /
Product Updates. 2020 Keystone Automotive Operations Inc. All Rights Reserved. 08/07/2020-Rev3 Page-6
E) Once you’ve found the horizontal position for the cross beam, next find the vertical
position for the cross beam.
NOTE: - If the Trailer is available for measuring follow the instructions in the section
“Operating Instructions” sub section “Preparing For First Use”. Otherwise put the
Cross Beam in the highest position per instruction (F).
F) Put the cross beam in the highest position using the pattern of holes on the end of the
cross beam. Place a flat washer, lock nut, and nut on each bolt & finger tighten. Add
shims as necessary to fill gaps. Snug down the four nuts using an "X" pattern. Torque the
nuts to 75 ft-lbs. Note: Be sure that the Cross Beam straddles the uprights. Do not over
tighten, as this will cause the uprights to fit improperly in the base rails.
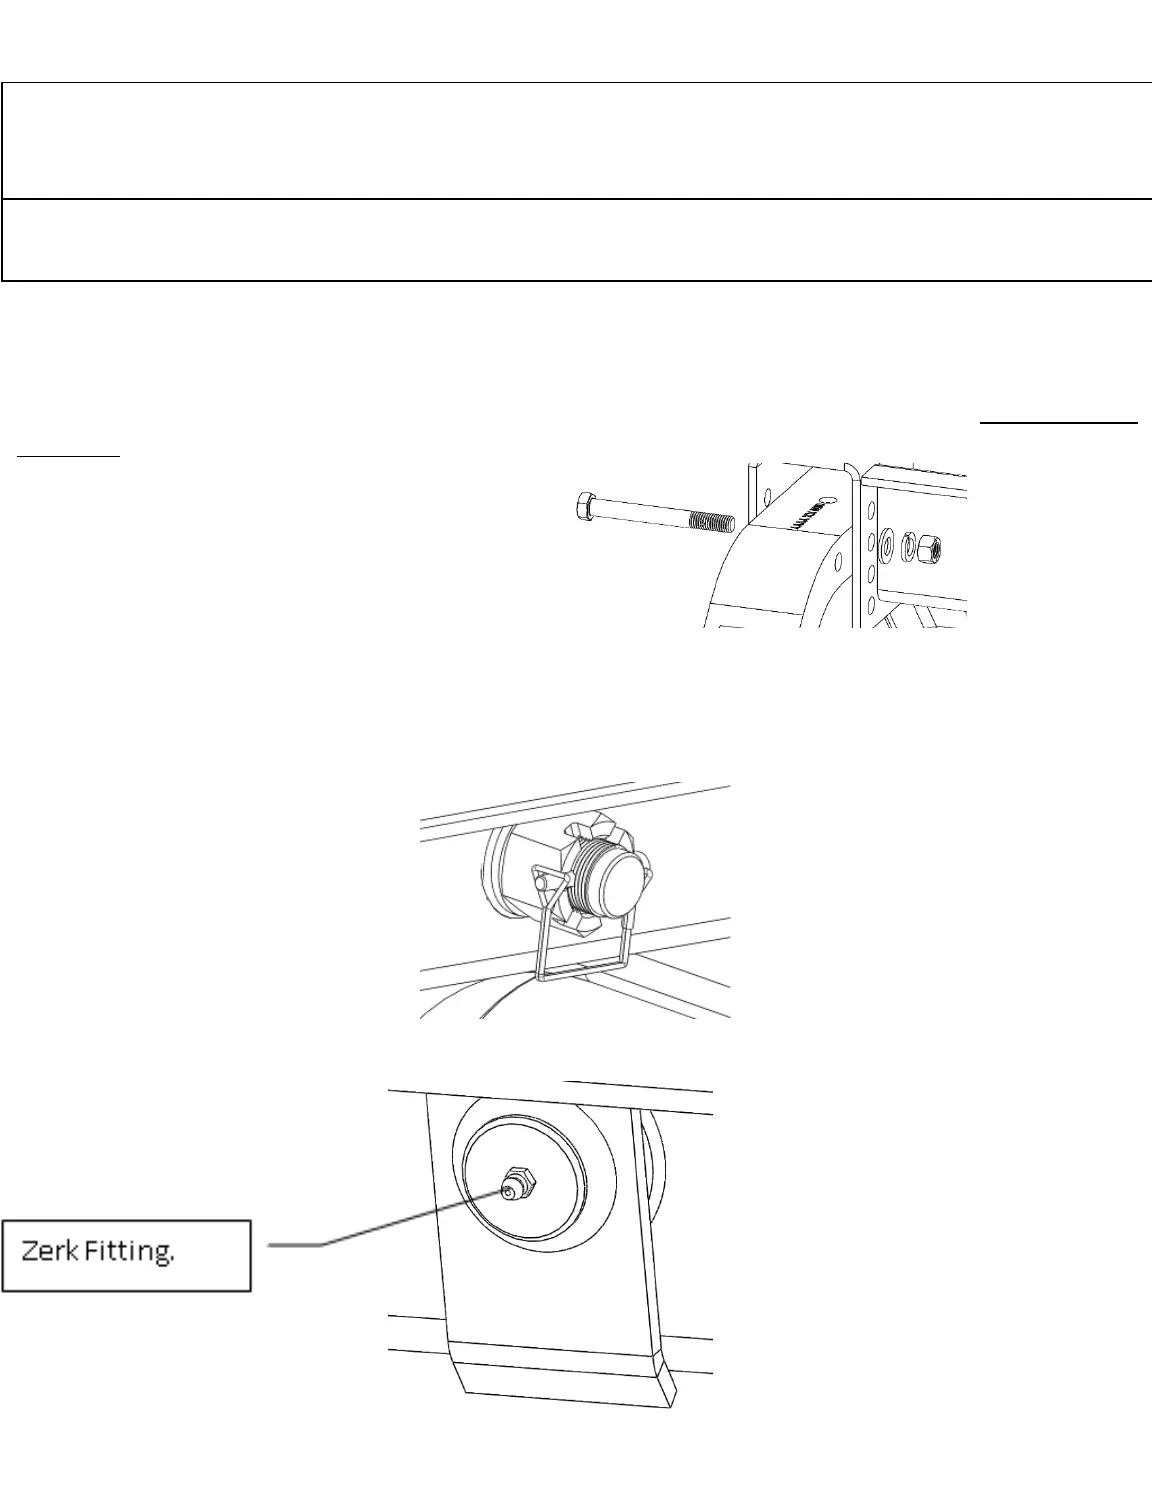
2. Head and Yoke Assembly
A) Install Head & Yoke with pivot pin and castle nut. Tighten the castle nut until all the fore
and aft movement is eliminated in the pivot pin and in the head and yoke assembly. This
may require 60mm wrench or pipe wrench. Continue to tighten the castle nut until the
safety pin can be inserted. Close the clip on the locking clevis pin to secure the nut.
B) Using a grease gun, grease the Zerk fitting on the plate side of the pivot pin.
Use only the supplied bolts, nuts, and washers to install this kit. All nuts and bolts
are Grade 5 unless specified otherwise.