This document is a Use and Care Guide for a Husky 12-Drawer Tool Cabinet, model # HMT5212, with item # 1000804523.
Function Description:
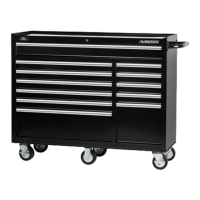
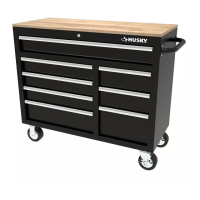
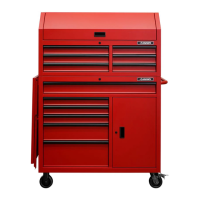
The Husky 12-Drawer Tool Cabinet is designed for organizing and storing tools. It features multiple drawers for various tool sizes and is equipped with casters for mobility. The cabinet is intended for use in a workshop or garage setting to keep tools secure and easily accessible.
Important Technical Specifications:
- Model Number: HMT5212
- Item Number: 1000804523
- Number of Drawers: 12
- Maximum Weight per Cabinet Drawer: 100 lbs.
- Casters Support Up To: 1800 lbs.
- Hardware Included:
- 24 M8 x 25 bolts (AA)
- 6 M6 x 16 bolts (BB)
- 1 Wrench (CC)
- Cabinet Components:
- 1 Cabinet (A)
- 1 Cabinet handle (B)
- 2 Fixed casters (C)
- 4 Swivel casters (D)
The manual emphasizes several safety precautions to ensure safe operation and prevent injury or product damage:
- Moving the Unit: Do not pull the unit; push it when moving.
- Brakes: Use the brakes when the product is not being moved to prevent it from rolling.
- Securing the Product: Secure the product properly before moving it with a forklift.
- Power Equipment: Do not tow the product with power equipment.
- External Locks/Electrical Equipment: Do not alter the product in any manner. For example, do not weld external lock bars or attach electrical equipment.
- Rear Lock Bars: When locking a cabinet, close the drawers completely in order for the rear lock bars to work properly.
- Vehicle Attachment: Do not attach or mount this product to a vehicle, as this may cause personal injury or product damage and will void the warranty.
- Standing on Product: Do not stand on this product, as it may cause personal injury.
- Opening Multiple Drawers: Be careful when opening more than one drawer. The product may become unstable and tip, which may cause personal injury or product damage.
- Level Surfaces: Keep the product on level surfaces. The product may become unstable and tip if stored or moved on an uneven surface, which may cause personal injury or product damage.
- Drawer Locking: Lock the drawers before moving the product. The drawers could come open and make the product unstable and tip, which may cause personal injury or product damage.
- Over-tightening Bolts: Do not over-tighten the bolts during assembly.
Usage Features:
- Assembly:
- Attaching the Cabinet Handle: The cabinet handle (B) is positioned over pre-tapped holes on the cabinet (A) and secured with M6 x 16 bolts (BB) and a wrench (CC). No nuts are required.
- Attaching the Casters: The cabinet (A) should be laid on its top with drawers locked, using packaging material to protect the finish. Two swivel casters (D) are attached to the same side as the handle, and the other two swivel casters (D) are attached to the opposite side using M8 x 25 bolts (AA). Two fixed casters (C) are attached to the center of the cabinet using M8 x 25 bolts (AA). All casters are tightened with a wrench (CC). The cabinet is then returned to its upright position.
- Removing Drawers: To remove a drawer, fully extend the empty drawer, push up the one black release lever, and pull down on the other black release lever. Then, pull the drawer outward until it is released from the drawer slide.
- Re-inserting Drawers: To re-insert a drawer, extend the drawer slides. Insert the brackets on each side of the drawer into the slots in the slides, ensuring they are properly positioned. Once properly inserted, completely close the drawer to set the slides in their proper positions.
Maintenance Features:
- Caster Maintenance: Grease the casters annually using high-quality bearing grease to ensure smooth movement and longevity.
- Drawer Maintenance: Lubricate the drawer slides semi-annually to maintain smooth operation and prevent sticking.
- Cleaning: Periodically clean the drawer fronts, drawer trim, and other surfaces with a mild detergent and water.
- Finish Protection: Auto wax preserves the storage unit's luster finish and protects against scratches. Apply the wax as you would on a car.
- Grease and Oil Removal: Remove grease and oil with a standard nonflammable cleaning fluid.
Warranty:
The product comes with a 3-year warranty from the date of purchase, covering defects in materials and workmanship. For repair or replacement parts, customers should call 1-888-HD-Husky or return the product to the store of purchase. The warranty does not cover normal wear and tear.
Customer Service:
For questions, problems, or missing parts, customers are advised to call Husky Customer Service at 1-888-HD-HUSKY between 8 a.m. and 6 p.m. EST, Monday-Friday. Additional information and products can be found at HUSKYTOOLS.COM. The manual should be retained for future use.