Do you have a question about the Husqvarna Viking Designer II and is the answer not in the manual?
| Brand | Husqvarna Viking |
|---|---|
| Model | Designer II |
| Category | Sewing Machine |
| Language | English |
Critical safety warning regarding electric shock hazards. Focuses on unplugging the machine.
General safety precautions for operating the sewing machine to prevent hazards.
Instruction to retain safety guidelines for future reference.
Technical guidance for servicing machines with double insulation.
Specific electrical safety information relevant to North American users.
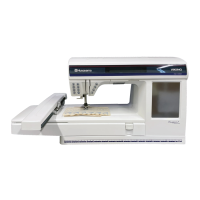
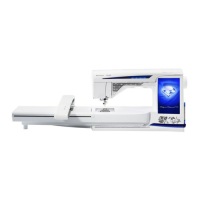
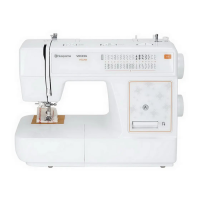
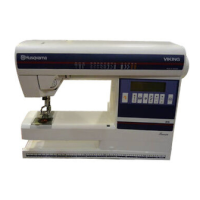
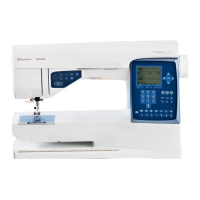
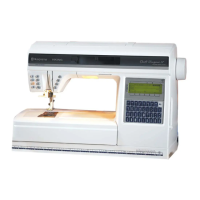
Detailed description of the sewing machine's front panel and its components.
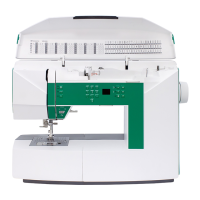
Description of the rear side of the sewing machine and its features.
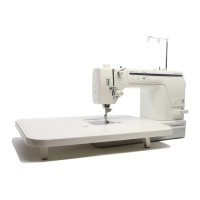
Details on the accessory tray for storing parts and its functionality.
Step-by-step guide for safely unpacking the sewing machine.
Instructions for connecting the sewing machine to a power source.
Procedure for safely storing the sewing machine after use.
Information on using the accessory tray to extend the sewing work surface.
Explanation of the main and auxiliary spool pins and their usage.
Step-by-step instructions for threading the upper thread.
Guide on how to use the automatic needle threader.
Specific instructions for threading the machine with a twin needle.
Procedure for winding the bobbin thread.
Instructions on how to correctly insert the bobbin into the machine.
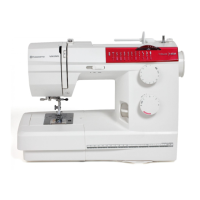
Explanation of the various function buttons on the machine.
Details on how the sensor foot pressure adjusts to fabric thickness.
Explanation of the sensor foot's lifting capabilities for fabric handling.
Instructions on how to lower the feed teeth for specific sewing tasks.
Descriptions and uses of various presser feet included with the machine.
Information on the specialized sensor foot for buttonholes.
Procedure for attaching and detaching presser feet.
Information on needle types, systems, and their applications.
Step-by-step guide for replacing the sewing machine needle.
Overview of the d-Card system for accessing stitches and designs.
Instructions for inserting a d-Card into the machine.
Procedure for ejecting and changing d-Cards.
Introduction to the machine's touch screen interface.
Overview of the main menus and functions accessible via the touch screen.
Explanation of the Sewing Advisor feature for fabric and technique selection.
Description of the SET menu for adjusting machine settings.
Description of the ADJUST menu for modifying stitch parameters.
Explanation of the FUNC button for switching between modes.
Information on accessing the HELP function for guidance.
Guidance system for selecting fabric type and sewing technique for garment construction.
Information on choosing between woven and knit fabrics based on properties.
Description of leather properties and its suitability for sewing.
Description of vinyl properties and its suitability for sewing.
Overview of different thread types and their uses in sewing.
Guidance on utilizing specific function buttons for sewing tasks.
Instructions for sewing standard seams on woven and stretch fabrics.
Technique for finishing fabric edges to prevent fraying.
Combined technique for sewing a seam and overcast edge simultaneously.
Instructions for temporary basting stitches for fitting or marking.
Technique for creating an invisible hem on garments.
Instructions for various hemming techniques, including topstitching.
Guidance on selecting and preparing for buttonholes.
Instructions for sewing buttons quickly and efficiently.
Introduction to utility stitches and their applications.
Details and usage of the straight stitch for various sewing tasks.
Instructions for the elastic lightning stitch suitable for stretch fabrics.
Technique for creating gathers using a long stitch length.
Explanation of the machine's feature offering 25 needle positions.
Step-by-step guide for sewing a center zipper into a garment.
Description of the triple and elastic reinforced straight stitch.
Information on various zigzag stitches for decorative and utility purposes.
Techniques for repairing small holes and tears in fabric.
Method for mending fabric tears using specific stitches.
Overview of different buttonhole styles available on the machine.
Detailed instructions for sewing buttonholes manually.
Guidance on safely cutting open sewn buttonholes.
Technique for adding cord for stability in stretch buttonholes.
Adjusting stitch density for buttonhole balance.
Adjusting stitch density for overall buttonhole appearance.
Reference table summarizing utility stitches with their applications.
Using fashion stitches from d-Cards for decorating clothing and accessories.
Introduction to free motion sewing for creative embellishments.
Applying free motion sewing techniques for garment and accessory embellishment.
Instructions for creating jewelry using free motion stitches.
Using satin stitches to create appliqués on fabric.
Technique for joining fabric or trim edges with a neat finish.
Using alphabet stitches for monograms and personalizing items.
Methods for modifying decorative stitches using machine functions.
How to sew a single decorative stitch pattern.
Using mirror image functions to alter decorative stitch direction.
Specific mirror image function for flipping stitches left to right.
Specific mirror image function for flipping stitches end to end.
Adjusting the length of satin stitches without changing density.
Instructions for creating and saving custom stitch combinations.
Information on entering and using the PROG mode for programming.
Details on the structure and options within the PROG menu.
Explanation of the nine permanent memories for saving programs.
Guidance on navigating the cursor within the programming interface.
Procedure for clearing or reloading programmed stitches.
Functionality of the Memory Tab for accessing programming functions.
How to create custom stitch sequences and combine them with letters.
Instructions for modifying existing stitches or letters in a program.
Procedure for inserting new stitches or letters into a program sequence.
How to adjust stitch parameters within a programmed sequence.
Instructions for executing programmed stitch sequences.
Modifying parameters for the entire programmed stitch sequence.
List of materials and threads required for the sewing organizer project.
Instructions for cutting fabric pieces according to project specifications.
Steps for creating and decorating pockets for the sewing organizer.
Specific instructions for decorating the third pocket with lettering.
Instructions for adding a pocket flap to the fourth pocket.
Steps for quilting the fabric layers of the sewing organizer.
Final steps for completing the pockets on the sewing organizer.
Instructions for applying binding to the edges of the organizer.
Method for attaching the pocket flap to the quilted organizer.
Instructions for sewing a button onto the organizer.
Steps for dividing the pockets on the organizer.
Technique for applying bias binding to the edges of the organizer.
Procedure for replacing the left-side needle light bulb.
Procedure for replacing the right-side upper light bulb.
General maintenance guidelines for keeping the sewing machine in good condition.
Instructions for cleaning the exterior surfaces and touch screen.
Detailed steps for cleaning the bobbin area of lint and debris.
Procedure for cleaning the area beneath the bobbin case.
Instructions on how to remove and replace the stitch plate.
Guide to identifying and resolving common sewing machine issues.
Troubleshooting steps for a non-functional bobbin alarm.
Troubleshooting steps for irregular bobbin winding.
Troubleshooting steps for a malfunctioning thread cutter.
Troubleshooting steps for incorrect or irregular stitch formation.
Troubleshooting steps for a presser foot that will not lower.
Troubleshooting steps for a sewing machine operating slowly.
Troubleshooting steps for a machine that refuses to sew.
Adjusting the touch screen contrast for better visibility.
Troubleshooting steps for unresponsive touch screen functions.
Recommendation for professional servicing if problems persist.
Information regarding warranty coverage and the use of parts/accessories.
A section for users to record personal notes and observations.
Details on the optional Quilt Theme package and its contents.
Details on the optional Heirloom Theme package and its contents.
Details on the optional Embroidery Theme package and its capabilities.
Details on the optional Home Dec Theme for home decoration projects.
Information about future availability of themes and product development.
Overview of optional Stitch d-Cards for expanding stitch capabilities.
Description of the optional B1 d-Card featuring buttonhole and bartack stitches.
Description of the optional C1 d-Card for pictogram and decorative stitches.
Details on optional D1 and D2 d-Cards for heirloom sewing techniques.
Details on the optional E1 d-Card for quilting and appliqué.
Description of the optional G1 d-Card with stitches designed for children.
Details on the optional H1 d-Card featuring various scallop stitches.
Information on the optional K1 d-Card with omnimotion stitches.
Details on the optional L1 d-Card for creating decorative stitch combinations.
Information on the optional M1 d-Card for crafting stitches.
Details on optional P1 and R1 d-Cards for lettering and alphabets.
Information on the optional T1 d-Card for multi-directional stitches.