Do you have a question about the Husqvarna Viking Lily 550 and is the answer not in the manual?
| Needle Positions | 29 |
|---|---|
| Free Arm | Yes |
| Stitch Options | Utility, Decorative, Quilting |
| Stitch Length | Up to 6 mm |
| Stitch Width | Up to 7 mm |
To reduce the risk of electric shock: Do not leave sewing machine when plugged in.
To reduce the risk of burns, fire, electric shock, or injury to person: Use only as described in this manual.
Place the machine on the table or cabinet, remove the packaging and lift off the cover.
Unplug the cords from the wall socket and the machine. Wind the cords around your hand.
Place the foot control on its narrow side. Fit the plug into the socket inside the foot control compartment.
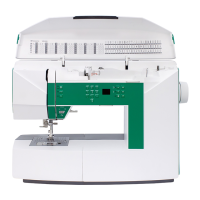
On the underside of the machine you will find information about the power supply (V) and the frequency (Hz).
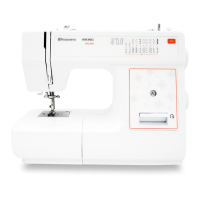
Open the Accessory box by placing your finger in the space on the top and lift upward.
Keep the Accessory Tray on the machine to provide a larger flat work surface.
The machine has spool pins suitable for all types of thread. The main spool pin (a) is horizontal.
Pull the spool pin out. Place the thread on the spool pin and the spool holder on the spool pin.
Insert a twin needle. Wind a bobbin with the thread you are going to use as the second upper thread.
Make sure that the presser foot is up and the needle is in the highest position.
Open the cover by slightly pulling it towards you and take it away.
Always use the recommended setting given on the Info-display to start with.
To understand the correct thread tension, sew a few sample stitches at different settings.
The presser foot pressure is adjusted with the dial on the front of the machine. Normal setting is 4.
The presser foot is raised and lowered with the presser foot lever. The presser foot must be lowered when sewing.
Make sure that the needle is in the highest position. Pull the presser foot down and towards you.
Loosen the screw in the needle clamp. Remove the needle. Push up the new needle with the flat side away from you.
The feed teeth are lowered when you turn the dial to the left to -.
This button sets whether the needle stops up or down in the material when you lift your foot from the foot control.
Use the SPEED button to set the three different maximum speeds.
Your machine sews backwards when this button is pressed. The machine sews forward when the button is released.
When you select a stitch, the machine will automatically set the best stitch length.
STOP, Mirror Image, Stitch Width, MENU, FUNC, Memory Navigation.
FIX, CLR (Delete), Memory Management, Recommended Presser Foot/Tension, Buttonhole Sensor.
When you turn on the machine it always selects straight stitch and the number 1 is displayed.
Utility stitches, Block letters, Outline block letters, Script letters, Pictogram elements, Hemstitches.
Utility stitches incl. Quilt stitches, Decorative stitches and Buttonholes.
The machine has 4 program memories holding up to 55 stitches or letters.
The machine has 2 program memories holding up to 25 stitches or letters.
Touch FUNC for PROG. Empty memory with CLR, then select menu with MENU.
Touch FUNC for PROG. Empty memory with CLR, then select menu with MENU.
Modify stitch length/width or mirror stitches. Correct or change stitches/letters in a program.
Mirror selected stitch or entire program. Adjust needle position or length for mirroring.
Press FUNC for PROG or REP. Use M button to select and advance through memories.
Use CLR to delete a stitch or the entire program. Re-press CLR to restore if done by mistake.
Select from bartack, round end, reinforced, heirloom, keyhole, and straight stitch buttonholes.
Feet have guide lines for length. Middle mark on foot C gives 1.5 cm buttoning edge.
Change stitch density by adjusting length. Unplug sensor to show stitch length for density adjustment.
Machine sews correct size buttonhole in one step and stops automatically when completed.
Select from bartack, round end, reinforced, heirloom, keyhole, and straight stitch buttonholes.
Feet have guide lines for length. Middle mark on foot C gives 1.5 cm buttoning edge.
Used to cut buttonholes and remove stitches sewn in error.
Select zigzag stitch, lower feed teeth, snap off presser foot, place button.
Use clearance plate. Push plate between button and fabric, lower presser bar, sew.
Sew seam, baste rest, open seam. Place foot left, fold fabric, place zipper, stitch. Reposition foot right.
Suitable for overcasting most fabrics. Trim edges before overcasting. Ensure needle sews over fabric edge.
Sew seams with straight stitch. Press allowance flat, sew edges down with three-step zigzag.
Use three-step zigzag for mending. Sew back/forth with reverse feed. Guide fabric slightly.
For light/medium non-stretch & light stretch fabrics. Use presser foot J.
For heavy stretch fabrics (Overlock) or medium stretch fabrics (Overlock stitch, model 550). Use presser foot B.
Facilitates sewing trouser legs, sleeve hems, and darning socks.
Use clearance plate for thick seams. Use thicker side of plate for thicker seams.
Use presser foot B, lower feed teeth. Fold loop ends, place under foot. Use wide zigzag, bartack outer edge.
Straight, Reinforced Straight, Stretch, Zigzag, Satin, Reinforced Zigzag, Three-Step Zigzag, Serpentine, Bridging.
Overcast, Overlock, Double Overlock stitches. Use for various fabric types and seams.
Flatlock, Elastic stitches, Elastic/Casing stitches. Used for hems, bands, shirring.
Elastic blind hem, Woven blind hem, Bartack, Quilting stitches, Appliqué, Feather stitch, Scallop stitch, Tapered satin, Darning, Buttonholes.
Straight, Reinforced Straight, Stretch, Zigzag, Three-Step Zigzag, Overcast, Overlock, Flatlock, Elastic blind hem, Bridging, Cross stitch.
Hemstitches, Satin stitch, Decorative edging, Decorative stitches, Quilting stitches, Appliqué, Feather stitch, Tapered satin, Darning, Buttonholes.
The light bulb is placed to the left of the needle. Use accessory box rubber sheath.
Regular cleaning required. No lubrication needed. Clean feed teeth & bobbin area with brush.
Replace stitch plate 5mm from rear edge. Push backward. Replace bobbin cover.
Unattractive stitches, thread breakage, bobbin thread breaks, fabric puckering due to tension or threading.
Needle issues, irregular thread tension, irregular bobbin winding.
Machine not feeding fabric (short stitch, lowered teeth), stitch too loose, incorrect stitch, sluggish machine.
Main motor not working (overload protector), buttonhole balance setting. Expert assistance recommended.
Combi, Standard, Twin, Jeans, Double Stretch, Rounded Tip, Embroidery, Stretch, Quilting, Microtex needles.