Do you have a question about the Husqvarna Viking Viking H Class 100Q and is the answer not in the manual?
| Type | Computerized Sewing Machine |
|---|---|
| Maximum Stitch Width | 7 mm |
| Maximum Stitch Length | 5 mm |
| Buttonhole Styles | 7 |
| Free Arm | Yes |
| Built-in Memory | Yes |
| USB Port | No |
| Display | LCD |
| Presser Feet | Included |
Critical warnings regarding potential electrical hazards and precautions to prevent them.
General safety guidelines covering personal injury risks, proper usage, and maintenance.
Instruction to retain safety information for future reference and user awareness.
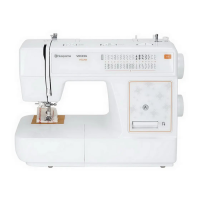
Identification and description of key components and parts of the sewing machine.
List and brief description of included accessories provided with the sewing machine.
Details on various presser feet, their functions, and applications in sewing.
Information on available stitch types, their settings, and recommended usage.
Instructions for safely removing the sewing machine and its components from the packaging.
Step-by-step guide on connecting the sewing machine to an electrical power source.
Procedures for properly storing the sewing machine and accessories after use.
Explanation of the polarized plug and its use in reducing electrical shock risk.
Guide on how to detach and attach different presser feet to the sewing machine.
Instructions for safely removing and inserting a new sewing needle into the machine.
Explanation of the mechanism used to raise and lower the presser foot.
Details on the safety feature that prevents sewing when the presser foot is too high.
Description of different needle types and their recommended uses for various fabrics.
Information on the use of horizontal and vertical spool pins for different thread setups.
Detailed steps for correctly threading the upper thread through the sewing machine.
Guide on using the built-in needle threader for easier needle threading.
Instructions for setting up the machine to use a twin needle for sewing.
Method for cutting the upper and bobbin threads after completing a sewing task.
Step-by-step process for winding thread onto a bobbin using the bobbin winder.
Instructions for correctly inserting the wound bobbin into the bobbin case.
How to lower the feed teeth for specific sewing tasks like button sewing.
Guidance on adjusting the needle thread tension for optimal stitch quality.
Procedure to bring the bobbin thread up to the needle plate level.
How to adjust the pressure exerted by the presser foot on the fabric.
Explanation of the slide control for adjusting the maximum sewing speed.
How the foot pedal controls sewing speed and machine operation.
Instructions for turning the machine's operational sound on or off.
Operation of key function buttons like START/STOP, Reverse, and FIX.
Functionality of the button to control the needle's final position after stopping.
How to adjust stitch length, stitch width, and needle position.
How to navigate and select different stitch patterns available on the machine.
Information on error messages displayed and sounds indicating machine status.
Explanation of the 'EL' error message and its cause, typically motor overload.
Information about the 'SP' display indicating the bobbin winder is engaged.
Fundamental technique for joining two pieces of fabric with a stitch line.
Description of the zigzag stitch and its common applications in sewing.
Details on the three-step zigzag stitch for durability and decorative purposes.
Technique for simultaneously sewing a seam and finishing the raw edge.
Using the guide for precise seam allowances, topstitching, and quilting.
Application of the satin stitch for dense, decorative finishes like appliqué.
Method for creating an invisible hem on garments using a specific stitch.
Techniques for inserting and sewing zippers using the specialized zipper foot.
Step-by-step process for creating buttonholes of various sizes.
Method for reinforcing buttonholes with cording for stability in stretch fabrics.
Instructions for securely sewing buttons onto fabric using the sewing machine.
Using decorative stitches for embellishment and creative sewing projects.
Techniques for piecing quilt blocks and creating quilted textures.
Preparation steps for free-motion sewing, including feed teeth and foot attachment.
Method for creating free-motion stippling patterns for quilt texture.
How to pivot and sew around corners smoothly with the sewing machine.
Using the reverse stitch function to reinforce seams at the beginning and end.
Operation of the FIX button for securing stitches on patterns.
Utilizing the free arm attachment for sewing cuffs, hems, and tubular items.
Instructions for replacing the sewing machine's light bulb.
Proper methods for cleaning the exterior of the sewing machine.
Routine cleaning of the bobbin area and feed teeth to remove lint.
Detailed steps for accessing and cleaning the area beneath the bobbin case.
Information on warranty limitations and initial steps for any sewing problem.
Solutions for fabric puckering, skipped stitches, needle breaks, and poor thread tension.
Troubleshooting for upper thread breaks, bobbin thread breaks, and irregular bobbin winding.
Addressing fabric feed problems, incorrect stitches, slow operation, and machine failure.
Resolving issues like main motor overload, blockages, and machine not sewing.