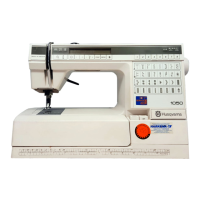
Do you have a question about the Husqvarna 1050 and is the answer not in the manual?
Adjusting the tangential play of the hook gear for proper operation.
Ensuring the presser foot is parallel to the stitch plate marking lines.
Setting the needle to pass through the center of the presser foot hole.
Adjusting the minimal gap between the hook tip and the needle.
Setting the thread resistance of the bobbin case with a weight.
Adjusting stitch length balance for buttonholes and patterns.
Setting the guide step motor for various model versions.
Steps to dismount the front cover and its components.
Replacing the transformer and its circuit board with ESD precautions.
Procedure for removing and mounting the sewing head assembly.
Guide to diagnosing and troubleshooting machine problems based on symptoms.
Important precautions for handling electronics to avoid damage from electro static discharge (ESD).
Tool for setting hook timing relative to the needle.
Tool used to measure the correct height of the feed dog.
Various gauges for setting step motors and needle position.
Various fixed spanners for specific adjustments and settings.
Hex keys of various sizes for motor and needle adjustments.
Tool used for safely removing components like the memo-chip.
Requirements and actions for checking the condition of the stitch plate.
Checking the presser foot for damage and its role in stitch formation.
Requirements and actions for checking the feed dog for damage and cleanliness.
Checking the tip and surface of the hook for damage.
Ensuring continuous speed control from lowest to full speed.
Diagram showing connections between external units and the driveboard.
Details on using service cassettes and programs for machine settings across different models.
Functionality and checking of the switch that detects presser foot position.
Checking the functionality of the buttonhole meter's potentiometer.
How the lower thread indicator works and troubleshooting its function.
Adjustment and troubleshooting for the thread tension step motor.
Setting and troubleshooting the step motor for zigzag needle movement.
Setting the step motor for feeding direction control.
Checking the function of the transformer for specific models.
Description of circuit boards and foil keyboards for models 1050, 1070, 1090.
Details on the 24V permanent magnet motor and troubleshooting its operation.
How to adjust the viewing angle of the LCD displays.
Ensuring the feed dog is parallel to the stitch plate grooves.
Setting the correct height of the feed dog above the stitch plate.
Adjusting stitch length balance for buttonholes and patterns on model 1050.
Adjusting stitch length balance for buttonholes and patterns on model 1070.
Adjusting stitch length balance for buttonholes and patterns on model 1090.
Setting the guide step motor for models 1100 and 1050/1090.
Setting the guide step motor for models 1200 and 1050/1070/1090.
Adjusting the step motor for side feeding mechanism positions.
Setting the sideways play in the feeding mechanism for smooth movement.
Diagnosing why the machine runs at reduced speed.
Troubleshooting when motors, displays, and diodes are non-functional.
Diagnosing issues with the foot control operation.
Diagnosing incorrect or non-existent zig-zag movement.
Diagnosing why the machine does not alarm for low lower thread.
Diagnosing issues when all symbols flash on the display.
| Brand | Husqvarna |
|---|---|
| Model | 1050 |
| Category | Sewing Machine |
| Language | English |