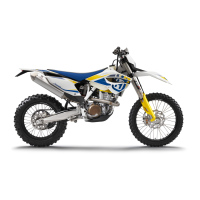
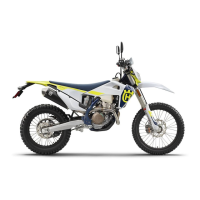
Do you have a question about the Husqvarna FE 350 2023 and is the answer not in the manual?
Defines the specific intended use and compliance of the vehicle with motorsports regulations.
Outlines potential dangers and consequences arising from using the vehicle not as intended.
Provides general safety instructions that must be followed for safe operation of the product.
Explains the different risk levels (Danger, Warning, Caution, Note) and their associated symbols.
Details conditions for warranty validity and exclusions for tampering or unauthorized modifications.
Emphasizes the importance of proper service for operation, wear prevention, and longevity.
Describes the clutch lever on the left handlebar, its hydraulic activation and automatic adjustment.
Locates the hand brake lever on the right handlebar for engaging the front brake.
Identifies the throttle grip on the right side of the handlebar.
Explains the function and possible states of the stop button on the left handlebar.
Details the horn button on the left handlebar and its operation.
Describes the light switch on the left handlebar and its positions for low and high beam.
Explains the function and operation of the turn signal switch on the left handlebar.
Describes the emergency OFF switch on the right handlebar and its ignition control functions.
Details the start button on the right handlebar and its function for actuating the starter motor.
Explains the functions of the combination switch, including engine mapping and traction control.
Illustrates and describes the meanings of various indicator lamps on the instrument panel.
Provides instructions on how to safely open the fuel tank filler cap.
Details the procedure for correctly closing the fuel tank filler cap and routing the breather hose.
Explains the function of the cold start button for aiding engine starting in cold conditions.
Describes how to adjust the idle speed of the throttle valve body for optimal starting behavior.
Locates the shift lever on the left of the engine and illustrates gear positions.
Identifies the foot brake lever located in front of the right footrest for engaging the rear brake.
Shows the location of the side stand attached to the left side of the vehicle.
Explains the location and function of the steering lock for securing the steering.
Provides instructions on how to lock the steering using the ignition lock.
Details the procedure for unlocking the steering using the ignition lock.
Provides an overview of the combination instrument, identifying its main components.
Explains how the combination instrument is activated via button press or wheel speed sensor impulse.
Describes possible messages displayed, such as low battery voltage or service due.
Guides through setting up the instrument, including selecting units (KM/H or M/H).
Explains how to change the unit of measurement for speed and distance.
Details the procedure for setting the 12-hour or 24-hour clock display.
Describes how to shorten or extend the service interval display.
Explains how to display and reset the trip distance (DST) and time.
Details how to display and reset the second trip distance (DST2) and time.
Explains how to view average speed, operating hours, and total distance covered.
Provides crucial safety advice and checks required before the first ride.
Outlines the recommended engine speed and performance limits during the running-in phase.
Explains how battery performance is affected by low temperatures and starting procedures.
Advises on checks and maintenance for challenging conditions like sand or mud.
Details specific preparations for riding the motorcycle on dry sandy terrain.
Provides instructions for preparing the vehicle for riding on wet sandy surfaces.
Outlines preparations needed for riding on wet and muddy off-road circuits.
Offers tips for preparing the vehicle for operation in hot weather or slow riding conditions.
Provides guidance on preparing the vehicle for riding in cold conditions or snow.
Lists essential checks and maintenance tasks to perform before every trip for safe operation.
Details the procedure for safely starting the motorcycle engine, including safety warnings.
Explains how to activate traction control and its benefits for improved control and propulsion.
Guides on how to safely start moving the motorcycle from a standstill.
Provides instructions on gear shifting, riding techniques, and safe acceleration/deceleration.
Offers advice on proper braking techniques and checks to ensure efficient braking performance.
Details procedures for safely stopping, parking, and securing the motorcycle.
Provides instructions on how to safely transport the motorcycle using tension belts or other devices.
Covers safety precautions and procedures for refueling the motorcycle's fuel tank.
Details mandatory maintenance tasks categorized by operating hours for motorsports use.
Lists recommended maintenance tasks based on time intervals (months) and operating hours.
Explains how to adjust suspension based on rider's weight for optimal riding characteristics.
Describes the high-speed and low-speed ranges of compression damping for the shock absorber.
Details how to adjust the low-speed compression damping using the adjuster screw.
Provides instructions for adjusting the high-speed compression damping of the shock absorber.
Guides on how to adjust the rebound damping of the shock absorber using the adjuster screw.
Describes the procedure for measuring the rear wheel dimension before checking sag.
Explains how to check the static sag of the rear shock absorber and its specifications.
Details how to check the riding sag of the rear shock absorber with rider input.
Provides instructions for adjusting the spring preload of the shock absorber.
Guides on how to adjust the riding sag, including spring rate selection.
Offers advice on checking the basic fork setting, noting that riding sag is not precisely determinable.
| Engine Type | Single-cylinder, 4-stroke |
|---|---|
| Displacement | 349.7 cc |
| Bore/Stroke | 88 mm / 57.5 mm |
| Compression Ratio | 13.5:1 |
| Starter | Electric starter |
| Transmission | 6-speed |
| Front Tire | 90/90-21 |
| Rear Tire | 140/80-18 |
| Fuel Tank Capacity | 8.5 L |
| Fuel System | Electronic fuel injection (EFI) |
| Cooling | Liquid-cooled |
| Front Suspension | WP XPlor 48 |
| Front Brake | Disc brake |
| Rear Brake | Disc brake |
| Frame | Chromoly steel frame |