EasyManua.ls Logo

Hussmann ARV-1230 - User Manual

Hussmann ARV-1230
24 pages
Print Icon
To Next Page IconTo Next Page
Loading...
ARV-570 &
ARV-1230
Owner’s Manual
P/N 0512887_A
1 October 2009
Beer
Merchandiser
®
®
P/N0512887A

Questions and Answers

  • K
    Kim PhillipsAug 8, 2025
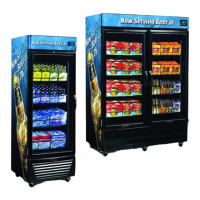
    What to do if my Hussmann ARV-1230 Merchandiser does not turn on?
    • T
      Tony NavarroAug 8, 2025
      If your Hussmann Merchandiser isn't turning on, here's what you can check: * **Plug:** Make sure the plug is properly inserted into the outlet. If it seems loose, remove and reinsert it. If there's still poor contact, have a licensed electrician replace the outlet. * **Power:** Check for a power outage or a tripped circuit breaker. If either has occurred, unplug the unit until power is restored or the breaker is reset. * **Voltage:** Low voltage can also prevent the unit from turning on. Consider installing a voltage regulator.
  • L
    laurachenAug 18, 2025
    Why is my Hussmann ARV-1230 Merchandiser slow to cool product?
    • R
      Renee AdamsAug 18, 2025
      Several factors can cause your Hussmann Merchandiser to cool product slowly: 1. **Dirty Condenser Coil:** A dirty coil reduces efficiency; clean the condenser coil. 2. **Poor Airflow:** Ensure the unit has enough space on all sides for proper airflow; reposition the unit if needed. 3. **Evaporator Blockage:** Check if the evaporator is blocked by ice, which may indicate a door sealing issue. Verify that the door is sealing completely. 4. **Heavy Use/High Humidity:** For heavy use in high humidity, reset the Safe-NET controller to increase the frequency of defrosts. 5. **Warm Product Loading:** Loading the merchandiser with warm product will extend the cooling time. The warmer the product, the longer it takes to cool.
  • T
    Toni WagnerAug 27, 2025
    How to fix unusual noise coming from my Hussmann Merchandiser?
    • M
      macksydneyAug 27, 2025
      Unusual noises from your Hussmann Merchandiser can often be resolved with these steps: * **Leveling:** Reposition and level the unit. * **Spacing:** Ensure the unit isn't contacting any surrounding structures; reposition it to provide space on all sides. * **Grille:** If the front grille is missing, replace it to help reduce noise.

Summary

SAFETY FIRST!

Electrical and Environmental Safety Precautions

Precautions for electrical safety, proper location, and ambient conditions for Hussmann Beer Merchandisers.

Contact and Service Information

Phone numbers for technical assistance and service calls for your Hussmann Beer Merchandiser.

INSPECTION AND UNCRATING

Shipping Damage Inspection Procedures

Examine equipment for shipping damage before and during unloading; note and report any loss or damage.

Uncrating and Model Identification

Carefully remove shipping box, avoid scratching, and identify models with wheels and built-in back spacers.

UNIT LEVELING AND INITIAL POWER-UP

Proper Leveling and Stabilization Techniques

Ensure merchandisers are level and secure with thumbscrew locks to prevent movement.

Critical 30-Minute Wait for Compressor Oil

Allow 30 minutes after leveling before powering on to allow compressor oil to settle.

ELECTRICAL AND SHELF INSTALLATION

Plug-In Requirements and Circuit Needs

Requires dedicated circuit; specifies 15A for ARV-570 and 20A for ARV-1230 with correct receptacle.

Shelf Installation and Spacing

Details shelf types, part numbers, clip placement for gravity/flat shelves, and spacing for airflow.

DOOR ADJUSTMENT AND AUXILIARY RECEPTACLE

Door Torque Adjustment for Proper Seal

Adjust hinge torque by manipulating support nuts to ensure the door closes and seals completely.

Fuse Specifications for Auxiliary Outlet

Use correct fuse ratings (1A for ARV-1230, 3A for ARV-570) to prevent warranty issues and fire hazards.

Safe-NET CONTROLLER SETUP

Setting Time, Defrosts, and Environment

Configure Safe-NET time, defrost schedules, and environment settings for optimal cooling performance.

Controller Location and Button Functions

Locates Safe-NET controller, explains button operations (SELECT, UP, DOWN), and initial display.

Safe-NET OPERATION AND CLOCK SETTING

Three-Button Navigation and Editing Rules

Guides on using SELECT, UP, DOWN buttons for menu navigation, value changes, and saving.

Clock Adjustment for Defrost Timing

Procedure to set the Safe-NET clock, including minutes, hours (24-hr format), and DST advisory.

Safe-NET MENU AND DEFROST MANAGEMENT

Menu Navigation Escape and Power Loss Clock

How to exit menus and information on the real-time clock's function during power outages.

Defrost Cycle Management and Optimization

Details defrost frequency, necessity, water drainage, default times, and customization for business needs.

DEFROST TIME AND COUNT CONFIGURATION

Setting Defrost Start Time (StAr)

Procedure to set the initial defrost start time using pass code, adjusting minutes and hours.

Customizing Defrost Schedules and Count (ndEF)

Adjusting defrost times for business needs and setting the number of defrost cycles per day.

LOADING AND STOCKING GUIDELINES

Product Loading Quantity and Overnight Pull Down

Maximizing bottle quantity and loading product overnight for optimal pull-down to temperature.

Initial Unit Operation Before Stocking

Allow unit to run for at least 30 minutes before stocking to ensure accurate temperature display.

CARE AND CLEANING PROCEDURES

Warnings for Glass and Canopy Cleaning

Avoid hot water on cold glass; do not use ammonia on canopies or abrasive cleaners anywhere.

Exterior and Interior Surface Cleaning

Clean exteriors with mild detergent; interiors with domestic detergents; follow specific 'Do' and 'Do Not Use' lists.

UNIT MAINTENANCE AND CLEANING

Shelf Removal and Cleaning

Shelves and clips are easily removed for cleaning; empty unit before performing maintenance.

Condenser Coil Cleaning for Efficiency

Clean condenser coil monthly by removing grille and using brush/vacuum attachment for optimal performance.

LAMP REPLACEMENT (ARV-570 Interior Top)

Preparation and Lamp Removal

Unplug unit, remove lamp assembly, disconnect wires, and remove lamp from end cap and shield.

Installation and Post-Replacement Startup

Replace lamp, reassemble, plug in, and allow unit to run for 30 minutes before stocking.

LAMP REPLACEMENT (ARV-1230 Center Column)

Preparation and Lamp Removal

Sell product, unplug, remove shelves, then remove lamp assembly and lamp from end cap/shield.

Installation and Post-Replacement Startup

Replace lamp, reassemble, plug in, and allow unit to run for 30 minutes before stocking.

LAMP REPLACEMENT (Exterior Canopy)

Preparation and Canopy Removal

Unplug unit, remove fasteners, and carefully remove canopy to access lamps.

Lamp Removal, Installation, and Startup

Disconnect wires, remove/replace lamp, reconnect, reassemble, plug in, and run for 30 min before stocking.

TROUBLESHOOTING GUIDE

Service Contact and Basic Checks

Contact Hussmann service; check power, outlet, voltage, leveling, and unit contact.

Unit Performance Issues

Covers issues like not turning on, unusual noise, slow cooling, and inaccurate temperature display.

Environmental Factors Affecting Performance

Addresses condensation on doors due to high humidity and proper airflow.

HUSSMANN LIMITED WARRANTY

Basic Warranty Coverage and Exclusions

Twelve-month warranty against defects; excludes lamps, fuses; covers motor compressors for five years.

Extended Warranty Options

Opportunity to purchase extended warranty coverage for additional periods.

WARRANTY TERMS AND LIABILITY LIMITATIONS

Patent Warranty and Repair Term

Warrants against patent infringement; warranty repairs do not extend the original term.

Exclusions: Food Loss, Unauthorized Repairs, Damages

Excludes food loss, unauthorized repairs, damages from external causes, misuse, negligence, improper voltage, or maintenance items.

Hussmann ARV-1230 Specifications

General IconGeneral
BrandHussmann
ModelARV-1230
CategoryMerchandiser
LanguageEnglish

Related product manuals