125816 5-3 REV B
Recommended Service Procedure
1. Release clamps and remove element. Clean the air
cleaner canister with a damp cloth.
2. Before installing a new element, inspect it by placing a
bright light inside and rotating the element slowly,
looking for any holes or tears in the paper. Also check
gaskets for cuts or tears. Do not attempt to use a
damaged element which will allow abrasive particles
to enter the engine.
3. Reinstall the dust cap. Make sure it seals all the way
around the air cleaner canister, then tighten the
clamps. Figure 5-4, Figure 5-5 & Figure 5-6
4. Check all fittings and clamps periodically for tightness
and inspect hoses for holes or cracks.
5. Periodically check the intake hose for signs of
ingested dust. Locate and repair the source of
ingested dirt.
6. Never operate the machine without an air filter
installed.
Overservicing
Overservicing occurs when an air filter element is removed
for cleaning or replacement before it is necessary. Each time
the filter is removed a small amount of dirt and dust could
fall in the intake system. This accumulated dirt can cause a
dusted engine. It only takes a few grams of ingested dirt over
the normal service life of an engine to cause a dusted engine.
Do not clean the element, but replace with a new element
only. Cleaning used air filter elements, through improper
cleaning procedures, can get dust on the inside of the filter
causing dirt ingestion and engine failure.
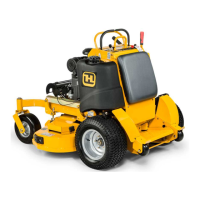
Kawasaki engine (non EFI) shown
A. Pre-cleaner
B. Canister
C. Dust cap
D. Clamp
Figure 5-6
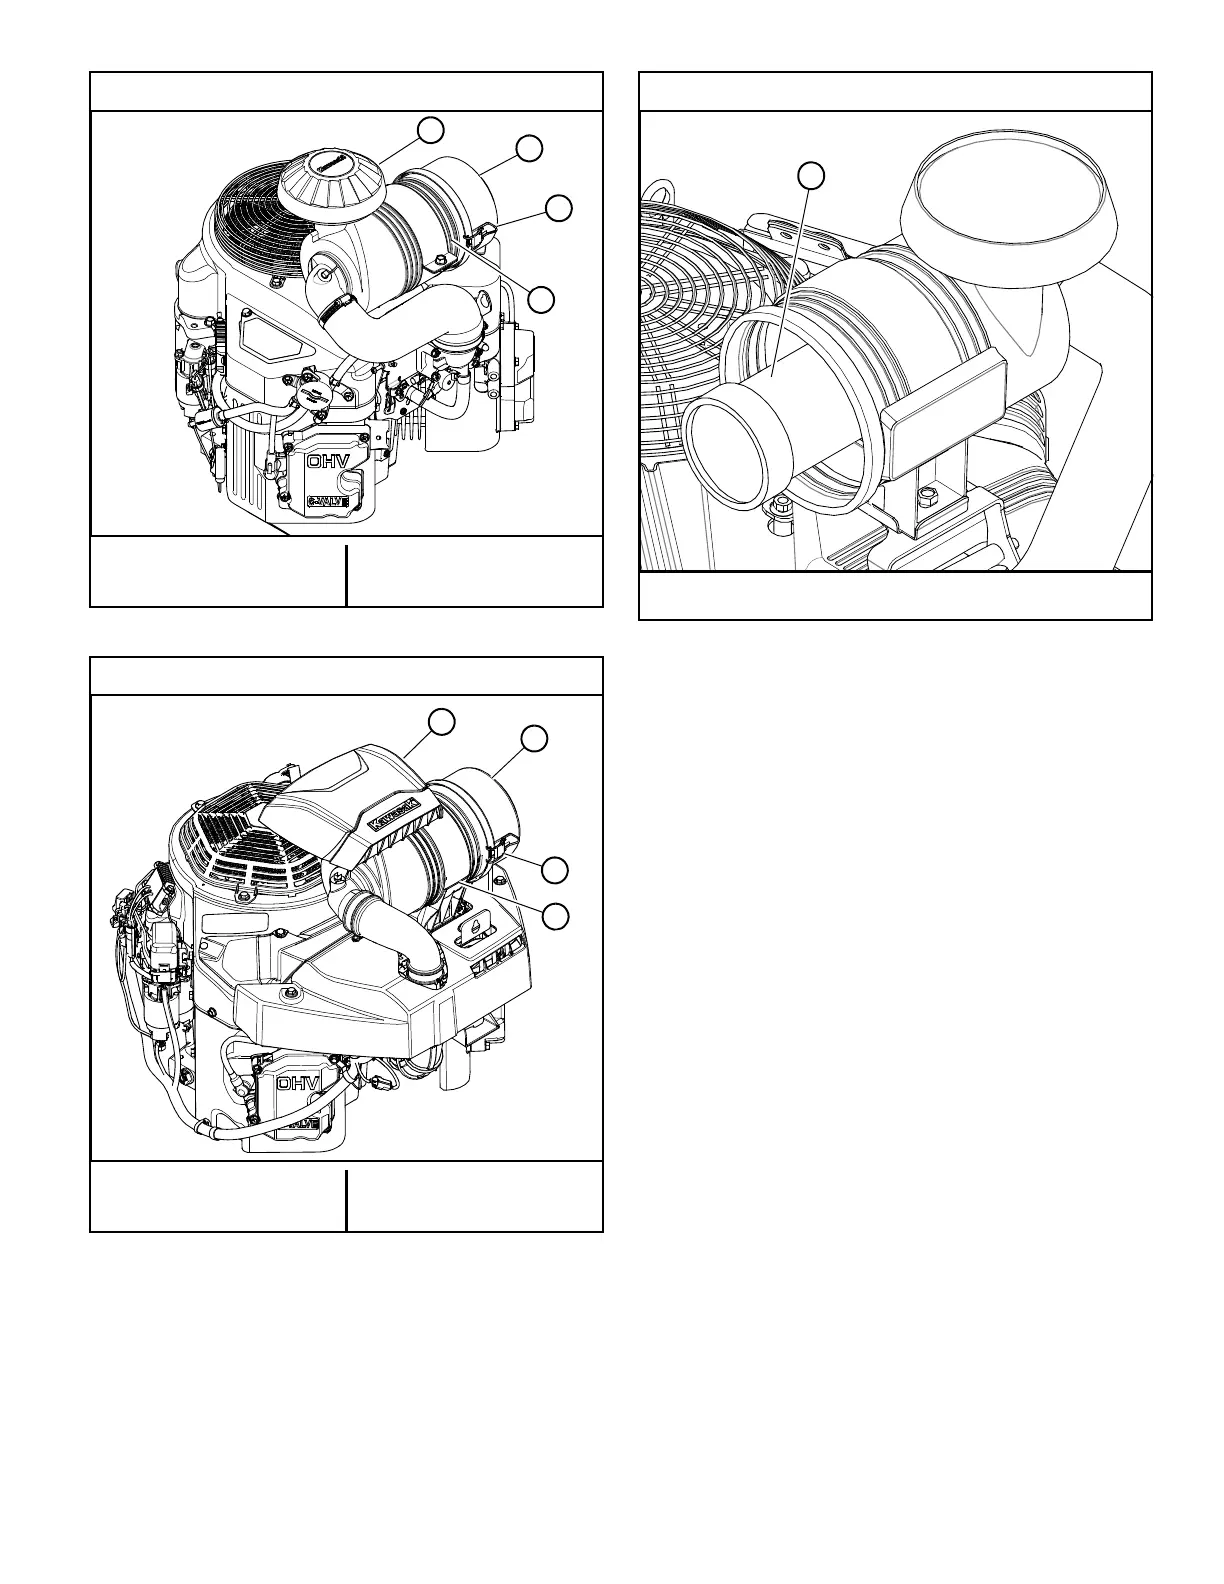
Kawasaki engine (EFI) shown
A. Pre-cleaner
B. Canister
C. Dust cap
D. Clamp
Figure 5-7
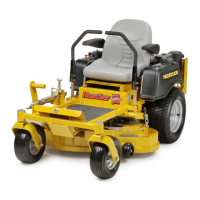
Engine air filter may vary from this illustration
A. Safety filter
Figure 5-8

 Loading...