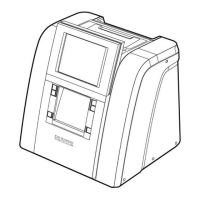
Why is milling mode impossible on my Huvitz HPE-8000 Edger?
- KkarlawardSep 13, 2025
If milling mode is impossible, it could be that the lens is interfering with the wheel or feeler during edging. Apply Axial/Spiral mode to resolve this.

Why is milling mode impossible on my Huvitz HPE-8000 Edger?
If milling mode is impossible, it could be that the lens is interfering with the wheel or feeler during edging. Apply Axial/Spiral mode to resolve this.
Describes the product's capabilities and features for lens processing.
Details the components of the HPE-8000 system.
Outlines FCC rules and device classifications for safety compliance.
Emphasizes user responsibility and understanding of safety notices.
Defines standard IEC safety symbols used in the manual for hazard identification.
Lists operating and storage conditions to avoid for optimal performance.
Covers essential safety rules for machine operation, installation, and maintenance.
Illustrates front, edging room, and rear views of the edger.
Shows front and rear views of the frame reader unit.
Displays front and bottom views of the blocker unit.
Lists all included accessories provided with the tool box.
Provides a step-by-step guide for installing the edger unit.
Details the installation process for the frame reader component.
Outlines the installation steps for the blocker unit.
Covers control panel functions for tracing lenses and patterns.
Explains scale plate, adapter setter, and blocking modes.
Describes the primary buttons like START, STOP, WINDOW, and CLAMP.
Overviews the primary display elements and navigation for the edger.
Explains the use of R and L buttons for selecting lens sides and exchange.
Details managing jobs, including new jobs, numbers, and the job manager.
Shows how frame data like curve, circumference, and diameter are presented.
Covers input for PD, OH, Bridge Size, FPD, and frame material.
Describes choices for edging types like Bevel, Flat, and Grooving.
Explains settings like feeling, pre-roughing, and clamp pressure.
Details buttons for Expert Job Editor, Menu, Digital Designer, and Retouch Mode.
Explains how to set the base position for bevels and grooves on the lens.
Describes how to define areas for partial grooving on the lens shape.
Covers adjusting bevel/groove positions across the entire lens shape.
Details making adjustments to specific sections of the lens shape.
Defines the areas for beveled or grooved sections on the lens.
Chooses between Flat Edging, Grooving, and Beveling combinations.
Explains options for safety bevels during specific grooving modes.
Describes how to navigate between waiting, working, and completed jobs.
Explains Open, Save, Search, and Delete operations for jobs.
Lists information for jobs received from other components.
Shows status and details for ongoing and finished jobs.
Details how to search for specific jobs within the list.
Covers modifying lens shape horizontally and vertically.
Explains how to adjust the near vision section of the lens.
Details the process of rotating the lens shape.
Describes how to alter specific parts of the lens shape.
Explains synchronizing settings between the left and right eye.
How to quit digital pattern and return to the main screen.
Explains the main parts of the hole editor screen.
Details the display and methods for adding drilling points.
Covers viewing holes/slots and copying them to the opposite side.
Describes tools like retouching, moving, grouping, and deleting holes/slots.
Explains how to configure diameter, depth, and angle for drilled holes.
Covers settings for PD, OH, Bridge Size, and Frame Type.
Details lens type, edging type, and bevel/groove position settings.
Explains advanced settings like polishing, safety bevel, and roughing type.
Steps to initiate lens edging on the machine.
Describes the icons shown during the edging operation.
Procedure for halting edging manually or due to errors.
Guidance on responding to error messages and restarting the process.
Steps to follow after the lens has been successfully edged.
How to register a lens for frame change processing.
Explains how to enable the frame change feature for accurate processing.
Outlines the workflow for changing frames on the edger.
Settings for the frame reader, including ports and beep sound options.
Accessing settings like Preferences and Adjustments via the MENU button.
Customizing the user interface and general operational settings.
Fine-tuning parameters related to the edging process quality.
Configuring the number and speed of rotation for lens processing.
Setting default clamping pressure values for different modes.
Adjusting the edging size for finishing and polishing steps.
Configuring margin values for roughing, milling, and polishing steps.
Adjusting the distortion of axis during lens processing.
Adjusting bevel and groove positions on the lens.
Adjusting front and rear safety bevel positions.
Configuring options related to edging wheels.
Steps for calibrating the frame reader (Stroke, Frame).
Steps for calibrating the frame reader pattern recognition.
Procedures for Size and Feeler calibration of the edger.
Using test mode to check sensor values and status.
Checking the operational status of the X, Y, and R axes.
Steps for initializing and testing the feeler mechanism.
Checking SBG assembly and wheel sensor status.
Checking the functionality of pumps and the vacuum cleaner.
Checking the clamp and window operational status.
Maintaining wheel performance by removing lens debris.
Monitoring the number of lenses processed since the last reset.
Shows wheel usage data for replacement timing.
Displays the total number of lenses processed since installation.
Setting system time and verifying touch screen functionality.
Backing up, restoring, and resetting system configurations.
Instructions for updating GUI and MOTOR software.
Guidance on wheel replacement, regular maintenance, and fuse replacement.
Lists issues like tracing size, LCD, and lens size problems with causes and fixes.
Enumerates all items included with the product.
Details specifications for the Edger, Frame Reader, and Blocker.
Provides dimensional drawings for the main components.
Information on how to get technical assistance and contact details.