Step 5: Check all eight black clamping knobs to make sure they are securely hand
tightened.
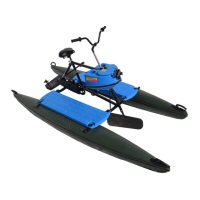
Step 6: Installation of Drive Train Lever.
Fit clamps (three) loosely around the Drive Train (DT) with tightening screws positioned on
the right side of the DT. Note: clamps tighten most effectively if screw is positioned on
forward curve and on the right side of the DT assembly as shown. The screw should FACE
TO THE REAR of the bikes for easy access when tightening.
•
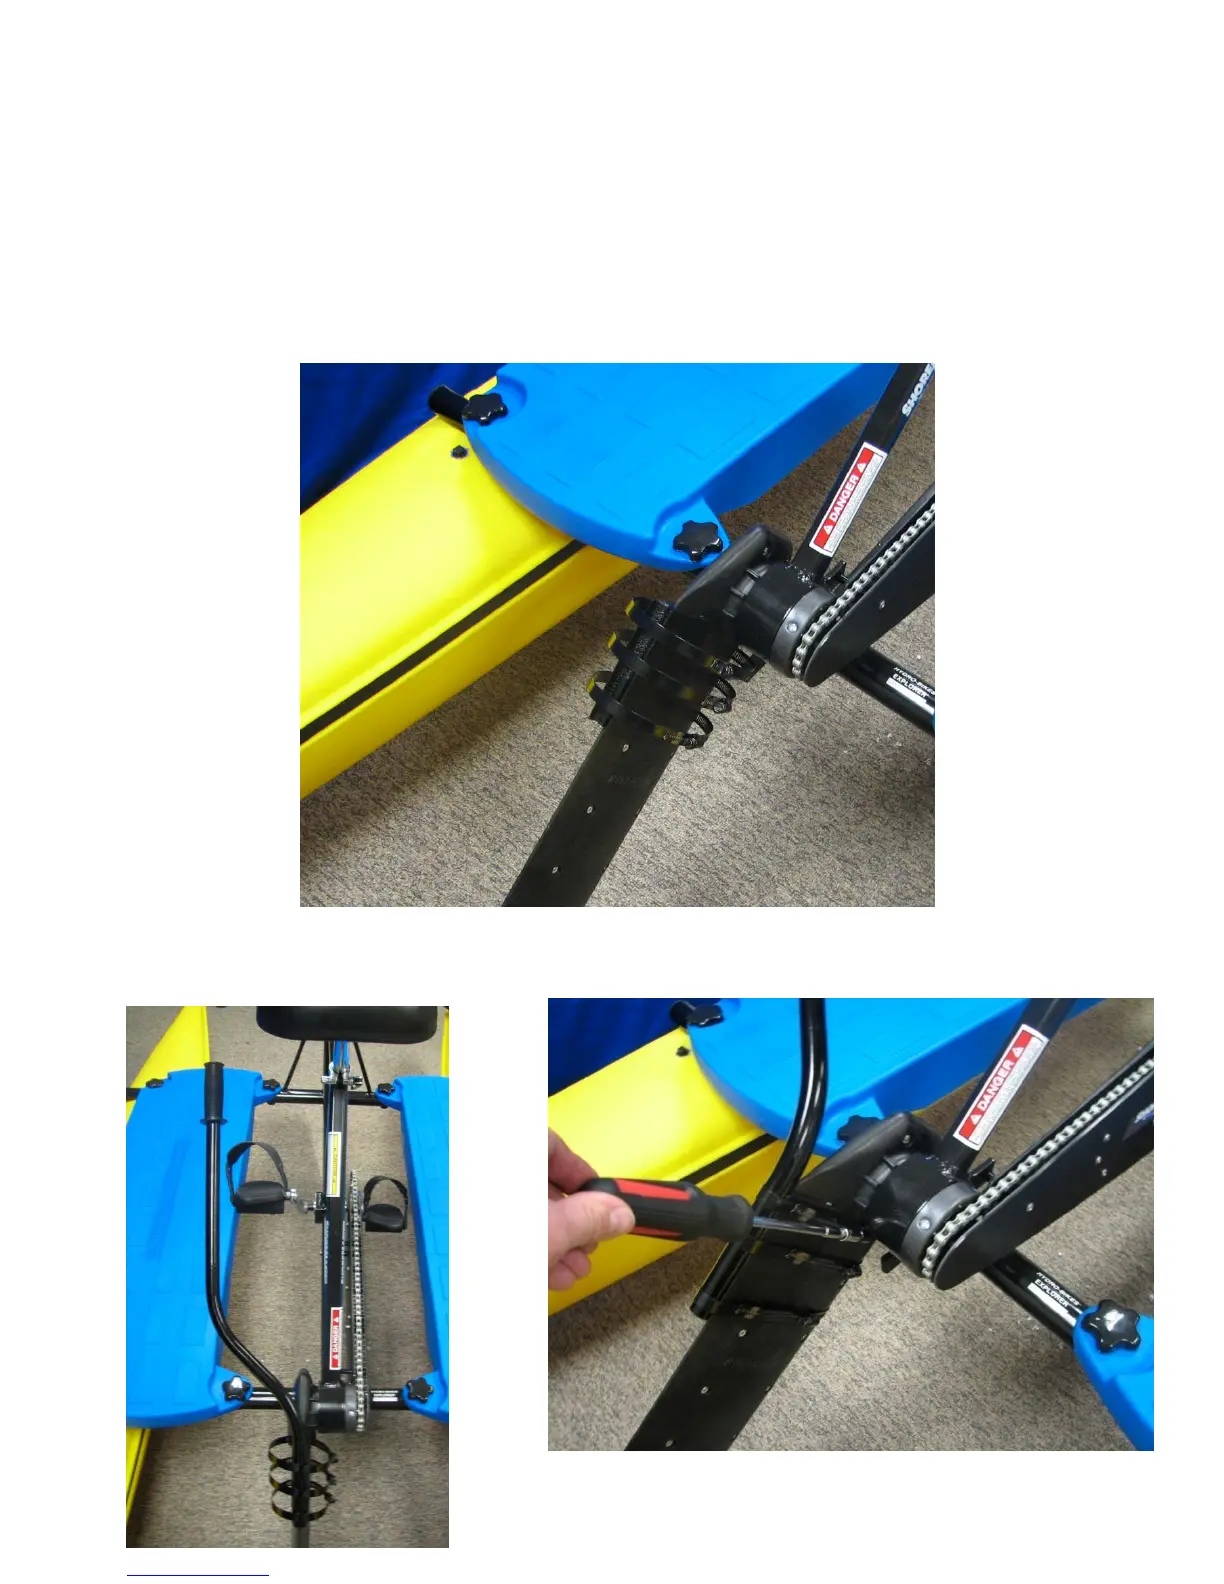
(1) Position the “Lever” mount against the back of the DT (facing) the rear of the bikes with the
DT assembly in the down position. The 2 inch key should be at the bottom of the mount
11